Replacing pipes in the bathroom yourself
In cases where a major overhaul is planned in the bathroom, it is necessary to carry out some training before installing the new pipeline system. It is necessary to prepare new polypropylene pipes, from which a plumbing (or heating) system will be created, as well as a set of necessary tools. In this article we will tell you how to change the pipes in the bathroom with your own hands.
Tools and materials

For quality repairs, which can be carried out simultaneously in the bathroom and toilet, and replacement of existing pipes, certain tools are needed:
- Bulgarian and several cutting discs;
- adjustable wrench;
- electric hammer drill;
- soldering iron for soldering polypropylene pipes with a set of nozzles;
- scissors for cutting pipes from polypropylene.
Will also be needed:
- fittings and shut-off valves, without which the installation of the system is impossible;
- seals (adapters), which are necessary to connect sewer PVC pipes with cast iron.
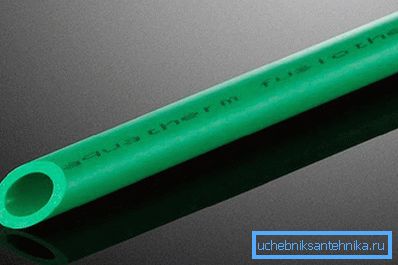
Having prepared the tools, you should estimate how many meters of the pipe you will need to purchase for the bathroom. It is important not to forget to buy fittings, their number should be more than planned - in case some part is defective or deteriorates on the spot. (Save the check, and if something remains, then this part can be handed over to the store). And, of course, you need fixtures that are screwed on the wall with dowels. The pipe will be inserted into these fastenings.
Tip! Considering the length of the pipes being purchased, it is necessary to think over where they will be laid - in the niche of the wall or the strobe in the floor.
The pipes can also be held by hiding them under a washbasin, in a drywall box or by another method. The same strobe is needed at the point where the mixer pipes exit the wall.
How to dismantle old pipes
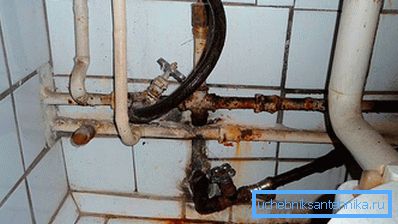
Before new pipes are laid, the old ones should be removed. For their dismantling, a grinder is needed, with which we will cut the pipe, as well as goggles and headphones or earplugs. It will be necessary to open the sections of water supply and sewerage that are closed. This can be done with a punch or using a chisel and hammer.
Tip! If the old pipe is laid in the wall or floor, then you can not touch it, just be sure that its edges were cut at some distance from the surface, which would allow them to be buried with a solution. Rotten metal pipe is better to remove completely.
Dismantling begins with the inputs, pre-blocking the water in the apartment riser. Most often, the stopcocks at the entrance will also need to be changed.
How to replace the stopcock
In the old pipes inside the housing may be water, so before you start dismantling it must be drained. Before that, you need to turn off all that the water supply is connected to - a washing machine, a mixer with a shower and everything else. If we are talking about sewage, then everything is the same here - all consumers are disconnected from old pipes - supply to the washing machine, bathroom or shower cubicle, toilet bowl (in those cases when repairs are made in the toilet) and a sink siphon.
Tip! Before dismantling the sewer pipe of the general riser, do not forget to negotiate with your neighbors from above so that they do not use the sewage system during this period of time, otherwise an unpleasant shower can spoil not only your mood.
After that, the pipes can be removed, sawing them into pieces so that it is convenient to carry them away. Old fasteners that remain in the walls must be removed (if the walls are putty and painted) or equalized with the surface of the walls (if tiles are laid) so that they do not interfere with the new installation.
Begin installation
If you want to cut the grooves, the edged disc, which sawn metal and reinforcement in the walls, in the grinder should be changed to a disk on concrete. If new pipes are planned to be laid below the level of the old pipeline, it may be necessary to punch new holes in the walls.
Now you can begin the installation of pipes. After installing the meter and the stopcock located in front of it, experts recommend installing a filter for coarse water purification, both hot and cold. If separate risers go to the bathroom and kitchen, such a filter is placed on each riser.
Tip! If you put the water meter in a sufficiently lit place, it will be easier to take readings from you and the controllers.
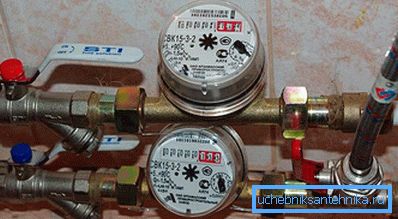
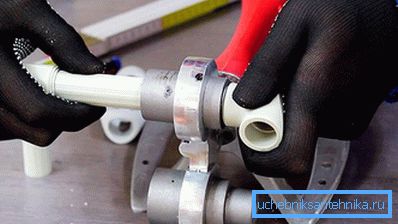
The pipes are soldered together with a soldering iron. Pipe fittings can be connected to connect two pieces together, a pipe with a corner and other elements. Such connections are necessary in those cases when the pipeline is bent or pipes of different diameters are connected. Also in the plumbing system can be used tees, if three pipes are connected together. The availability of such parts must be taken care of in advance. How many and what kind of fittings, tees, adapters and corners need, help to understand the creation of the drawing, indicating all the nuances of the pipeline.
The following steps will help to properly solder the pipes:
- Before soldering, the cut pieces of the pipe are marked with a marker (marker), taking into account all the turns, so that the corner and straight joints are made exactly.
- In the heated soldering iron, turned on for some time before the start of soldering, insert the edge of the pipe on the one hand and the desired face of the fitting on the other hand to heat them and then connect. How long to heat polypropylene products of different thickness is usually indicated in the instructions for the soldering iron.
- After that, the pipes are connected with the necessary details. It is necessary to wait for a while until the soldering cools down, and make sure that the whole process is carried out correctly. The waiting time is about 15 seconds, which is enough to cool the plastic and harden it.
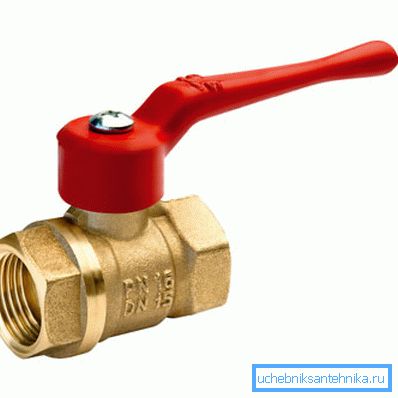
- Before the faucets, bath or shower, as well as in front of the cistern of the toilet, washing machine and other plumbing fixtures install a ball valve. It is necessary in cases where local repairs are being carried out (for example, replacement of gaskets for the mixer). It gives the opportunity not to block the water throughout the apartment.
- Considering the pipes through which hot water will flow, they should not be fixed to the wall rigidly, but use sliding fasteners. Such elements can be fixed to the wall with dowels of 6 × 40 mm.
Tip! It is extremely undesirable to overheat the plastic material - because of this, the pipe can be sealed tightly, because of which the resulting defect will be rather difficult to find, or it will leak.
Check the quality of the installation
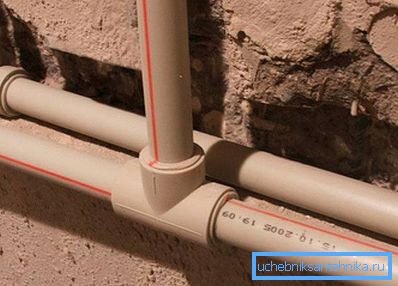
In order to make sure that everything is done properly, you need to perform a series of steps, after which it will be seen whether there are flaws, and if so, where:
- cold water should be turned on for a quarter of an hour;
- while water flows, all welded seams and connections on the thread are checked, whether there is water or moisture there;
- if a leak is detected, it should be fixed and then re-checked the problem area;
- for hot water, the check is performed on the same points - it turns on for 15 minutes and all seams are checked.
The inspection of sewage pipes running in the bathroom and toilet is checked in a slightly different way. In each sanitary device (sink, toilet, etc.) pour a few buckets of water, then find out if there is a leak, and eliminate all the disadvantages, if any.
Following these tips, you can collect high-quality and reliable sewage system and water supply, which can be used for more than a dozen years, without being engaged in their repair.
Video
This video shows how to install water from plastic pipes in the bathroom:
This video is an instruction on how to properly stack, connect, solder and lay plastic pipes: