Enamel bath itself
If your bath has lost its attractive appearance, does not shine and gives yellowness, do not rush to part with it and buy a new one. Thanks to modern technology, you can easily eliminate defects, among which are rust, enamel that has cracked, and limestone deposits. So, you will not only save money, but also deprive yourself of the pleasure to carry out work on the dismantling and installation of a new bathroom. This is possible if you cover the old surface with enamel. In this article, we will look at how to enamel a bath with your own hands at home.
Ways of restoration

To put the bath in order, use three methods:
- Classic enamel coating.
- Installation of acrylic liner.
- Filling with liquid acrylic.
Depending on the choice of the restoration method, the work is done in different ways. Next we look at two of them in detail.
Preparation of tools
Before you start work, you need to prepare tools and materials. To perform the work you will need:
- bath coating liquid (bulk acrylic);
- soft spatula;
- grinding machine (if there is none, use a regular drill with a special nozzle for grinding);
- acetone to degrease the surface;
- respirator for protection of respiration from toxic substances and dust;
- additional materials (rubber gloves, rags, knife, masking tape, newspaper, wooden lath, which you need to mix enamel).
Armed with all this, you can proceed to the preparatory work.
Surface preparation

In order for the enamel to be fixed on the surface, rather than the glass on the bottom of the cast-iron bath, it must be pre-treated. The main requirement for the surface to be rough (had a matte structure) and degreased.
Also important is the temperature of the bath. On a warm surface, the coating lays down better than on a cold one. Therefore, before starting work, cast iron bath should be filled with hot water for 20 minutes. After that, drain the water and wipe the surface with a dry cloth that does not leave a pile. The steel bath can be heated with a building dryer with the minimum temperature of the supplied heated air.

Work order:
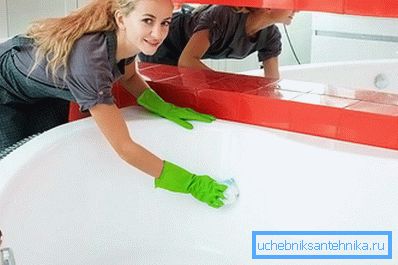
- Rinsing bath. Use an aggressive detergent. Thanks to this, you degrease the surface and give it a roughness.
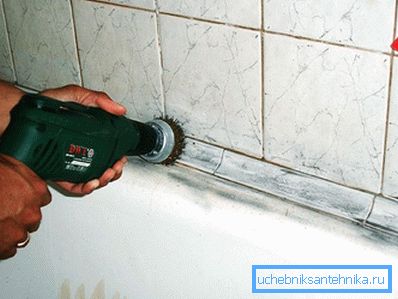
- Grinding. To do this, use a sander or drill with a nozzle - what will be at hand. If there is neither one nor the other, you can use a grinding block or a piece of emery paper attached to a wooden handle. When working with the tool, be especially careful, as there have been cases when some craftsmen were so zealous that they rubbed a layer of enamel down to the metal. Do not forget about the respirator during work.
- Repeated cleaning. As a result of polishing, dust, dirt and remains of old enamel were formed. They need to be removed and the bath is thoroughly washed again. Then fill with all detergent and leave for 30 minutes. Rinse again with running water and wipe dry (rags can be used).
- Check the quality of the work done. Ensure that the surface is completely degreased. To do this, direct the jet from the shower to the surface, if the water flows in a continuous stream, then everything is fine, and if drops form, additional degreasing is necessary. Use acetone.
- Drying If the room is rather warm, the bath will quickly dry by itself. In the case when the room is cold, you will have to speed things up a little. Take a regular hair dryer and dry the surface. If there is no possibility to regulate the temperature in your construction hair dryer, then it is necessary to use an ordinary hair dryer for drying.
- Dismantling of the upper and lower drain. This is done to prevent fluid from draining into the sewer system.
- The final touch is to vacuum the surface. This is done in order to remove all residual dust.
Bath is ready for restoration work, it remains only to cover it with enamel.
Enameling by the classical method

This is the most important work, so be especially careful. If we talk about the standard enamelling of baths, where epoxy resin-based paints and varnishes are used, the procedure is simple:
- Glue the walls and floor with a newspaper so as not to stain them.
- Overflow seal up with scotch, and drain the drain plug.
- Mix the components and divide the resulting liquid into two parts (how to make the solution is indicated in the instructions).
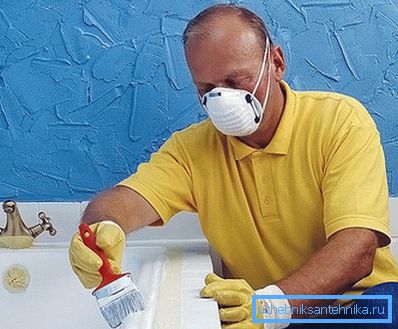
- Using a brush, it is necessary to apply the composition to the surface. For convenience, take a brush with a width of 70 mm, you can more. You need to start from the top of the side, gradually going down.
- Until the first layer has dried, apply a second one (wet on wet technology).
- After applying the enamel, leave the bath for 15 minutes. After that, check the surface for any smudges (usually they are always there). Brush smear droplets movements from the bottom up, stretching it. Your task is to catch the moment when the enamel is not completely dried and has a fluidity.
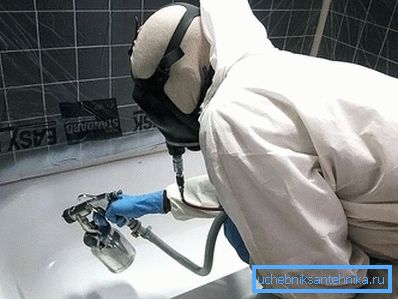
Since enamel bath compounds are toxic, be sure to use a respirator and open all windows and doors during work to ensure good ventilation.
Liquid Acrylic Fill

This method differs from the previous method of applying the composition. You need to fill the bath with liquid acrylic. The following is the order of work:
- Following the instructions, mix liquid acrylic with a hardener to the desired homogeneous mass.
- Prepare in advance the container from which the spill will be liquid. This may be an old canister or container of hardener.
- Cover the walls and walls with newspapers.
- Then pour the acrylic on the side of a thin stream. Using a spatula, push the grout under the tile.
- Continue to pour it in a thin stream to get a 4–6 mm layer on the edge of the rim. In this case, the acrylic will flow down the walls to the middle, leaving a perfectly flat surface.
- Pour acrylic in a thin stream, moving along the edge of the bath until the circle closes. Do not allow long breaks. If acrylic is over, just top it up and continue.
- When the first lap is completed, continue to pour the mixture in a spiral, as the acrylic flows. Make a new layer just above the end of the old one.
- Using a flexible spatula, you can smooth the surface and deliver the acrylic to the non-flooded area.
- At the end of a spatula smear the remains of acrylic on the bottom, and remove excess in a drain.
When you fill, do not touch the liquid acrylic with your hands, use only a spatula - the enamel itself will even out and be perfectly flat.
That's all, leave the bath to dry. Then clean the drain and set the grate back. The finished bathroom should be washed and wiped with a cloth. With properly executed works, you get a new bath that is ready for use. As you can see, there is nothing complicated, such work can be done by hand. For clarity, watch the video, where you will see the work in detail from start to finish.