How to change the heater in a water heater
Electric water heaters and boilers firmly entered our lives, becoming indispensable helpers in everyday life. Without these convenient and aesthetic devices, it is difficult to imagine comfortable living in an apartment, a country house or in a country house. Flow models of rapid heating coexist perfectly with other kitchen appliances. Varieties of storage heaters with a large volume of a water tank Termeks, Ariston, and other well-known brands are increasingly being established by consumers as the main source of warm water throughout the house, as they are able to fully meet the household demand for hot water. Such devices require care, they also have to be repaired. It will be useful for you to know how to change the heating element in the heating boiler, even if the master does it.
The cause and signs of failure of heaters


How carefully do we treat our home helpers? We carry out, as recommended by the instruction manual, once a year prevention, in order to prolong the service life of the unit? And all it takes is: rinse the heating tank of scale and mineral salts with a hose with water, clean the heater, immerse it for a day in a solution of citric acid 50 g powder / 1 liter of water and, if necessary, replace the anode.
Most users use poor quality water and do not do regular auditing. As a result, once the boiler is on (the average life of the heating element is four years) and it starts to rustle, the RCD will often trigger - a sign of an increase in current in the load. Then the system automatically turns off inside the water heater itself, it cannot be switched to heating again. In 90% of cases, this means - the heating element has failed, it needs to be changed.
The design of the heating element is a hermetically sealed copper or steel tube with a nichrome wire located inside, surrounded by a dielectric layer - ceramic filling. This characteristic phenomenon occurs for two reasons:
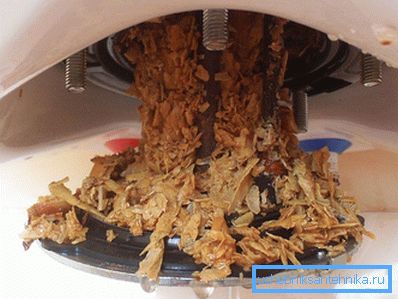
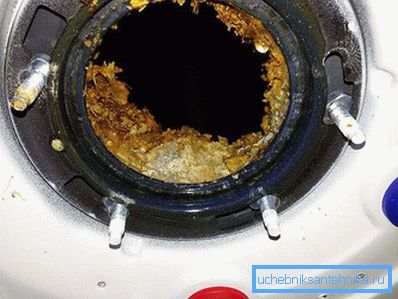
- As fouling with a layer of scale or iron hydroxide gets worse, the external heat emission deteriorates, the nichrome becomes hot and the wire burns out.
- Corrosion corrodes the walls of the tube, water enters inside and, as a result of depressurization, a short circuit to the case occurs.
Consider how to independently change the heater in a water heater, without resorting to the help of service departments.
Diagnostics, dismantling and installation of the heating element

- First you need to make sure that the cause of the malfunction is the electric heater, and not the breakage of the current-carrying circuit or the failure of the automation. For this, we measure the resistance between the de-energized element with an avometer (tester). Pre-remove the protective cover. It is imperative to turn off the power supply and turn off the two terminals of the supply voltage from the two thermocouple inputs. The meter reading “infinity” means an internal break, “zero” means a short internal circuit, “zero” between one of the terminals and the case means a short circuit to the case. If the instrument reads from 5–7 ohms to several tens ohms, the heating element is in good condition, the cause of failure is different.
- Check the absence of electric potential on the housing relative to the ground (water pipe). Turn off the water supply, pay attention that the valves should be shut off as the supply of cold and outlet hot water. Drain the water from the boiler and, if it is disconnected from the water supply, turn the water heater upwards for convenience.
- Unscrew the flange nut or, depending on the design, fasten some nuts and remove the heater. Pay attention to the state of the anode - an additional metal threaded rod screwed on the back side of the flange. A 50% corrosive means a loss of 10–15 mm of magnesium layer, which serves as a protection against corrosion of the tube and the walls of the tank. Such wear is a good reason to replace it.
- Replace the sealing gasket between the base of the heating element and the tank, install and connect the new heating element in the reverse order. Wipe the outside of the flange from moisture.
- First connect only one power terminal. In the open circuit of the other terminal and the power supply wire, turn on the tester in the mode of measuring AC current. Carry out a test of TENA for performance. To do this, briefly, for 3-4 seconds, apply the supply voltage of the network and measure the flowing current. The strength of the current must be as specified in the technical specifications.
- Fill the water tank completely, release air through the hot water nozzle, and ensure that there are no leaks for 10 minutes. After that, supply power, having previously checked the connection and integrity of the ground wire.

The water heater is ready for operation.
Video
Watch the video, which shows how to replace the heating element in the boiler with your own hands: