How to change the hose on the mixer
When the flexible hose of the mixer is used for a long time, it can start running water through itself in one or several places. The problem is that the inner part of the hose, consisting of a rubber tube, deteriorates and breaks. Therefore, it is necessary to know how to change the hose on the mixer, as well as how to choose it correctly.
Replacement of hoses to the mixer

It often happens that in the mixer hoses spoil along which water fits to it. This can occur in the kitchen faucet, as well as in the bathroom. How to unscrew the hose, consider below.
The first step is to prepare certain tools and accessories:
- adjustable and gas keys;
- seals;
- hoses themselves.
Be sure to check that the mixer on which the hoses are to be replaced is in good condition. If it is a silumin product, it is possible that the mixer body is cracked, it leaks and so on. Therefore, it is necessary to purchase a new mixer before replacing the hoses and install it.

Buying hoses, you need to pay attention to their length. For example, the hoses that come with the new mixer can be short - only 30 cm. Therefore, they will have to be replaced with longer ones. When buying hoses, you also need to pay attention to their quality - inexpensive products in a conventional metal sheath will not last for a long time, so repairs will have to be carried out again.
Tip! To simplify the assembly process, you must purchase hoses with a fitting (or needle) of different lengths - then it will be convenient to work with a key. Otherwise, the key will be very difficult to turn, because it will rest against the nut on the adjacent hose.
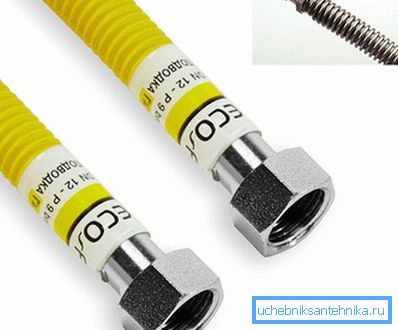
It is important to accurately select the type of connection on the thread for the water pipe. This includes both the diameter and the type of thread entering each other (called “father” and “mother” in the plumber's language). By definition, it is customary to use a "mother" hose, the nut on which it is sized? inch to mount it directly to the water pipe.
When choosing flexible hoses, among other things, one should pay attention to such characteristics of the threaded part as its diameter and type. At the same time, the installed hose does not need to be tensioned, but it should not hang out either. If there are pressure drops during the opening and closing of the valve, the hoses may vibrate, as a result of which they deteriorate quickly and will leak.

Corrugated hoses that do not rust are considered more durable and well-known for their reliability. Although their price is somewhat higher, and installation is more difficult, due to their rigidity they can take any shape and save it after installation.
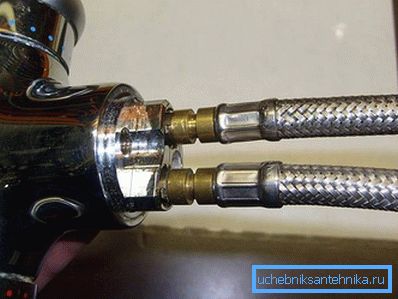
Having chosen the necessary hoses, you can begin to change them. First you need to remove the flexible hose from the mixer, unscrewing the nut that secures it with the gas wrench. Then a new hose is screwed in its place. It is very important not to overdo the thread, otherwise it can be spoiled.
In order to seal (seal) a threaded joint, it is imperative that you have flax tow and special sealing paste on hand to guarantee the possibility of leakage. In addition, if for mounting the hoses or replacing them you need to remove the sink from the tabletop for a while, then you should take care of the silicone on which it will need to be planted, reinserting it into the hole in the table.
Tip! Rusted or stuck threaded connections may not immediately unwind, so it is better, instead of applying brute force, to apply WD-40 - a special solvent for rust, after using which the connection can be dismantled after 5 minutes.
When the hoses are installed, it is necessary to supply water to the mixer and check both hoses for leaks. If it breaks up somewhere, you need to check the seam - use a little more tow or turn off the water, wipe the metal dry and slightly smear the seam with silicone.
How to choose a shower hose?

Usually, the hose is purchased in the construction market or plumbing stores. What is worth paying attention to? First of all on the length of the shower hose. This moment is very important, because if the hose is short, it will be inconvenient to swim, and for the hose itself too much tension is harmful. But if it is too long - it will be confused and sag, it will have to wind up in a small bay.
The standard dimensions of a shower hose are 1.25–2 m. The optimal hose length is 1.6 m, hoses of this length are suitable for most cabins and baths of similar length. Of course, this indicator is not a template, as for short baths, hoses up to 1.25 m long are used, and for longer baths a hose of about 2 m may be needed.
What material should a quality hose be made of? It is worth paying attention to the manufacturer. If you need a conventional metal hose with braiding in the corrugation, then fit the products produced at the enterprises of Russia, the Czech Republic or China. Inside these hoses a rubber tube is laid with walls of small thickness. For the faucet in the bathroom, this option is not bad, but there is a problem - if the corrugation starts to unwind, its sharp edges can damage this tube so that it will tear.
Germany, known as a supplier of higher quality goods, does not release its hoses in a corrugation, but in a special silicone shell. Such products last longer in the bathroom, are more durable and flexible, so they are not afraid of bends.
Tip! You can not bend the hose too much and leave it in this position for a long time, because it is not designed for this.
The winding in the German hose consists of several layers, so that it is not particularly susceptible to fractures and bends (repeat). In addition, the hoses for the mixer from Germany are often decorated with metal braid, or they can be made of polymer without additives. Silicone hose is easy to clean from dirt, because its surface is smooth. Best in the bathroom will look opaque polymer hose, because the hose with transparent walls with time from the inside gets a yellowish tint due to impurities contained in the water.
How to repair the hose?

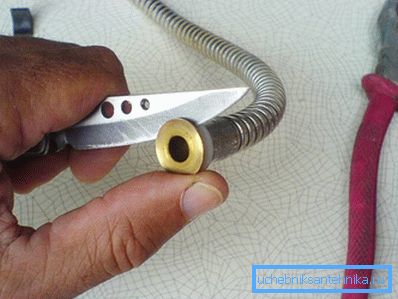
Before starting the repair or replacement of the hose it is worth checking the position of the water on the mixer - the handle should shut off the water supply to the hose. There is a flare nut on the mixer, it is located at the base of the hose - it should be unscrewed with a wrench. After that, the hose tube is pulled out of the mixer. Using a screwdriver, you need to pry the plastic nipple (sometimes it can be made of brass). Behind the nipple in the corrugation is visible tube of rubber or flexible plastic.
Pulling this tube out of the corrugations, you need to check where there are cracks or fractures. If they are on the edge, then it is necessary to remove the nipple, cut off the spoiled piece of pipe and attach the nipple again. When this tube is attached to the nipple by pinching.
Tip! Carefully remove and install the nipple so as not to damage it.
This repair has a drawback - pinching the tube with time leads to the fact that it cracks near the nipple. You can wire it around a brass nipple, but then the tube material will dry out there. Ultimately, sooner or later, you will have to install a new hose, so it will not prevent them from stocking up in advance.
When the hose is assembled, it is attached to the mixer in the reverse order - it is fed to it and screwed on with a nut. The principle of fixing the shower head to the hose is similar to the method of repairing the tube. After the repair, it is necessary to put water on the shower hose and check if there are any leaks.
We also advise you to read the article "Replacing the gasket in the mixer".
Video
This video shows how to replace the hoses on the mixer:
This video is about repairing a shower hose: