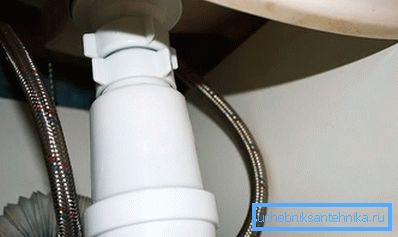
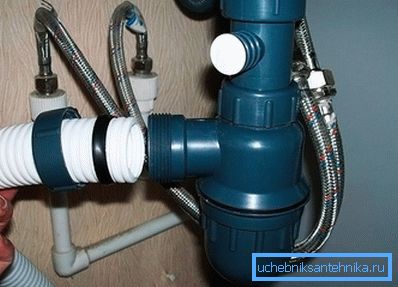
How to install sink drain
Self-installation of the drain on the sink refers to the simplest procedures that do not require preliminary preparation and any special tools. In our article, we will introduce you to the procedure for replacing a drain that has become unusable. It is clear that before you install a sink drain in the bathroom (kitchen) - you must first remove the old one.
Dismantling the old drain device

If you are dealing with a standard plastic drain of domestic production, then no tool for dismantling is required.
The procedure in this case is as follows:
- First of all, you should make sure that the water supply valves are closed.
- Then under the sink you will need to put a bucket to collect the residual water accumulated in the siphon sump.
- To dismantle the siphon, first of all, it is necessary to unscrew the plastic fastening nut on the sewer drain, and then disconnect it.
- Now it will be possible to unscrew the flare nut, by means of which the siphon is attached to the sink drain pipe.
- After that, the siphon is simply removed from the place of its attachment, and the remaining water from its sump is poured into the bucket.
- The sink drain with a protective net is dismantled at last (it is enough to unscrew the union nut securing the pipe to the sink).
If the protective grid (lattice) is mounted on the sink using a special screw - to dismantle it, you will need a screwdriver of the appropriate type.

Preparation and installation

Before you assemble a new drain on the sink, you should check its completeness, as well as the quality of all parts. For installation of old-style sinks (with plastic and rubber elements), tools, as a rule, are not required. In this situation, there is also no need for additional sealing of the joints, that is, in the use of special glue or sealant.
The general procedure for assembling a sink for a sink in the kitchen or bathroom is shown below:
- first of all, all necessary connections are made to the sink;
- then a siphon is mounted on the drain;
- at the final stage of assembly, the resulting structure is joined to the sewage system.
When attaching the drain to the sink, a pipe with a protective grid and a rubber gasket is first inserted into the hole from above, after which it is tightened with a plastic nut from the bottom. When screwed, the drain pipe with a hole for fasteners is supplied from below, and the grille pressed from above is fixed on it with a special screw.
Installation of the siphon and connection to the sewer

Assembling the siphon begins with the fact that a plastic tightening nut with a conical gasket is put on the drain nipple. After that, with its upper part, the siphon is put on the drain nipple to the desired depth, after which the tightening nut is lowered and twisted by hand (without using a tool). Before installing the cap on the siphon body, a flat rubber gasket is put on below, which, if necessary, can be additionally sealed by winding from FUM tape.
To clean the siphon, the lid has to be periodically removed, so silicone sealant is usually not used to seal this joint.
At the final stage of installation, the drainage system of the sink in the bathroom or in the kitchen is connected to the sewage system. To perform this operation, a standard sewer branch with a diameter of about 50 mm is joined to the sewer pipe by means of a plastic nut with a conical gasket.
When the parts to be joined are of non-standard sizes - a special plastic adapter is used for their joints. At the same time, a special rubber cuff is put on the bell of the pipe, which excludes the possibility of odor penetration from the sewage system into the apartment. To obtain the required tightness of the connection, the inner diameter of the cuff is chosen smaller than the outer diameter of the pipe.
In order to avoid breakage of the connected parts, all plastic cap nuts should be tightened very carefully (with limited force).

So, connect the sink to the sewer is quite possible without the involvement of specialists. So, you can save a family budget. If you have any questions on the topic, then write comments on this article. If necessary, you can also ask for help from an expert.
Video
Before you install the siphon you need to collect it. This video shows how to properly assemble the siphon:
After the siphon is assembled, the sink drain should be installed correctly. How to do it? This is discussed in the following video: