How to remove the cover from the toilet bowl
The problems with the toilet and cistern are rather unpleasant in their essence. One of the most common problems is the leakage of water into the toilet through the tank. In this case, the question becomes relevant - how to remove the lid from the toilet cistern without spoiling anything? Although the designs of toilet bowls from different manufacturers differ from each other, they have a general principle according to which we consider this problem.
Most often, a button is located on the cisterns of the latest models of toilet bowls, which can be either solid or composite - it is this which prevents the reservoir from being easily raised. If the toilet is older, then it is enough to simply lift the lid. Sometimes it is required to disassemble the top of the trigger.
Many believe that the tank with the button itself can often not be disassembled. It is not so - it is not difficult to open the tank; the main thing is to understand its design.
Required tools
Before you disassemble the tank, you need to prepare the following tools, without which you can not do repairs:
- a couple of slotted screwdrivers of different sizes;
- may need pliers.
Instructions for new tank types

Next, consider the scheme of analysis of the tank on the example of tanks manufacturer "Ido" and similar with him plumbing fixtures:
- Using a screwdriver, it is necessary to gently turn the ring located around the button in the opposite direction of the clockwise rotation, so as not to scratch the top of the tank.
- When the ring moves, you can continue to turn it with your hands, without a screwdriver - there will be no need for it anymore.
- Unscrewing the ring, which should resemble the plastic cylinder externally, we retrieve it.
- After removing the ring, you can slightly lift the lid. In this state, turn it 90 ° so that it is across the tank - this position will remove the clothespin located on both sides of the button. It is this clothespin and holds the button.
- Clothespin should unscrew.
- After removing the clothespins, the tank lid is removed without problems. Then the tank is repaired, its operation without a cover is checked. If everything works fine, the system can be assembled in reverse order.
Tip! Removing the lid of the tank, put it on something flat, preferably not under your feet and not in the toilet itself - a hood where the lid will not break so that it can be safely and securely installed on the tank after repairs.

And here is how it is necessary to remove the cover from the tanks, which have double buttons:
- First, press the button half button, after which a small slot is found inside the other half.
- Using a screwdriver, you need to cling to this slot and remove part of the button, after dismantling which you can get to the second one.
- In the hole you can see the slotted screw, which is part of the fastening of the tank cover - you need to unscrew it.
- After unscrewing the screw, it will be possible to slightly lift the cover and rotate it 90 °. By analogy with the previous instruction, you should remove the double-sided clothespin, after which the cover will be removed.
- Removing the lid in a safe place, you can fix the valve or leakage, and then collect everything as it was, but in the reverse order.
Tip! When repairing plumbing in the toilet room, you need to be careful enough to remember the safety regulations. In short - all the details of the flushing mechanism during the repair work, which I will get, must be stored in a place where they would not fall apart and be lost, and also not under their feet. Be sure to ensure that access to these parts do not have small children and pets that can swallow or drag something.
Even before the start of repair, the water supply to the tank must be cut off, otherwise it cannot be avoided that it is filled during the repair of the system. Water can include only the one who repairs the drain system, or the one who this person asks for. Also, water is usually only included in order to check the system, as well as after the person is convinced that everything is working properly.
Options for removing the covers
Some models of tanks are made so that the cover can be removed from them without problems, because in such systems the button is not part of the cover. And what to do in cases where the above instructions are not suitable? Consider several options.
If it is not so easy to open the tank lid, you can try to unscrew the cork screwed onto the mechanism responsible for draining. Along the circumference of the button there is a ring made of plastic coated with chrome - you need to unscrew it counterclockwise. It may happen that a small effort will not be enough - then you need to apply a little more force, while trying not to break the ring. However, most likely, the button after such a "strong" repair will have to be replaced.
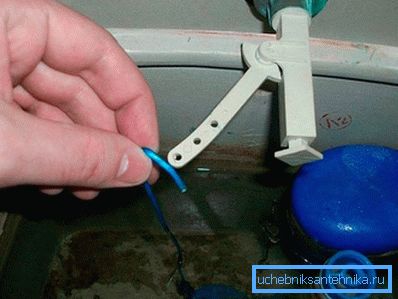
If, after lifting the lid, you can hear how the water is draining - it means that in this design a chain is attached to the button, which is attached to the drain valve. You can remove the chain for convenience, but it is important to remember and note where it was attached to the valve. If this is not done, it will take a long and painful time to select the length of the chain for optimal drainage. Disconnecting the chain, you can safely without any problems do repair tank.

The main thing in the repair of tanks to remember that you need to follow the tips given in this article, and do nothing using brute force. The principle “there is strength — mind is not necessary” is not for this case, since the force can damage the thin plastic elements of the drainage system.
Video
This video shows how to remove the cover from the toilet bowl: