How to repair chipping in the bath
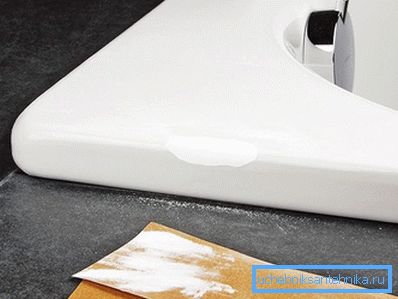
There are cases when your brand new bath has suffered from the fall of a foreign object, or you hooked it with something during the repair or simply taking bath procedures. Anyway, it may form a chip from mechanical damage. I don’t want to buy a new one because of how much it costs. Therefore, the question arises how to seal the splitting in the bath to eliminate the effects of damage?
This can be done, but it should be noted that to give the original appearance of the bath will not work. The treated damages, at least a little, will differ from the factory enamel, because there are many shades of white and it is difficult to choose the one that is perfect. That is why some masters do not want to carry out such work. But still, if you decide to remove this unwanted chip, the tips below will help you. They will minimize the differences from the original paint and, thanks to them, your bath will find its former appearance. Consider 2 ways.
Method one - using a special set

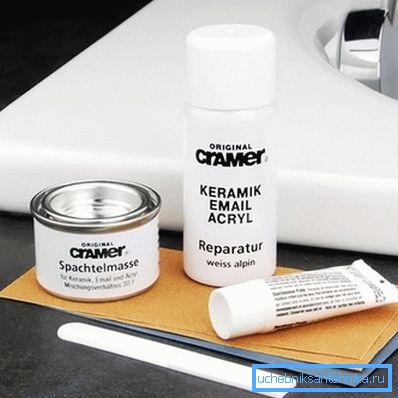
The easiest method is to buy a special set. Since the problem of chipping is quite common, manufacturers have satisfied the demand and created many sets for repairing damage. It is worth noting that the products of domestic manufacturers do not inspire confidence. They are not entirely of poor quality, but the fact that there is a lack of proper control and certification is not in their favor. More reliable are foreign companies that specialize in the manufacture of products to restore plumbing defects. What kind of set to choose - especially your decision.
The kit for eliminating chips includes:
- corrective putty;
- spatula, which mix the hardener with putty;
- sandpaper, 2 pcs. - for acrylic and enamel;
- A special enamel spray suitable for ceramics, acrylic and enamel.

After the acquisition of all this kit, we proceed to work to remove the chip.
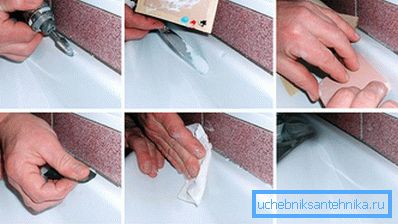
- Before starting work, you need to clear the damage. Just washing with water will not be enough. It is necessary to thoroughly clean all dirt and rust, if any. To do this, fill the damaged area with toilet cleaner or ceramic surfaces. And to degrease chipped, treat it with baking soda. Then dry. If you have acetone, it is recommended to treat chipped. Do not regret the funds for this purpose.
- The next stage is the preparation of putty mixture. Mix the contents of the putty jar with a hardener made of plastic tube. To make the consistency suitable, you need to mix the ingredients in a 30: 1 ratio. To make the task easier and understand the relationship, imagine that a putty is about the size of a walnut. Then the hardener will be the size of a pea. Given the magnitude of the damage, knead as much mortar as needed. Remember, in relation to the putty, the excess hardener will adversely affect the quality of the coating. Then mix the mixture thoroughly and apply it gently on the chip.
- After the putty has dried, the surface must be cleaned. Drying usually takes half an hour. For cleaning use special sandpaper for puttying. Using sandpaper, smooth the area so that the transition between the putty and the bathroom is not felt. Try your finger and stop when everything is flush. As already mentioned, the kit has 2 types of sandpaper. If you have a bath of acrylic, use a special paper, usually it is gray. And when the bath of enamel - use brown sandpaper.
- The final stage - painting. Everything is simple. In the place of the chip spray paint, keeping a distance of 15-25 cm. In order not to paint an unnecessary surface, use a stencil. In thick paper, cut a hole equal to the damaged area. With this stencil, apply paint in several layers. Do not try to do everything at once. Spray the contents of the aerosol in layers, every 2–3 minutes. Do this until the difference in color between the chipped area and the bathroom is not noticeable. That's all. After 2 hours you can touch the restored site. Full drying will occur after 48 hours. Please note that taking a bath should not be for four days.

This method can remove chipped anywhere on the sink, washbasin, toilet and even kitchen tiles.
The second way is to collect the kit yourself.

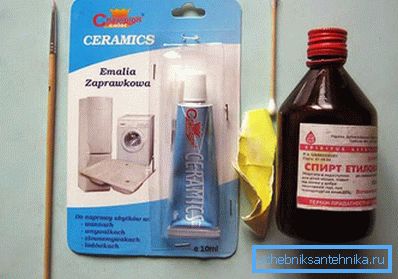
It is not easy to buy a ready-made kit for sealing a bath. Not everyone has the opportunity to purchase it, due to the fact that it is not available in every store. In this case, we will assemble such a kit yourself. Humble yourself that it’s perfect to restore the cleavage, so you can proceed with confidence in your abilities. To dial you will need:
- Car putty. When choosing a putty there are no special requirements. In order to save buy a small tube. Color putty - white. It will cost around 100 rubles. You can take fiberglass putty, which will be better to keep the temperature. Accordingly, its price will be higher.
- Sandpaper. Choose the simplest paper, without moisture resistance. It should be petty. Enough 1 or 2 sheets.
- Spray to eliminate chips. There are quite a few such products on the markets, and there will be plenty to choose from. The main thing is to choose a color close to the color of your bath. The composition must be water resistant and withstand high temperatures. If you want to make everything perfect, you can buy enamel. It will cost more, but the result will be better.
- Abrasive paste for polishing the surface to shine.
All these products can be purchased at any car store. The further process of restoration will be the same as in the first case. When mixing the putty base, read the instructions that come with the putty. The resulting mass is applied to the chip, paint and polish.

During operation, try to prevent ingress of aggressive chemicals and bleaches to the bath surface.
This simple method can eliminate the defect that has formed. In this case, you do not spend a lot of money on a new bath or a specialist call. Anyone can do it yourself at home.
Maybe you will be interested to get acquainted with additional materials on our site:
- How to determine the cause of the blockage of the bath and eliminate it
- Fungus in the bathroom. How to be
- How to make a downhole filter
- Features of the installation of water supply
Video
If you watch the proposed video, you can familiarize yourself with another way to seal the cleavage on the bath: