Installation of polypropylene pipes
Plastic pipes are gradually replacing metal in all engineering systems at home - plumbing, heating and sewage. Their popularity was promoted by the long term of operation, reasonable price and simple installation. Polypropylene pipes are suitable for transporting hot and cold water. They contain stabilizers that provide special resistance to high pressure and temperature changes.
Each person can do the installation of propylene pipes with his own hands, and to make a quality connection you do not need to have professional knowledge - it’s enough to follow the technology.
Marking

Polypropylene pipes are suitable for any purpose, but should be selected according to the characteristics indicated by the marking:
- PN 10, 16 — A thin-walled tube is used to supply cold water.
- PN 20 - reinforced with glass fiber and can be used for hot and cold water.
- PN 25 is a pipe with thick walls and a layer of aluminum reinforcing foil, used in the heating system and underfloor heating.
Pipe reinforcement is performed to compensate for expansion when heated. This is a significant drawback of propylene, since it loses its shape at temperatures above +20? C. Placing an aluminum strip between plastic layers avoids material lengthening. The diameter of the pipes is offered in a wide size range from 16 to 125 mm.
Pros of the propylene pipeline
- limestone deposit is not deposited on the smooth surface of the plastic;
- low weight facilitates installation;
- temperature limits of operation from -10 to +90? C;
- durability 50 years;
- do not crack when water freezes;
- are not conductors of electricity.
To extend the life of the heating system of propylene pipes should monitor the water temperature in the range of +70? C.
Methods of distributing water pipes
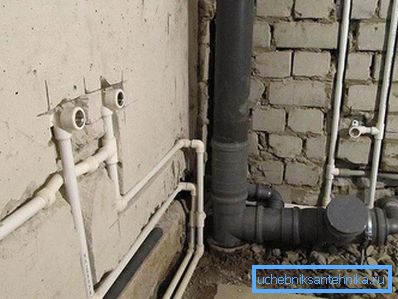
Pipe wiring from the point of connection to the main line to the end points - faucets, toilets, bathtubs, can be open or hidden in the wall. The second option does not spoil the appearance of the house, but it is more difficult to install and use. It requires solid pipe sections and access to the joints. With the open method, the pipes are laid near the floor, and in the vertical plane - in the corners of the rooms.
The wiring scheme is collector - cold and hot water is supplied to a common collector, and from it is directed point by point, and consistent - this is a simpler way when the pipes are carried out directly using tees. There is another option with loop sockets, but it is not popular.
Heating layout
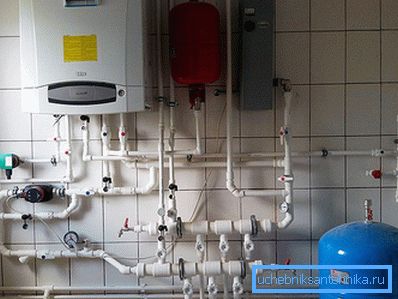
Making a plan of installation of heating, all the details are taken into account, the position of the fittings and adapters is indicated. Indicates the location of fixation of pipes and radiators. Connection is made by one or two pipes, from below or from the side. Small linear expansion is also inherent in reinforced pipes; this must be taken into account in the design. The ergonomics of the system - an important criterion, it is necessary to lay the minimum number of turns.
Installation Features
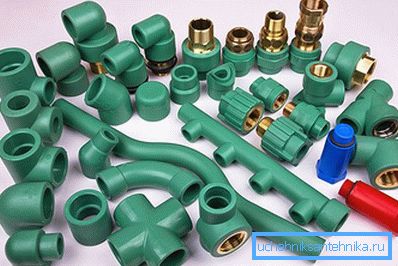
Pipe connection is performed by fittings, these parts are threaded, they are used to create detachable joints, and made of one plastic, which are used to create a permanent welded joint. Connecting elements must be of good quality, because the tightness of the pipeline depends on it. Do not install deformed parts. When cornering, corners are used or pipes are bent using a special technology, which is not always possible. Soldering of the vertical and horizontal parts of the unit is performed at a right angle, to ensure unimpeded thermal expansion. If the pipeline with hot and cold water are located nearby, then the hot one should be higher, otherwise condensate will appear on the cold one.
Threaded elements are expensive, so they try to count their number accurately and do not charge them with stock, and fittings and pipes are affordable, so they are bought more than the required amount, since some of the material may deteriorate during unsuccessful welding.
Fastening of pipes is carried out with a step of 500 mm, it should be bought with the rest of the material. Works on soldering pipes are carried out at a room temperature not lower than +5? C.
Tools for work
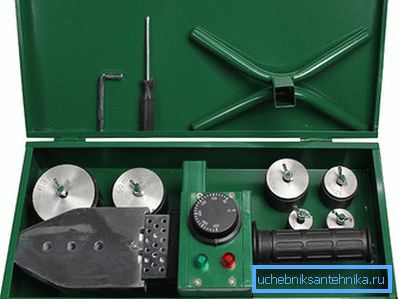
- Household electric soldering iron for pipes with a set of nozzles of the desired diameter.
- Sharp scissors for metal.
- Roulette, pencil.
- Shaver - a tool for stripping reinforced pipes.
Materials
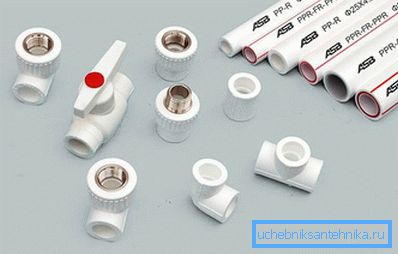
In addition to plastic pipes of the desired diameter, having a standard length of 4 m, you will need fittings:
- couplings for straight lengths;
- tees and crosses for branches;
- plugs for hermetic sealing of pipe ends;
- threaded fitting for connecting with instruments and valves;
- Ball Valves;
- clamps for mounting pipes on the walls.
The pipeline is installed after installing plumbing and fixing radiators. The layout of the pipes is marked on the walls, fasteners are fixed by marking.
Soldering
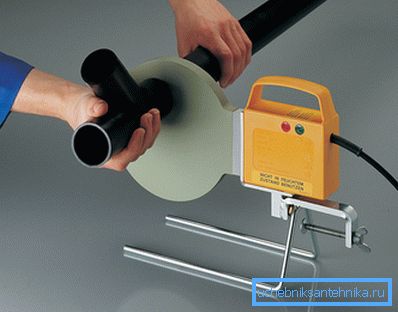
For installation of pipes, they choose a convenient place, you can solder individual nodes, and then connect them to a common pipeline.
- After installing the nozzle on the soldering iron, the device is switched on to the network for heating. The normal temperature of the device is 260? C, when it reaches the relay is triggered.
- A piece of the required length is cut from the pipe, the main thing is not to damage the material with scissors and cut at a right angle. If burrs remain, they are thoroughly cleaned.
- The ends of the cut degrease.
- If a pipe with a layer of reinforcement is used, it is pre-cleaned with a shaver. The tool removes the layer to the lower layer of propylene and further the same actions are performed as with a conventional pipe.
- Now the soldering depth is measured, for this, the edge of the pipe is inserted into the fitting or the coupling and the diving depth is marked with a dash. The pipe is heated from the outside, and the fitting from the inside. They are simultaneously inserted into the nozzles; if due to inexperience you cannot do this, then first put on the fitting. The retention time of parts on the nozzle depends on their diameter - 16 mm - 4 seconds, 20 mm - 5 seconds, 25 mm - 7 seconds, 32 mm - 8 seconds. The larger the pipe, the longer it warms up.
- They remove parts at the same time with smooth movement without turning, and immediately insert them into each other up to the intended line. In this position, hold for 5-6 seconds to fix the plastic.
Do not move parts, otherwise the seam will not be tight.
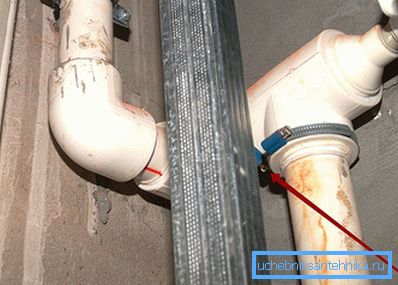
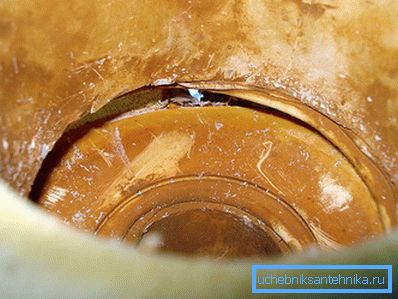
Looking into the pipe, you can assess the quality of the seam, if the material was overheated, there will be a drip overlapping the internal space. Unsuccessful connection should be regarded as experience and perform a new one. All elements are successively welded in a single pattern.
It is necessary to properly distribute the sequence of connection parts, so as not to have to weld in a remote place.
Connecting the next segment with the main highway, you have to keep the soldering iron on the weight, one of its nozzle is inserted into the pipe, and the tee is put on the second one.
Do not allow moisture and pollution on the pipes, it leads to deformation of the seams and the appearance of leaks during operation. All parts for installation of the system must be from one manufacturer, otherwise they will differ in chemical composition and a tight connection will not be obtained.
Video
In this video you can see how the soldering of polypropylene pipes and the installation of the mixer are performed: