A toilet with a hidden cistern: how to integrate sanitary
Now in the building supermarkets presented a huge amount of plumbing equipment, with which you can implement any design idea for the design of the toilet and bathroom. The greatest interest is caused by a wall-mounted and floor-mounted toilet with a concealed cistern, which makes it possible to hide not only the container in the wall, but also the pipelines.
How to choose a suitable model and install it yourself, read below.
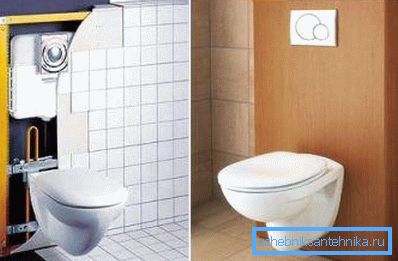
Device description
Before you install the toilet with a hidden cistern, it will not be out of place to deal with the peculiarities of its design. This will help determine the choice before buying the device and provide an opportunity to understand which system to install it will suit you the most.
So, toilet bowls with flush-mounted flush cisterns consist of the following elements:
- Steel frame - the base, which serves to firmly fix the visible part of the structure - the bowl. This is the main element with which installation begins. The strength of the whole structure depends on how firmly the support will be fixed.
The frame can be floor and wall mounted, made of steel metal, able to withstand a lot of people visiting the toilet.
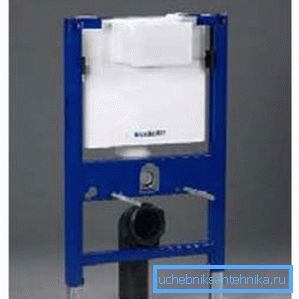
Note! The frame can not be mounted on thin interior partitions, made of foam blocks, drywall and brick. Installation is permissible only on the main walls or partitions, but constructed from massive blocks or cast from concrete.
Most supports have elements that allow you to adjust the height above the floor. Using them, you can install wall-mounted toilet toilets with a hidden flush system as convenient as possible for people living in an apartment or house.
- Hidden toilet cistern. It is made of polymers and is different in shape from the standard capacity that we used to see on classic sanitary devices.
The bottom line is that the tank should be placed in a fairly thin space, so its geometrical parameters are somewhat modified. In addition, the external surface is insulated with a special material that prevents the appearance of condensed moisture.
Capacity is attached to the same steel frame. Drain is carried out using a special lever installed in the front of the tank. There is also made a hole for the repair and replacement of drain fittings inside.
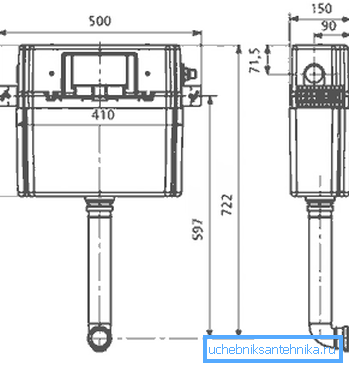
A flush mounted flush tank is often equipped with a separate drain lever that allows the release of a strictly measured amount of water.
- Toilet bowl. This is the only element of the described construction, which is visible after finishing the work on the decoration of the sanitary room. Usually hidden toilet does not differ in shape from the classic, but there are also design models with bowls of various shapes, colors, textures and so on.
The scope of delivery already includes all necessary hardware and instructions for its use. The maximum that you will need to purchase - a longer outlet, hose and plastic tape for sealing. The price of all these parts is low, because they do not affect the estimated cost of construction.
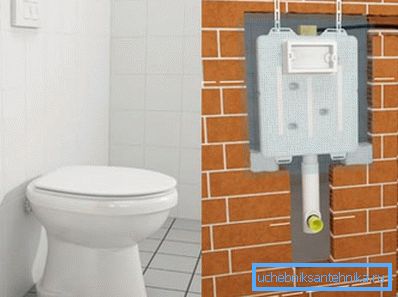
Having defined the model, you can begin to design.
There are two main ways here:
- for installation - in this case, the frame, bowl and cistern will be required: for the flush mounting of the toilet bowl, only specially provided parts are used;
- on a concrete base - this is a cheaper option, but special attention should be paid to the quality of work, since the smallest marriage can lead to quite serious consequences.
Consider each of the options in more detail.
Installation procedure
Using installation
The procedure for installation of the hidden toilet is as follows:
- Mounted support frame. There are special holes with which it is attached to the wall or floor. For this purpose, special powerful dowels or anchor bolts are used. To the installation site of the frame also need to bring the sewer pipe and water supply.
Note! Be sure to ensure that the support was fixed perfectly evenly both vertically and horizontally. In addition, at this stage you need to set the height of the toilet above the floor. It can vary from 40 to 45 cm. Choose yourself based on the height of people living in an apartment or house.
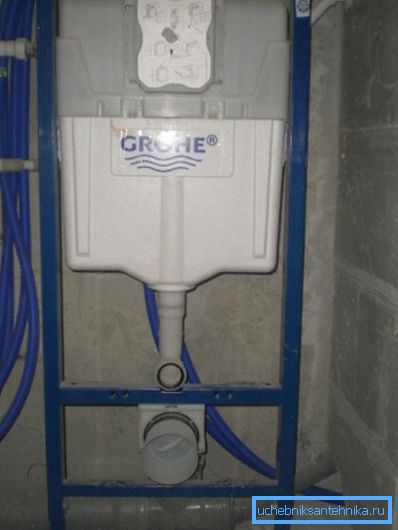
- Arrangement of water liner. You can use a flexible and rigid hose. The latter option is preferable due to a longer service life. Remember that before the installation is complete all valves must be in the closed position.

- Installation of the drain system. A corrugated plastic cuff is used to connect the installation nozzle to the inlet of the sewer pipe.
Having finished with installation, it is recommended to test the system in operation. To do this, the toilet bowl must be temporarily screwed to the frame and pour a bucket of water there. The fluid should go off quickly. Also check the joints of the corrugations with the pipes for tightness.
At the end of the inspection, the bowl is removed, since the final fastening of this part is made at the very last stage of work.

- Plasterboard installation plasterboard. Choose a waterproof material with a green backing. Naturally, before that you need to fix galvanized profiles.
You can sew the whole wall with sheets or just disguise the installation itself. In the second case, there will be a small shelf on top, where it is convenient to store different accessories. Also do not forget to cut through plasterboard technological holes for connecting the toilet bowl and system maintenance.
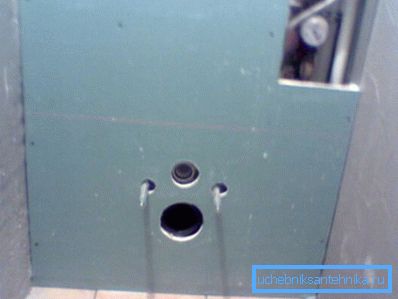
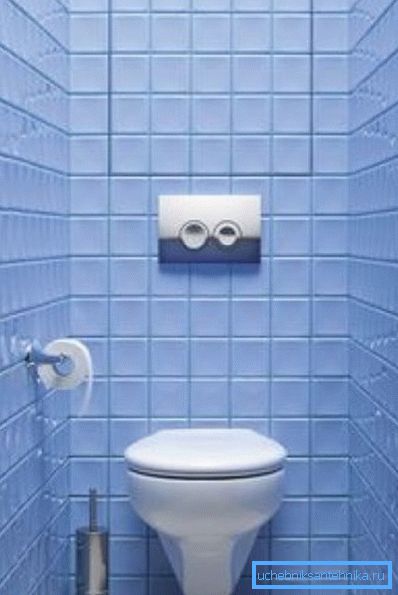
- The next stage is facing with ceramic tiles.. Color, size and texture is selected on the basis of the stylistic orientation of the toilet room.
- The last stage of the work - fixing the toilet bowl. If all previous work is done correctly, it will not cause difficulties. Two studs are used.
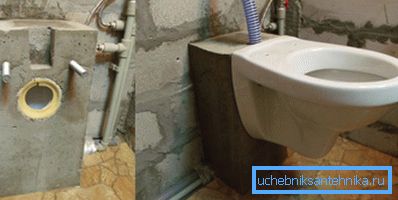
On concrete base
This is a cheaper option, but here all responsibility for the correctness of installation rests solely with you.
The procedure is as follows:
- Special rods are fixed in the capital wall, on which the toilet bowl will be hung on. This design is able to withstand a weight in excess of 300-400 kilograms.
- Then mounted coupling to connect the drain. Carefully observe the dimensions to avoid problems when installing the bowl.
- The next stage is the installation of formwork. In it you need to make small holes through which hang the previously attached studs.
Tip! When carrying out work, it is necessary to correctly calculate the length of these rods. They are deepened into the main wall of not less than 15 cm, and the rest of the length should be enough to attach the toilet.
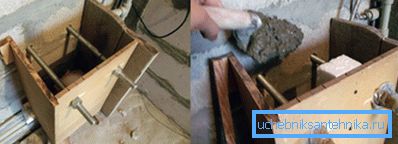
- Before pouring concrete you need to fix the pins in the wall. To do this, use a special potent chemical composition - anchor adhesive.
- After this, a concrete solution is prepared and placed in the formwork. Do not allow the studs and drain holes to move. They can be temporarily backed up with pieces of foam.
- After the solution hardens, decorative decoration and hanging of the bowl are carried out. These stages of work are performed in the same way as when using the installation.
Conclusion
A toilet with a hidden drainage system is definitely an excellent device for installation in the bathroom. It allows you to get rid of non-aesthetic-looking pipelines that supply water to the tank and remove waste from the bowl. By the way, in a similar way you can install and bidet.
For more on this, see the video in this article.