Assembly of a shower cabin: all stages of work
Now more and more popular shower stalls. They are comfortable and take up little space in the bathroom. Experts take a lot of money for their installation, but it is also possible to assemble a shower stall with your own hands.
Cabin elements
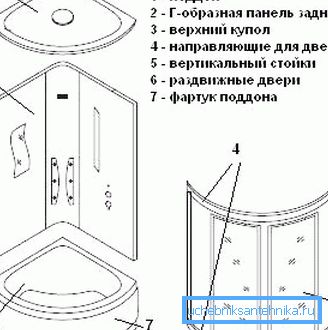
At first we will remind of what elements this sanitary equipment consists.
Types of pallets
Their function is the waterproofing of the user's location and the removal of wastewater into the sewer system. The shape of the pallets depends on the type of booth and can be square, rectangular, angular, semicircular, and even polygonal.
Based on the height of the sides of the device are divided into such species.
- Flat (small). Their depth is up to 8 cm. A small height of the sides increases the comfort of using the shower, as the obstacle is not necessary to step over.
However, such a bowl needs a wide discharge - a large amount of water in it cannot be accumulated.
- Bath trays have a depth of 16 cm. This design makes it possible not to take note of the rate of flow of water.
Note! The most common materials for manufacturing are acrylic and quary. Pallets of them are durable, they have good thermal conductivity and heat quickly, and their price is relatively low. The main disadvantage of products is the risk of chipping along the edges.
Steel, cast iron, stone and ceramic models are also produced.
Side walls, doors and dome cover
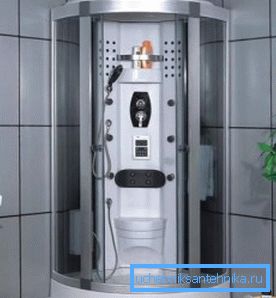
These enclosing structures impart tightness to the construction and hide the user from prying eyes. The necessary equipment is also mounted on the walls and lid of the booth.
Based on their design, there are two types of booths.
- Open In addition to the frame and the pallet, they have only one or two front walls, 80% consisting of sliding doors. Other sides are protected by the walls of the bathroom.
- Closed facilities. Assembly and installation of a shower cabin of this type is more complicated. Components of the design make it completely sealed, often even at the top (ceiling panel). Such a device is typical for hydromassage boxes.
Necessary tools
- Screwdriver or electric drill. The best option is to use a powerful screwdriver on the battery. So you will not be tied to the power supply.
- Two drills for metal 6 and 3 mm, as well as bits PH / 1.
- Bubble level.
- Two screwdrivers - slotted and cross-shaped.
- Adjustable or gas wrench.
- FUM - tape.
Installation of a structure
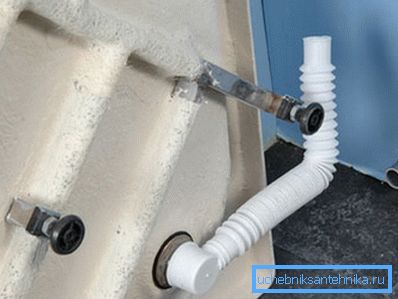
Now, what is the order of assembly of the shower.
Pallet Mounting
- First you need to connect the shower drain with a siphon. Mount it on a pallet. Then insert its corrugated tube into the sewer outlet.
- The pallet should be installed on the legs. Take long studs and screw them all the way into the landing points.
- Screw nuts to them and put on washers.. Then put on metal base supports.
Note! When working, you should always have before your eyes a bundled shower cabin assembly diagram. Install on an even and clean floor.
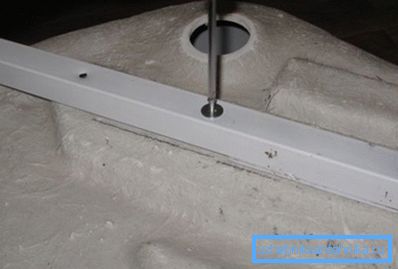
- Choose a support that is shorter than the rest. Locate the welded nut on it. Fix the middle leg in it. Screw it in tight and fully tighten it with the nut and washer.
- With the help of self-tapping screws, secure the frame to the bars recessed into the fiberglass bowls.. Further, the instruction prescribes to tighten all fasteners.
- Use a level to check the correctness of the horizontal pallet.. Adjust the feet if necessary.
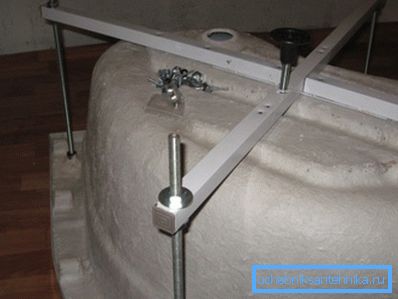
- Next, insert the mount for the screen of the bowl.
The assembly of the shower tray pan is complete. You can start the assembly of enclosing structures.
Installation of panels and walls
Inspect the glass and find their top and bottom. Usually the top side has more holes.
As for the guides, the top plate is wide, and the bottom one has a thin figured notch.
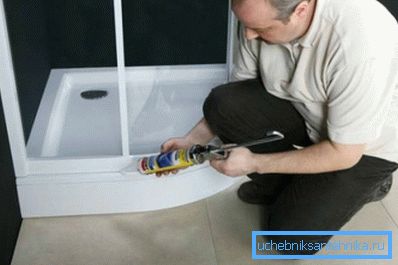
- Next, the traditional scheme for assembling a shower stall includes careful installation of glass into special grooves of the slats-guides. Preliminary should be greased with sealant joints.
- Then connect the guides with the stand with screws, then put the seal on the glass.
- Apply silicone to the pallet (under the bottom of the guide rails) and install the panes. Here (especially if the corner shower is being assembled) the help of a second person is needed.
- Attach panel sidewalls to the pallet with screws. For this purpose it has special openings. Treat all joints with a sealant, silicone-free putty will do.
- Next, install the back panel.
Note! Do not overtighten screws. Leave a small gap for additional regulation. Mount the shower cubicle neatly, the guides and the structures are made of aluminum, and this is a soft metal.
- When finished with the assembly of enclosing structures, wait until the sealant grabs.
Door Hanging
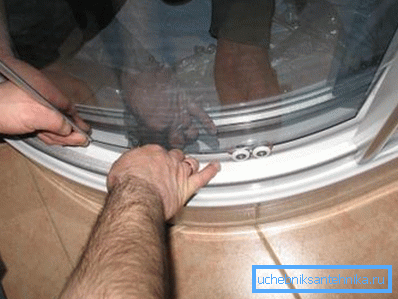
- Fix the rollers on the cabin doorway, then mount the seals.
- Install the flaps and adjust them with the upper rollers so that they fit together most closely.
- Put on the screws, fastening rollers, plastic caps.
Installation of equipment
In this part, the assembly technique of the shower cabin 85x115, 80x80, 90x90, etc., is exactly the same.
- Screw the mixer in the shower with a watering can on the hose.
- Next, install and connect all electrical appliances: fan, speaker, backlight.
- Do not forget to grease the edges of the speaker sealant.
- After that, install the necessary accessories: shelves, mirror, handles.
Final stage
When you mount the booth, first of all check the pallet for durability - it should not pop and sag. If you have such problems, adjust the legs of the bowl. After that, check the operation of all communications facilities: water supply and its abstraction, as well as all electrical devices.
Next, check the tightness of the booth and the strength of all its connections. If you find leaks, fix them.
When done with this - install the screen, and the shower stall will be ready for use.
Conclusion
From all of the above it follows that the assembly of the shower cabin itself is not so difficult. The main thing is to follow the recommendations and instructions of the manufacturer. The video in this article will help you in your work.