Button for cistern: design features and operating rules
If the installed tank to drain water in the toilet works correctly, no one thinks about its internal structure, principle of operation and the procedure for carrying out repairs. It is a different matter when water is not drawn to the required level or it does not merge well into the toilet bowl. It is here that you will need a diagram of the device of the toilet cistern: with a button, a lever or any other device.
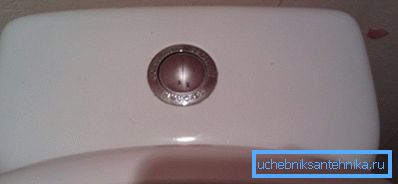
Storage capacity device
The design of the toilet cistern with the button is almost the same as the model equipped with a lever. And the purpose of both varieties is the same thing - water intake from the water supply network, storage and quick drain upon a signal from a mechanical stop valve.
However, there are some differences. Of course, it is easier to push than to lift the lever, but there are plenty of opportunities to break a more complex structure. According to statistics, the repair of a toilet bowl - a flush tank with a button - is performed several times more often than repairing a plumbing device with a lever-type drain.
In addition to various mechanisms for draining water, containers are classified by type of material. Features of each of them are given in the table.
| Material | Description |
| Cast iron | Cast iron tanks were used at the beginning of the last century. It is very reliable and strong material which is almost not subject to corrosion. And now in some apartments you can find similar devices. However, new models are not available due to the high cost and complexity of the production process. |
| Faience | The faience cistern is included in the delivery of the classic toilet. Special mounting holes and fittings allow you to fix the container directly to the bowl, ensuring excellent tightness and ease of use. |
| Plastic | Polymers are usually made drain tanks designed for flush mounting and installation in country toilets. In the first case, the button is located on the front surface of the container, otherwise it will not be able to use it. Country drain tanks differ in the strong case and are completed with necessary accessories for fastening separately from a bowl of a toilet bowl. |
The toilet cistern system with a button or two is designed according to a scheme that differs from the one you saw in the old storage tanks. We will talk about its features in the next section.
Modern drain tanks
With one button
The number of buttons with which the drain tank is equipped does not affect the design of the valve device installed inside the tank. Moreover, if the holes in the case and the dimensions are the same, you can replace the mechanism and enjoy an adjustable descent.
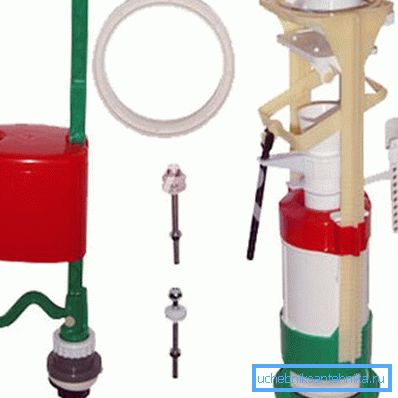
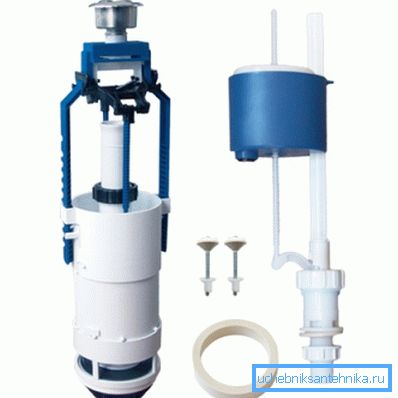
Consider how the toilet cistern with the button is arranged in more detail:
- The float, with which the water level in the tank is measured, can be made of plastic or metal. In the latter case, the price of the mechanism increases slightly.
- This device is connected to a ball stop mechanism that opens and closes the inlet pipe through which water enters the tank.
- For smooth filling of the tank and noise reduction, the nozzle is also equipped with a diaphragm with a lever that regulates the jet head.
- Adjustment of water drainage is performed using a siphon and a special gasket that covers the outlet.
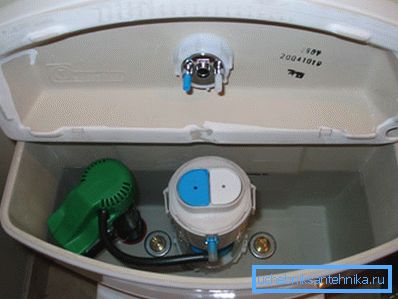
Note! There are non-collapsible and collapsible siphons. The latter are preferable, since they are easier to maintain: it is not necessary to remove all valves, it is enough to dismantle and wash the rubber valve itself.
Now we will deal with how to assemble the toilet cistern with a button and disassemble it if necessary. It should be noted that the need to dismantle the tank occurs only in the event of clogging of the membrane. The rest of the mechanism is so reliable that it does not require maintenance.
The most difficult thing when disassembling the storage tank is to pull out the button itself, which, if you twist it with your hand, rotates freely around its axis.
Instructions for dismantling is extremely simple: before you twist, you just need to press it and hold it in this state until it is completely removed.
When finished with the button, you can rinse the membrane.
This is done as follows:
- the tap that stands on the pipe supplying the water to the tank is turned off;
- all liquid is drained from the tank;
- then unscrew the nut connecting the siphon with the inlet pipe;
- after that, the entire mechanism is dismantled and the membrane in the lower part is cleaned.

With two buttons
Such a mechanism is used to save water. By activating this or that lever, you can flush half or all of the liquid into the toilet.
The device of a toilet cistern with two buttons practically does not differ from the one-button version. Only exhaust valves have been slightly modified.
Another difference is the dismantling method. It is unlike the order of disassembly of the storage tank, equipped with only one button.
In this case, you need to act in the following sequence:
- Press the two buttons at the same time, freeing the special mounting groove located on the sleeve.
- By inserting a screwdriver into this slot, you can remove the first button, and then the second one.
- Below them is a mounting screw holding the top of the tank.
- Unscrewing it and removing the lid, you get access to the tank fittings for cleaning, adjusting or replacing.
Tip! To avoid problems with the operation of the cistern, purchase quality and expensive mechanisms. By saving some money now, you may face many problems in the future.
Order of service tank with a button
Common problems
The device of a toilet cistern with a button, as you could see, is as reliable as possible.
If you still have any problems with the product, you need to act as follows:
- Shut off the water, unscrew the button, remove the upper part of the tank and perform a visual inspection of the internal space of the container. For convenience, you can pre-drain the water.
- Special attention during examination should be given to the outlet membrane.. Most often, problems with the tank are associated with loss of tightness of this node.
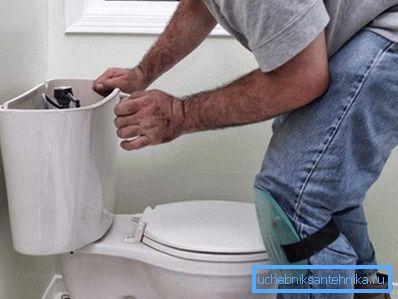
- In most cases, the membrane should be flushed from debris, but it is better to replace it with a new one.. The fact is that due to the poor quality of water in the pipes, the silicone or rubber of the sealant becomes unusable and ceases to perform its function.
- If the tank is not fully filled, you need to adjust the level of the float with your own hands.. To achieve the desired volume can only experimentally: pouring water and draining it.
- If it is necessary to replace the reinforcement, it is advisable to purchase a complete repair kit consisting of a membrane and a sleeve. When installing do not forget to equip parts with gaskets.
The quality of work and durability of the tank is greatly influenced by the correctness of its installation. If you do not want to use the services of specialists, you will have to fix the capacity yourself.
It is produced like this:
- Before installation, the purchased tank must be prepared: install drain fittings, branch pipes, gaskets, and so on. All necessary actions are described in detail in the accompanying documentation to the container.
Tip! Screws and nuts need to be twisted hands, without making excessive efforts. Using wrenches or pliers, you can damage fragile plastic parts that are not designed for this impact.
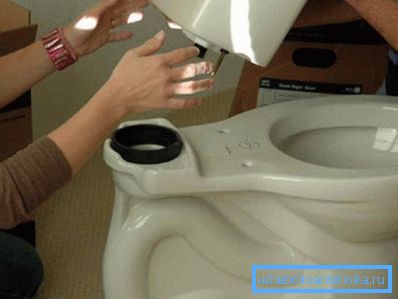
- After assembly, the container is fixed on the toilet. To do this, use metal bolts, equipped with rubber gaskets, which are screwed to the bottom with plastic nuts with petals.
- The joints need to be sealed with rubber gaskets and sanitary gel. After processing the seams with pipe sealant, the latter must be given time to cure.
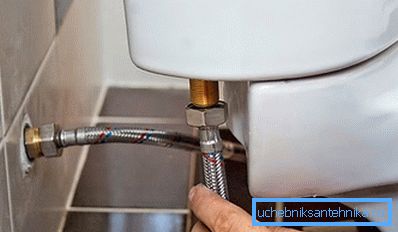
- Then the water pipe is connected. It is necessary to install a faucet on it in order to block access of water to the tank, if necessary.
Conclusion
Knowing the design features, principles of work and the order of maintenance of the cisterns, you will be able to independently resolve the problems that have arisen without the help of plumbers, whose services are sometimes quite expensive. In order to avoid any troubles with plumbing equipment, you need to properly connect it to the engineering networks of an apartment or house. Learn about the order and rules of the work can be from the video in this article.