Ceramic sink: everything you need to know about it
At present, a ceramic sink in the kitchen, bathroom or toilet is most often made of glazed earthenware, but it can also be made of porcelain, but this is rather expensive material. In addition, ceramic bowls may vary in type of installation.
That is, they can be mounted as overhead, recessed or mortise. And although the last two options are very similar to each other, nevertheless, there is a significant difference in the preparation of the seat for mounting the vessel. Let's try together to figure out how it looks in practice and in addition we offer you a demonstration of the video in this article.
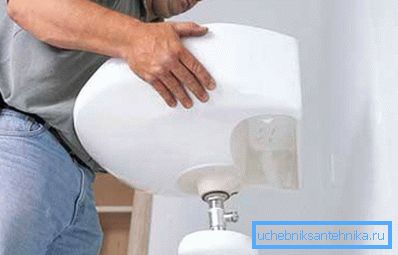
Shell differences
According to the material
Note. Probably the most important difference in ceramic sinks is not the installation method, but the material from which they are made. After all, this factor inevitably entails such indicators as the quality and price of the product.
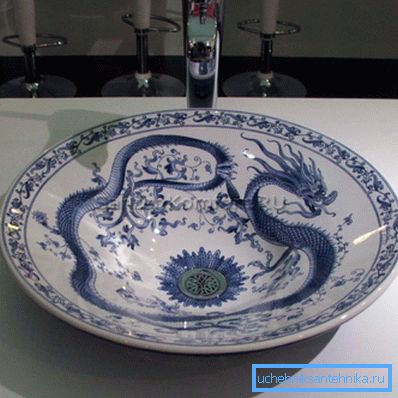
- Porcelain sinks may not even be known to everyone, since for some reason such products are referred to as ceramic, although very few people are aware of what is hidden under this name.
- So, unlike the earthenware, porcelain has a very dense structure, this contributes to the fact that dirt can hardly get into the pores of the material, therefore, the color, pattern and luster of the bowl will always remain unchanged, but this is possible, of course, only with regular care. Hot water can be poured into the sink, and if it is not alternated with cold water, it is not dangerous for the bowl, and the vessel can be washed and cleaned even using abrasive detergents. However, porcelain belongs to fragile materials and is afraid of shocks, which makes it somewhat difficult to transport.
- Despite the fact that earthenware has a porous structure, you will most likely hardly be able to distinguish it visually from porcelain if you place two sinks of different materials in front of you, provided that you do not have professional experience.
- And the whole secret lies in the fact that the earthenware is coated with glaze and its porous surface takes the form of a practically mirrored surface, which is misleading during visual inspection.. But, despite the glazed coating, the pores still contribute a certain amount of tar to the honey barrel - the surface of the bowl darkens with time - this is the result of contamination of the surface micropores. And it is the owners of faience most often wondered how to wash the ceramic sink.
By installation method
It is probably the easiest to install the overhead bowls, since all the difficulty basically comes down to connecting and, as an option, in making a hole in the tabletop for the drain siphon.
Such shells can be mounted on a cabinet, cabinet or tulip, more precisely, on a pedestal or a leg of a tulip, and this is perhaps the most familiar option for everyone. Overhead models are sometimes confused with built-in sinks, but they have differences in the specifics of the installation.
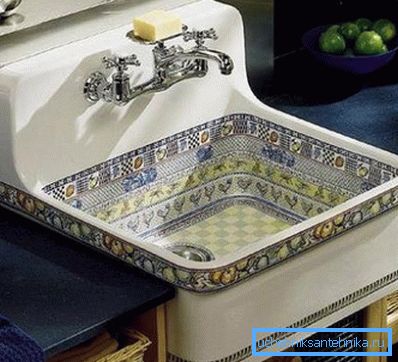
If you have a question, which is the best ceramic or stainless steel sink, then you will certainly choose the interior for the kitchen and, most likely, if you prefer ceramics, this will be a recessed option that is most suitable for placing such an appointment.
Such shells differ from overhead and mortise models in that the bowl itself is built into the tabletop, but its sides remain at the top, due to which, in fact, the vessel is held. The seat itself can be provided in the furniture design, as shown in the top photo, or it will have to be cut out in the tabletop by yourself.
Note. It should be noted that the ceramic kitchen sink is good in cases when the dishes are washed in a specialized machine, and the bowl itself is only needed for washing food or hands.
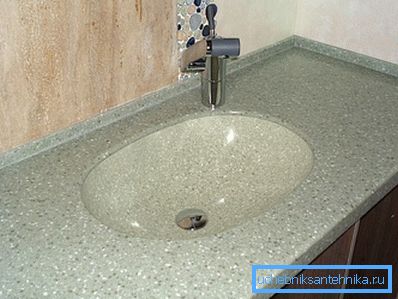
The most difficult is to install the sink when it is cut into the tabletop and the edges of the bowl are either flush or slightly below the surface, as you can see in the top photo.
And the difficulty lies in the fact that the hole in this table top needs to be cut in the right place with your own hands, and the instruction in this case requires that both the hem and the cut itself be clear and even.
Such filigree accuracy is needed more for aesthetic reasons, because if the invoice and embedded option completely overlaps the seat, then the edge is visually visible, and sometimes (if below the surface) the cut itself.
Note. In addition to the differences listed above, ceramic bowls can have different shapes — they can be round, oval, semi-oval, rectangular, square, angular with an arc, and in some rare cases even triangular small shells can be produced.
The possibility of repair and restoration

If we talk about the restoration of the old sink, then first of all, you probably need to figure out how to whiten the ceramic sink, and most often this need arises in cases where the products are made of faience.
So, if we talk about special-purpose products, then for this you can use SANOX or similar cleaning agents made on the basis of oxalic acid.
Instructions for use are usually printed on the container with the substance, but most often it comes down to applying liquid or gel on the ceramic surface for 5-10 minutes, then rinse it off with warm water using a sponge or cloth.
But you can also use the improvised means, such as food and soda ash, bleach and alcohol vinegar. Stir 2 tablespoons of soda ash with two tablespoons of food and rub the shell with this mixture, leaving it all for 5-10 minutes.
After that, mix 50g of bleach and 50g of vinegar and moisten the surface with this mixture, leaving it for half an hour, then rinse the liquid with warm water - such a restoration of the ceramic sink will add its snow-white color.
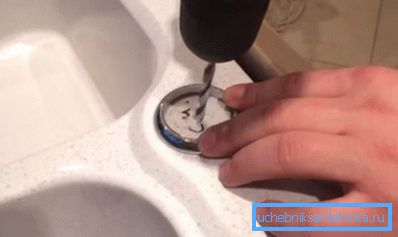
And now let's learn how to make a hole in the ceramic sink, if the tap needs to be installed in another place or it happens that there is no hole at all - the sink is designed for the tap to be fixed on the wall.
To do this, we need to determine exactly where this crane will be located and mark the center of the installation, after which we use a diamond drill or diamond drill to make a center punch, that is, drill a shallow hole in the center to stop the cutter.
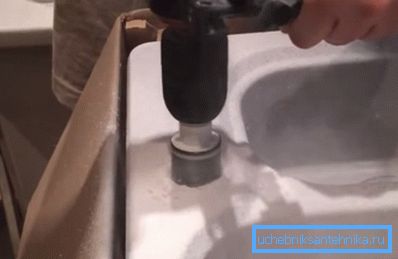
After that, we take a pobedit or diamond cutter of the required diameter (diamond is better) and start drilling with an ordinary electric drill, and the impact mode is not used here, since it is almost impossible to repair the spall on the ceramic sink - it will still be visible.
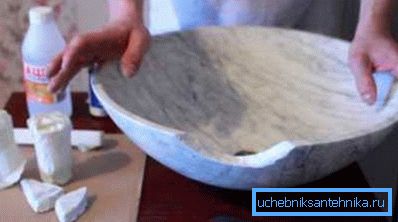
If you are interested in how to seal a crack in a ceramic sink or glue a broken piece, then you will need cold welding for ceramics, waterproof glue and acetone.
Dry the surface, degrease it with acetone, apply cold welding and apply a broken piece. After drying, the surface is treated with sandpaper and secured with waterproof glue.
Conclusion
It can be said that a ceramic sink for a bathroom or kitchen is quite simple to install, except for the tie-in. If you need to embed it in a porcelain or marble worktop, then for this it is better to use the services of a specialist who has the right tool.
Successes!