Connection of a sink to communications and its installation
How to install a washbasin or sink? How to connect the sink to the sewer and water supply? Does this simple, in general, work some pitfalls?
Let's try to answer these questions.
Installation
First, find out how the sink can be installed.
- On brackets or consoles. They are attached to the wall with dowel-screws or anchors, after which the sink is placed on top and fixed with a pair of bolts (on consoles) or with its own weight.
Nuance: it is better to fix the faience sinks at the base of the bracket. To do this, in the closest to the wall of the lower groove of the washbasin is laid tied with a thick copper wire segment of a thin (6-8 mm) steel bar. Wire straps bracket.
- On anchor and pedestal.
This method of attachment has several subtleties:
- On the back side of the sink, it is better to apply a couple of strips of silicone sealant that will serve as a damper between it and the wall tile.
- Nuts that attract the sink to the anchors should not be tightened to the stop. The shell should rest on both the anchor and the pedestal.
- The sink is better to fix with a slight inclination forward. Then on the shelf under the mixer will not collect water.
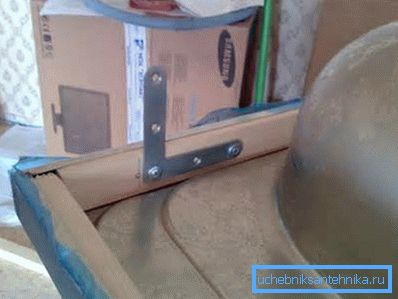
- On the cabinet or tabletop. Laid on sink is attracted to the walls of the cabinet; The mortise fits into the cut-out of the tabletop and is attracted to it by screw fasteners or sits on the sealant.
General rules
Connection of a sink of any type is carried out taking into account several general rules.
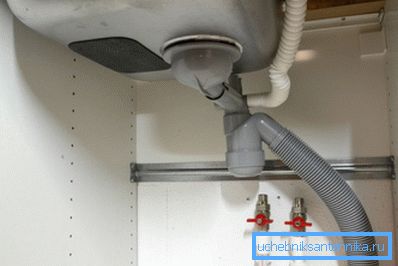
- Under the sink is placed a pair of individual valves. They will allow you to not suffer without water throughout the house because of the trifling breakage of the mixer.
- The method of installation of the sink, which does not allow simple disassembly (the same sealant between the sink and the tabletop) is permissible only if the table is advanced or the tabletop is removed. Sooner or later, you will have to change the flexible connections to the mixer or the mixer itself; It is almost impossible to do this by lying in the cabinet and working in the cavity between the sink bowl and the wall.
- For the same reason, it is necessary to install a mixer and discharge into the sewage system before the sink or sink is installed. So faster and easier.
Mixer installation
Regardless of the design of the mixer between the body and the sink should be an annular gasket. It provides a tight connection and does not allow water to flow under the sink.
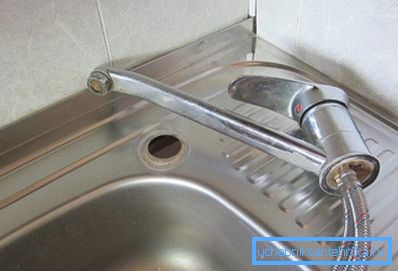
The mixer should not rock when turning the lever or sheep. If it is installed on a thin stainless steel sink, it is advisable to place a piece of sheet metal cut at the place of the bottom or thick plywood impregnated with linseed oil under it.
Flexible liners can not be screwed, holding them for braiding hoses. This work is done only and exclusively with an open end wrench or adjustable wrench. The instruction is connected with the method of fastening the liner and the braid: it is very easy to tear one from the other, breaking the thin rubber tube inside.
Do not rely on rubber rings, which, according to manufacturers, should seal the connection threads of the hoses and the body of the mixer. Tape these threads with a FUM tape or polymer sealing thread.
Installation release
Installing your own release is more than easy; Moreover, most of the sinks and washbasins are completed with assembly guidelines. But who reads these instructions?
We allow ourselves to give a couple of simple tips in this area.
- Laying under the release - the grid is placed below, under the sink. If you put it on top, there will always be water in the bowl.
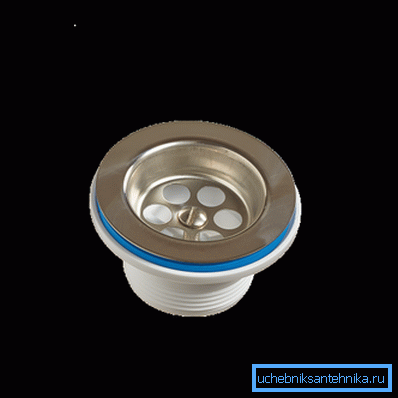
- Under the plastic grate, an annular gasket on top of it, willy-nilly, has to be placed - otherwise the connection will flow. There is, however, one workaround. Instead of a standard gasket, a thick ring of microporous rubber is cut and installed under the sink.
Siphon installation
The connection of the siphon to the sink is carried out using annular gaskets with a conic section.
- A cap nut is put on the release.
- The gasket is tightened to release the tip of the cone down.
- The release is inserted into the siphon socket. The gasket should partially go into the socket.
- The nut is tightened - by hand, with moderate effort.
Similarly, a knee or a corrugated tube is connected to the siphon.
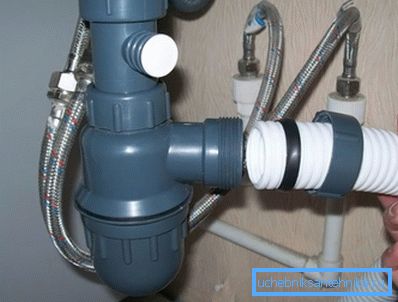
A siphon cover can be leaked with a FUM tape when leaks appear.
Nuance: instead of installing a siphon, connection of a sink outlet is practiced directly to the corrugated pipe connecting it to the sewage system. In this case, the corrugated pipe is laid with a significant counter-slope. Water shutter will not let the sewage smell into the apartment.
Connection
So, the mixer and the siphon are on the sink; it is securely fastened. It remains only to connect the plumbing device to the communications.
Water
The connection scheme of the supply lines to the sink is more than simple: there are only two of them. Hot water is usually diluted from above; on the mixer, the dhw tap is marked in red or with the letter H (from English “hot” means “hot”). Cold water is marked in blue or the letter C (from cold - cold).
In the general case, for connection, it is enough to carefully tighten the cap nuts of the flexible connections on the external threads of the mom-and-dad valves.
If, due to some reasons, the valves are not installed, and the eyeliner is a steel pipe, it is better to equip them with so-called brass extension pieces - branch pipes with external and internal threads. Their price is more than low; the presence of extension cords will allow you to tighten the nut with the gasket not on the corroded and uneven end of the steel pipe, but on the neat brass end.
How to seal threads:
- Sanitary flax with a small amount of paint or silicone.
- Polymer thread.
Tip: Flax without paint and tape FUM for metal threads on the liner is better not to use: the first rots when in contact with the inevitable condensate in the summer heat, and the second leaks with minimal reverse flow.
Sewage
Both an ordinary washbasin and an autonomous sink without connecting to the water supply should be drained somewhere. How to connect to the sewer?
Most siphons are now completed with a corrugated elbow that fits tightly into the socket of a plastic sewer. With considerable resistance, the rubber sealer can be lubricated with liquid soap.
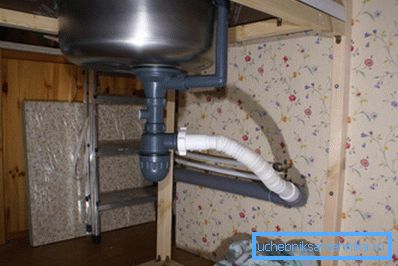
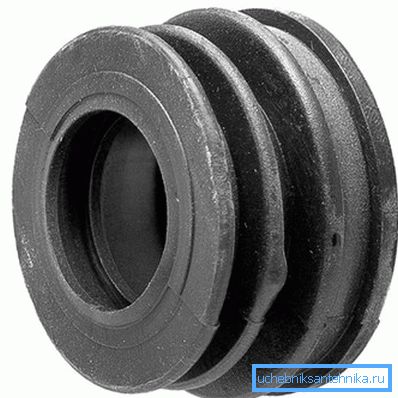
For older kits with a knee and a cast-iron sewer, the solution is a rubber cuff. The most popular diameters of the knee and sewage are 40 and 50 mm, respectively.
To ensure normal drainage, the sewage system should be laid with a constant slope. Its value depends on the diameter of the pipe:
| Diameter, mm | Slope, cm / linear meter |
| 50 | 3.5 |
| 100 | 2 |
| 150 | 1.8 |
Conclusion
We hope that our material will help the reader to solve all his problems. Additional information on how to connect the sink, will offer a video in this article.
Successes!