Country sink for washstand: we collect the simplest design
A sink with your own hands in the country can be made fairly quickly and without the use of expensive materials and sophisticated technologies. In our article we will give a few examples of such structures, so that you can choose the option that suits you best.
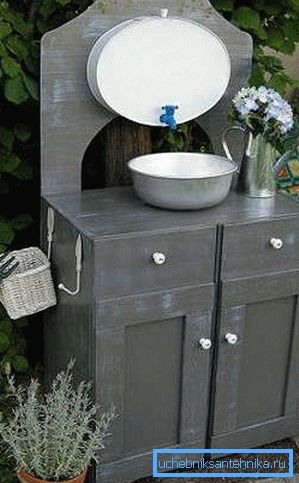
Country washbasins
Products from scrap materials
In order to have an opportunity to wash hands before a meal or wash the dust off your face at your summer cottage, you should equip at least the simplest wash basin. And here we have a choice of a variety of designs, which differ in both cost and complexity of manufacture.
The easiest way to use those items that are always at hand:
- Elementary washstand is made of plastic bottle. Capacity is fixed on the tree or the wall of the country house, cut off the bottom to quickly fill with water. Then slightly unscrew the bottom cover and use a thin stream of water for its intended purpose.
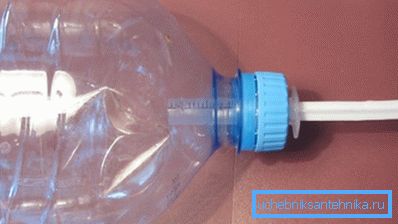
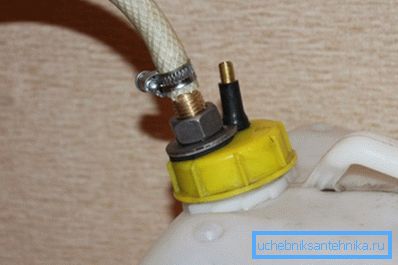
- To simplify the washing process, an elementary pressure valve can be built into the lid.. To do this, we make a small hole in the plastic through which we pass the nail. Inside we fix the design with a nut with a sealing rubber gasket. Clicking on the nail head below, we raise the gasket, opening the water hole.
- Other containers can be used instead of plastic bottles.. Suitable as a small polymer cans, and metal cans up to 5 - 8 liters.
Note! It is not necessary to do a washstand of a larger size - it can not stand support. Yes, and warm in the sun such a volume of water will be much longer.
Separately, it is necessary to arrange a place to drain. If a simple plastic bottle is used, water can be poured directly on the ground.
But for large containers it is better to either install a special pallet, or dig a small hole. At the bottom of the pit lay drainage, and close it on top of the lattice.
Capital construction
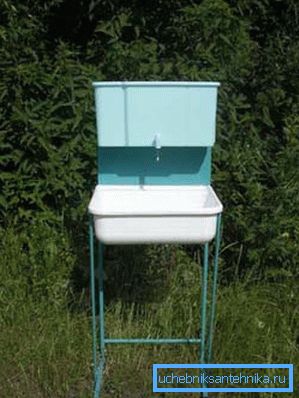
However, if you spend a lot of time on the site, then instead of improvised washbasins, it is desirable to equip the capital structure.
It includes such details:
- A framework from a tree or metal on which all elements are placed.
- Water tank attached to the top of the frame. Usually, a conventional or pressure valve is built into the container, and pressure is provided by the height of the water column.
Tip! In order to guarantee sufficient pressure even with partial filling of the tank, many people attach simple pumps (manual and foot) to the tank. Naturally, the design in this case should be as tight as possible.
- Wash, which is installed on the frame guides. If you do not know what to make from the old sink in the country, then this is the best option to use the parts - do not throw away the same!
- A drain that can either go to the sewer (cesspool, septic tank) or open into a container located at the bottom of the structure. The second option is preferable for portable structures, but less practical.
How you can make a similar sink with a cabinet for a country site, we will tell in the next section.
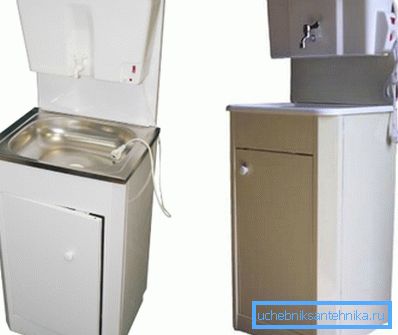
Shell assembly
Materials used
Before we start work, we need to purchase some materials. In principle, you can use what you have on hand, but it is better to make a high-quality washbasin once, which can last for several decades.
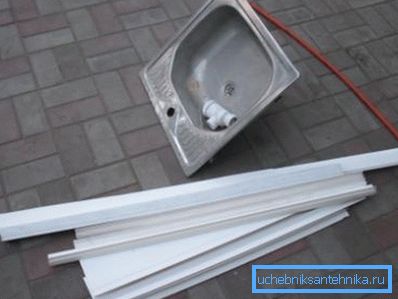
So, we need:
- Elements for the frame are bars with a section of 30x30 mm or shaped pipes of 20x20 mm.
Note! The metal frame is more durable, but it is harder to assemble (requires the use of a welding machine), and it will be more difficult to attach the casing to it and the details of the structure.
- Materials for plating - board or plastic panels.
- Plastic or metal water tank.
- Crane (push or standard).
- The shell itself (metal or plastic, shallow, with a bottom drain).
- A set of drain fittings (siphon, overflow and pipes).
A fragment of the table top can also be used - then the washstand will look much more attractive.
As for the tools, their set is close to the standard:
- Saw on wood or metal, depending on the fact from which we will collect the suburban frame cabinets with sink.
- Welding machine (if used tube)
- Drill.
- Cordless screwdriver.
- Level.
- Hand tools for carpentry operations - hammers, pliers, files.
- Adjustable wrench for working with pipes.
When everything is ready, you can proceed to installation.
Frame Mounting
At the first stage, we need to make a product frame with our own hands.
Here we describe the method of erection of a wooden structure: there will be few steel differences, and they will consist mainly in the method of connecting parts.
- Cut out four blanks with a height of approximately 170 cm from the timber, and two more - 80 - 90 cm each.
- We assemble a frame from parts, connecting the vertical parts with horizontal elements.
- In the high part of the frame we install the transverse bars on which the water tank will rest.
- On horizontal lags we place the tabletop. While it is possible not to fix it, as soon we will build in it a sink.
- The frame is thoroughly impregnated with a moisture-proof composition with antiseptic components. This is done in order to protect the wood from rotting in the inevitable contact with moisture.
Note! If you plan to make a stationary outdoor sink, then the supports can be buried in the ground by about 30-50 cm. In this case, the lower parts of the frame are wrapped in roofing material, otherwise they will rot in just a few years.
Bowl installation
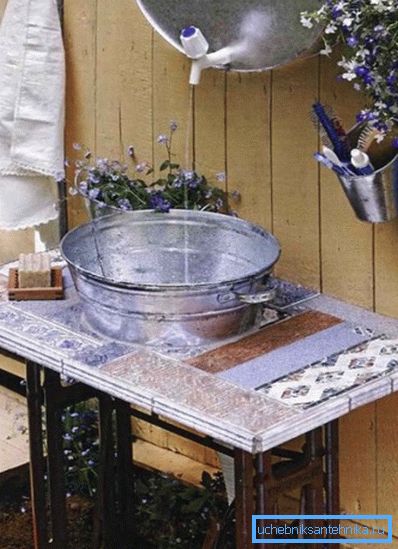
The installation instructions for the shell itself are not complex:
- Ideally, we just need to lay the product on wooden rails, and fix it from the inside with special brackets.
- If we make a mortise shell, then from the seamy side of the table top we apply a template and apply marking on it.
- By marking we drill several holes, which we then connect using a jigsaw.
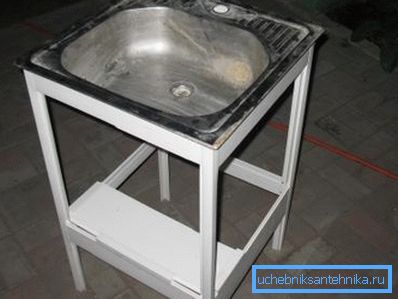
- Next, in the resulting nest install the sink, sealing the joint or sanitary silicone, or a special butyl tape.
- Bottom we fix the sink with steel clips.
Water tank
The tank in which we will pour water is also very important.
For its manufacture, it is desirable to choose a plastic container of a suitable volume:
- Flat canisters are not suitable for this purpose because they do not provide sufficient water pressure. The low height of the water column will cause the trickle from the tap to flow very thin.
- Where it is better to take the product stretched up: even when it is filled to a quarter, the water will flow into the faucet under sufficient pressure.
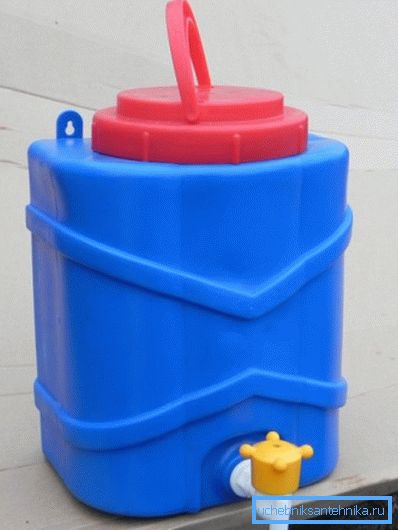
Tip! To prevent the liquid from stagnating, it is better to install the tank not evenly, but with a slight bias towards the crane.
- The design is placed in the upper part of the frame, and the higher the better.
- In the bottom or in the lower part of the side wall we cut in the faucet, and we carefully seal the place of the tie-in.
It is also worth thinking about the placement of the faucet: the spout should be chosen in such a way that at any turn the jet would fall exactly into the sink.
In principle, this washbasin assembly can be considered complete. We can only fasten the trim on the supporting parts of the frame, and attach the door to the bottom. Through these doors we will get access to the drain node, which also needs to be properly mounted.
Plum arrangement
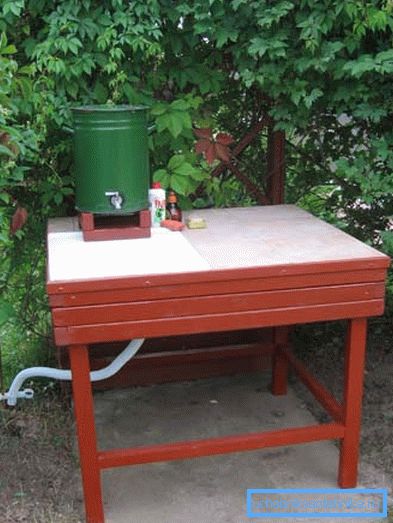
The simplest discharge of water from the sink at the cottage is done according to the following scheme:
- In the sink itself, we install a mesh from debris, and from the bottom we fix a discharge pipe about 10 cm long.
- Under the pipe set plastic or metal tank with a wide neck. The capacity of the tank can be very different, but it is desirable that it be at least equal to the volume of the water tank.
- As it is filled, the container is removed and emptied into the cesspool or septic tank.
However, this option is suitable for portable models.
How to make a sink from the sink in the country, which is constantly used in one place - we will tell below:
- First, we install a pit-siphon siphon, which we connect to the drain using a nozzle.
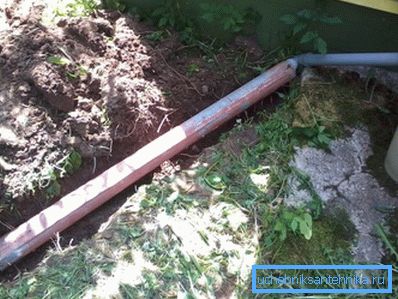
- A siphon outlet pipe is connected to a sewer pipe laid in a trench and connecting the installation site to a septic tank or cesspool.
- If this is not possible, then right under the washstand we dig a hole up to a meter deep, fill it with a third by drainage and develop a dense overlap. To drain the water, we use a wide pipe, which is mounted in the roof of the pit.
In principle, the discharge can have a very different design, but when designing it, it is necessary to maximally avoid the ingress of contaminated water to the soil or to the opening of sources (ponds, wells, natural reservoirs).
Conclusion
If you need a sink on the street in the country - with your own hands according to the above algorithm, you can build it pretty quickly. With proper design and quality manufacturing, such structures are very convenient to use, so at least for several years the issue of maintaining personal hygiene in a country house will be closed for you.
For more information about the options for construction of summer shells can be in the video in this article.