Do-it-yourself shower stall: the right course of action
Many of us want to put a comfortable, compact and stylish shower stall in the bathroom of their home. But it is often impossible to choose a specific version of it: the dimensions do not fit or the price of the model you like is too great.
In this case, you can independently assemble a plumbing structure from individual components and components.
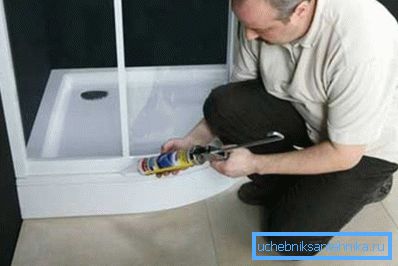
Components of sanitary facilities
So that you have an idea what you are dealing with, we will describe the complete device of a shower cabin with a tray in its most complex version of “hydrobox”. The table shows the construction sites and their elements.
| Roof | Central panel | Rear walls | Door | Pallet |
| Speaker | Control panel (square, oval, rectangular) | Mirror | Cloths (glass or plastic) | Bowl |
| Fan | Mixer (the distance between the axes 9, 10, 12, 12.5,14, 14.5, 15 cm) with switching to 1 - 5 positions | Shelf | Videos | Screen |
| Lamp | Jet nozzles for torso | Shampoo dispenser, soap | Compactor | Siphon |
| Transformer | Back | Watering Fitting | Magnetic tape | Drain / overflow |
| LED backlight | Seat | Watering shower | Pens | Support frame |
| Rain shower or tropical | LED backlight | Holder for watering can | ||
| Power Supply | Radio, telephone, etc. (depending on configuration) | Shower rod (railing) | ||
| Armored hose | ||||
| Foot massage |
Pallet Mounting
For installation you can choose a deep or shallow pan. The first option is convenient because you do not need to worry about the pressure of the water and the device can be used as a bath. The second type, due to its low sides, is especially convenient for children and the elderly.
Preliminary actions
First determine the location for the drain device. It depends, among other things, on the location of the drain hole in the bowl and the sewage inlet.
Installation of shower tray is very simple. Almost all models are now equipped with height-adjustable legs on the frame. When installing the bowl, consider the thickness and level of the finishing floor covering of the shower room.
This is necessary in order to close the gap between the bottom of the pallet and the floor with a decorative special screen without any problems.
Note! The plane of the bowl is recommended to slightly tilt in the direction of draining the water from the shower. So drains will go faster and will not leave puddles.
Installation fixture
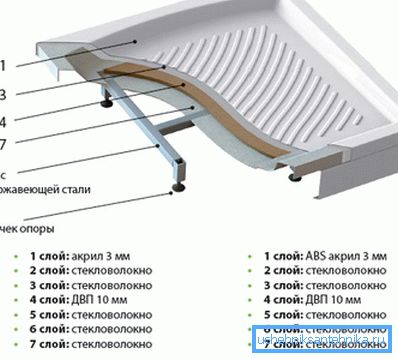
Modern pallets are most often sold already completed with all the necessary elements described in the table above.
Before you begin to install the bowl, check the following.
- Water supply to the shower must be completely finished.
- The angle between the two walls in contact with the pallet should be as close as possible to 90 degrees.
- The edges of the bowl should fit snugly to the walls. Note that if this is not the case, the joints in these places will have to be filled with silicone sealant.

- The outlet pipe of the sewer pipe should coincide with the drain node of the pallet as accurately as possible.
- For all these reasons, it will be necessary to adjust the device in height and level.
The installation diagram of the shower tray tray is as follows.
- First of all, determine the level of outlet of the nozzle for sewage drainage hole of the bowl.
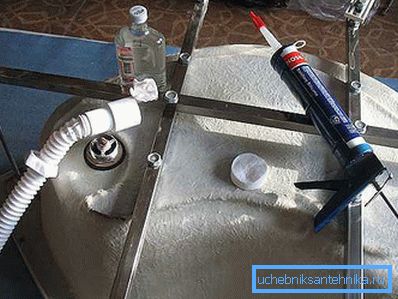
- Attach adjustable feet to the outside of the bottom of the pallet.. The best option is if they have plastic nozzles to prevent them from slipping on the floor and damaging it.
- If you put the bowl in the technological recess in the rough floors, with the help of a hammer and chisel prepare the surface of the "nest" so that it does not feel unnecessary and sharp areas.
- With the help of a metal corner, in the extreme case - the usual wall or floor tiles check the pairing of two walls in the corner, where the pallet will be placed, according to the right angle. If the angle is more or less than 90 degrees, the walls will have to be leveled, at least by the height of the bowl.
- Next, mount the outlet of the sewer pipe so that when you install the bowl its bell was located as accurately as possible under the drain hole of the pan.
- With the help of adjustable legs, put the shower tray strictly in the correct horizontal plane.
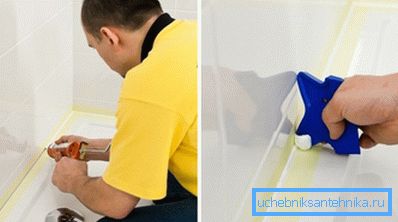
Note! Before you connect a shower cabin, note that ceramic and acrylic bowls are quite fragile. Mount them carefully, without subjecting to shock and mechanical stress. Otherwise you can damage them.
Wall mounting
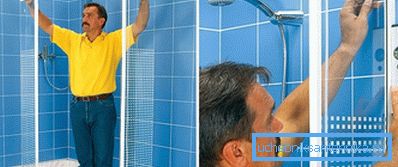
You can purchase a ready-made, already-equipped shower stall, or assemble it into separate parts. In the latter case, the cost of sanitary facilities may increase. But you will get a shower, which has exactly the parameters that you want.
When you mount the bowl of the pallet, the walls surrounding it can be tiled or insulated with plastic, glass walls, and front doors can be installed.
Doors can be made in a variety of ways, which differ in the method of opening, installation method, design of execution, materials used.
The instruction notes that before you assemble the shower stall yourself, you should consider: if it is angular, then it will take much less materials than if it is standing next to one of the walls.
It should be immediately taken into account that the fencing structures of sanitary facilities can consist of several elements (one, two or three sections). They movably mate with each other, as a result, the volume of the room can be used more efficiently.
The construction of the sections is quite diverse. Elements can be solid (plastic or glass), as well as composing - from several vertical strips. In this case, the material of fences can be colored, transparent, matte, embossed, or have a pattern.
On this basis, you can always choose the wall for the booth, the most suitable for the conditions of its operation and your aesthetic preferences.
Installation of standard enclosing structures
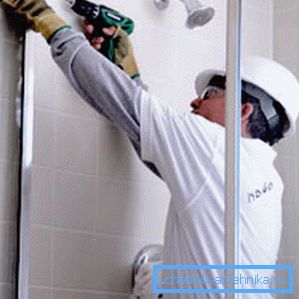
The factory set of enclosing structures of the booth can be installed with your own hands on the already delivered pallet as follows.
- Attach the wall profile to the edge of the pallet and the wall. Use the bubble level to set it vertically. Next mark with a marker on the wall of the place for drilling.
- Screw dots for future holes if the surface is tiled. So the drill will not slide off the tile.
- Drilling points should be prepared with a special center punch, breaking through the glossy face layer of the tile. Carefully strike the corener so as not to damage the tile.
- When drilling a tile with a perforator so that the tile does not split, it is necessary to switch the tool to the rotation mode. After the tile is passed, you can switch the punch to the percussion mode.
- The hole should be drilled to the length of the plastic dowel.
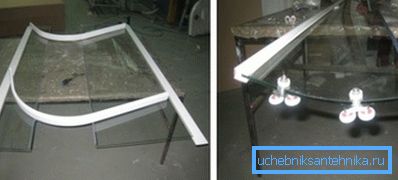
- When everything is ready, you can start attaching wall profiles.
- Next, install the fencing panels, fixing their glass or plastic strips in the hinges.
Note! Enclosing structures are quite fragile. Do not over tighten the screws. Otherwise, plastic or glass may crack.
- Before fixing the fencing panels, hang the door leaves on the hinges and adjust them. Note that the seal, if the door is closed, should fit tightly to the edge of the pallet.
Conclusion
In fact, there is nothing particularly difficult in assembling a shower stall on your own. The main thing here is to do everything according to the attached instructions, carefully and thoughtfully. The video in this article continues her theme.