Do-it-yourself sink: materials and production methods
Of course, the sink of concrete with their own hands, it is not quite easy. But, you have the opportunity to invest in this product your imagination and make it the way you like. In this case, you can use all the possibilities of free space in the room.
The main thing in this work is the form, thanks to which the sanitary unit will acquire its shape and here you need to be especially careful. Only in this case, we will use not just a cement-sand mortar, as it will crack, so we will learn how to make a good mixture on our own. In addition, we will show you the video in this article.
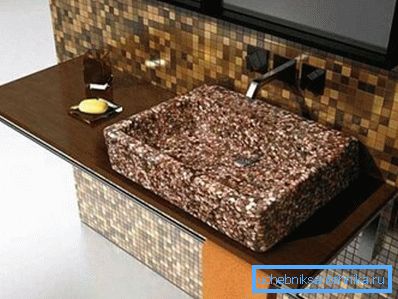
Homemade sink
What we need from the tool
Note. All materials and tools must be harvested in advance so that there are no failures during the work, as the concrete cannot set and harden.

- You can not do without an electric jigsaw or a hand-held circular saw - the handsaw is not even considered here, as you will have to cut curly lines.
- Perforator with drills for concrete (with a pobeditsovy nozzle) with a diameter of 6, 8 and 10 mm (the first two for dowels, and the last for fittings).
- Mixer for mixing the solution.
- Screwdriver (you can figured screwdriver, but it is too uncomfortable).
- Hammer.
- Scissors for metal.
- Welding machine.
- Construction level, rule and pencil.
- Metric tape measure at least 5m and construction (thick) pencil.
- Crosses for mosaic (under the gaps).
- Comb for putting glue with teeth no more than 5-7 mm and rubber (soft) spatula.
- Pistol under the tube.
- A pair of steel lighthouses.
- Capacity under the batch.
Materials
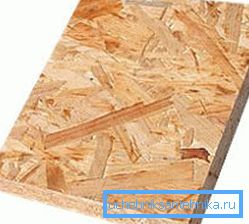
- DSP or OSB - you can have whole sheets, but you can also trim, given that their price is cheap.
- Plastic dowels 6-8 mm with screws (20-30 pieces).
- Furniture corners of any sizes and U-shaped suspensions will be needed (used for frames for plasterboard constructions) for assembling and fixing the formwork to the wall. It is also desirable to strengthen all the joints, as the product in its raw form has a very large weight.
- Galvanized sheet metal.
- Fittings 10 mm at least 6-8 rods.
- Pieces of plastic pipe - one to drain, the other under the hole for the mixer. Whoever has the desire, can also stock up on a pipe for overflow, as required by the instructions for the factory sinks.
- Sewer sealer for sealing the internal joints of formwork.
- Bricks or blocks, which will serve as temporary supports under the formwork.
- Fine concrete not lower than M400 or even M500. The quantity is calculated by the formwork volume.
- Mosaic tile to your taste and waterproof grout for joints.
- Tile adhesive, preferably with anti-fungal additives.
Concrete Preparation Tips

Before you figure out how to make a sink with your own hands out of concrete, let's learn how to make a quality solution that can stand for a long time without cracking.
In our case, we will veneer the construction with mosaic tiles, which means that instead of rubble we will need granite chips or ordinary granite sifting, which will be much cheaper. In cases where the lining is not provided, marble chips are used instead of rubble, and after hardening the surface is polished with turtle-type discs (with diamond additives).
In order for the mixture to be the most durable, first of all, water is poured into the concrete mixer, the cement is poured and thoroughly mixed. When you have a homogeneous mass of the type of milk, add there the right amount of well-sifted sand, just make sure that it does not contain clay. After mixing the cement-sand solution adds crumb or screenings, mixing it all up to readiness.
Given the subtlety of our design, mixing the solution in a concrete mixer will not be enough, therefore, it should be dumped into any container (trough, bathroom) and be additionally smashed with a mixer.
In addition, you will protect the finished structure from the influence of temperature differences if you add a plasticizer to the finished mixture. The required amount of plasticizer for a certain volume is indicated on the capacity (usually it is 1 cup (200 g) per concrete mixer of average size).
Making a sink
Note. For fastening of this structure, considering its mass, a strong brick or concrete wall is necessary, but it is better if it is an angle, as in this case. If the garden sink will be poured in open space, then it is necessary to erect brickwork for it.
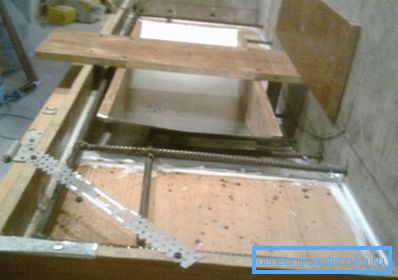
First of all, we need to make a formwork from chipboard or OSB, even if it is a washbasin from a basin with our own hands - its value does not have certain parameters and will depend on your desire.
It should start with the main outer box, which you can also assemble on the floor, to fix it to the wall afterwards. In addition, the place where the formwork will be fixed must be marked out using a building level - its position determines the final position of the shell itself.
At this moment it is very important to take into account all possible changes in the interior parameters, for example, it can be the thickness of the future floor screed or the thickness of the tile on the floor and / or on the bowl along with a layer of glue.
In order to get the most convenient design height, you can take 80-82 cm as the base - this is the standard size of pedestals and cabinets for kitchen sinks. Only these figures should be calculated from the future (present) floor covering.
On the wall, according to the size of the formwork, you mark and drill holes in the supporting wall for reinforcement, which will be installed across the structure. The formwork is stitched with screws, and it should be fixed to the wall with corners, U-shaped hangers and plastic dowels with screws. Bowl trough made of galvanized sheet and OSB.
Heels are welded to the reinforcement on the opposite side of the wall, which can be steel washers or the same pieces of rods. Try to keep the reinforcement in the middle of the fill - you will need to release the rods from the wall along the edges of the sink and countertop, as well as the long pieces along these edges. The frame is connected either by knitting wire or electric welding.
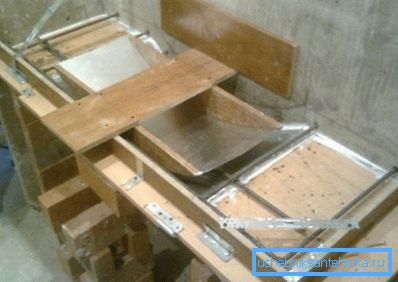
Under the formwork, be sure to install as many supports as possible so that they can withstand the mass of wet concrete and the additional load during tamping. Carefully sweep the formwork case from dust and close up all the joints. Check all the components of the structure for strength.
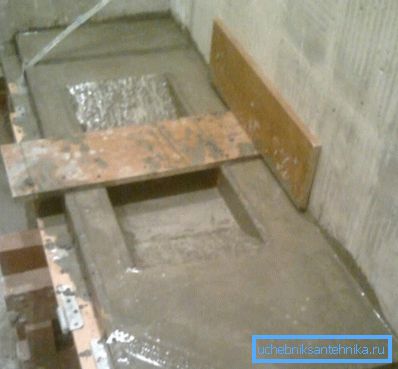
Now you can make concrete using the tips and proportions shown in the table. Start pouring from the most difficult places - these are the grooves in the chute and so that there are no shells in the solution, you need to ram it during the pouring.
For this, the most ordinary stick is suitable, for example, it can be a cutting from a shovel, or even better (thinner), a piece of staff 5020/25 mm. After pouring, cover the structure with cellophane film.
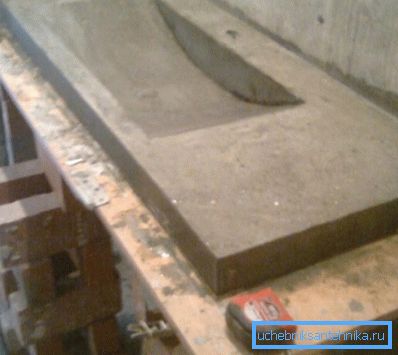
After a week, the formwork can be removed, but it should be disassembled from above, assessing the quality of the fill. Do not pay attention to small bubbles - they will still overlap when finishing tiles.
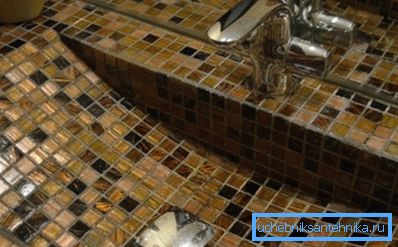
Now it remains for you to overlay the sink with mosaic tiles and rub the seams. The crane and siphon is best to install 4 weeks after installation - this is the period of complete (operational) drying of the concrete.
Conclusion
After removing the formwork, check the countertop with a building level. You can remove all possible irregularities with the help of a layer of glue on which you will lay the tile.