Domestic sewage - detailed installation guide
It is not such an easy task to organize the system of removal of drains from a house correctly, as it may seem at first glance. Domestic sewage according to SNiP must meet the mass requirements, and take into account several standards at once. However, following the guidelines in this guide will help you avoid mistakes.
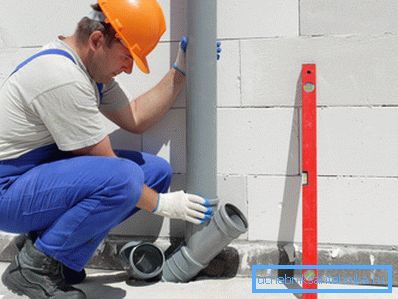
Regulatory requirements for domestic sewage
GOST for water supply and internal sewage networks contain the basic requirements for the construction and operation of water supply and wastewater systems.
Already at this stage it is possible to get bogged down for a long time in the analysis of the literature, because the mention of the sewer system and water supply is found in several documents at once:
- SNiP 2.04.01-85 * - can be considered the main document from the entire list. Contains basic data required for installation;
- SNiP 2.01.09-85 - used mainly in the design of water supply;
- SNiP 2.04.03-85 - attention focuses on the hydraulic calculation of the elements of the drainage network. It has value for specialized organizations, but when laying sewage in the house alone it is hardly useful;
- SNiP 2.04.07-86 * - regulates the methods of water heating for a centralized hot water supply system, also contains instructions for additional water treatment;
- SNiP 3.05.01-85 - from here you can learn only the rules for the placement of sanitary devices in height;
- GOST 2874-82 * - puts forward requirements for water quality.
It is also worth noting the SNiP 3.05.04-85 *, but it largely duplicates the SNiP on the internal networks: sewage from 1985.
Based on the analysis of these standards, it is possible to formulate the general requirements that the sewage system in a house must meet:
- wastewater should only be discharged through closed pipelines under the influence of gravity;
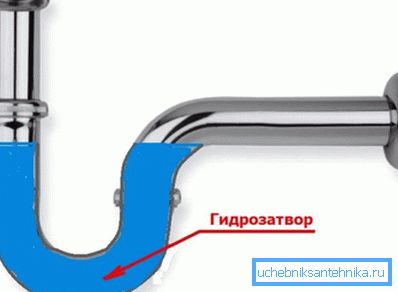
- the connection of all plumbing fixtures with the pipeline must be carried out through the water trap of the sewer system;
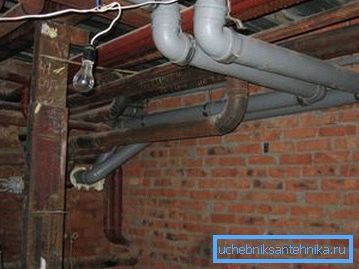
- with regard to placement, the open pipe laying method is allowed to use in basement and semi-basement rooms. In other cases, a hidden method of laying is used (for finishing walls, in mines, special boxes, etc.);
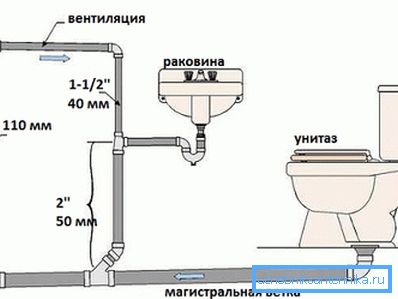
- also GOST for water supply and internal sewage networks require the provision of ventilation of the sewage system. Ventilation is carried out through risers and displayed on the roof, the minimum elevation above the roof level is 0.3 m;
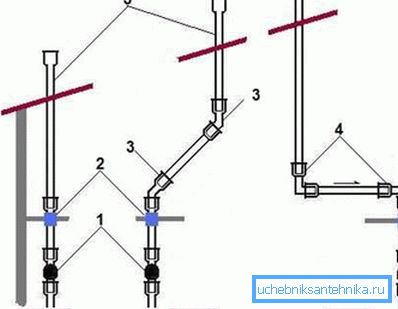
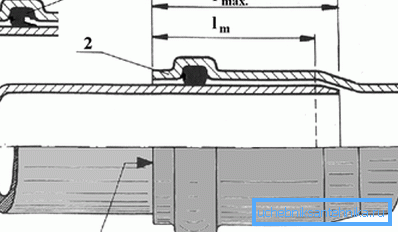
- connection of individual elements of the pipeline is carried out bell-shaped using seals.
Polypropylene or PVC?
Recently, plastic has come to replace the usual steel or cast-iron pipes, in addition to low weight, such a pipeline still does not rust, and has an enviable durability. The choice is most often between polypropylene pipes and PVC pipes.
Polypropylene pipes have a higher sensitivity to temperature, because of this, it is necessary to use compensating nozzles to eliminate dimensional changes. Their strength decreases with increasing temperature of the effluent.
PVC pipes are free from such disadvantages. You can only complain that this material does not tolerate long-term exposure to high temperatures and is not as plastic as polypropylene.
In general, PVC pipes are most often used for the internal sewage system. Polypropylene can be used in selected areas.
Planning of domestic sewage
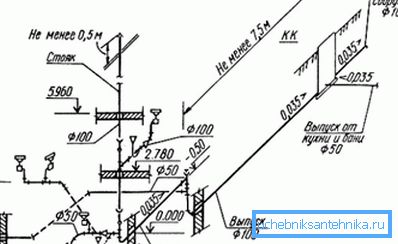
Planning is required not only because you can compare several options for laying sewage and then choose the simplest one. At this stage, the required pipeline length and the required fittings for internal sewage are also determined.
A simple sewage system can be quickly projected on a sheet of graph paper.
The instruction at this stage looks like this:
- scale drawn home / floor plan;
- determines the location of sanitary devices on the plan;

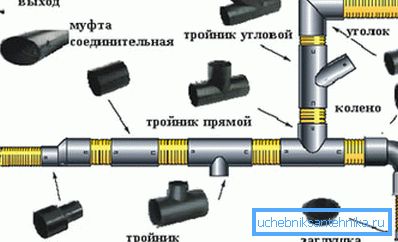
- the diagram shows the pipeline, and also the necessary fitting elements (tees, adapters, elbows, etc.) are shown in the form of symbols;
- you need to remember that the ventilation of the sewer riser is displayed on the roof of the house, this is taken into account when calculating the total length of the pipeline.
The proposed sequence of actions must be repeated for each floor. When calculating the required number of shaped elements, it is necessary to take into account the general rules for performing work and the requirements for internal sewage.
General rules for installation of domestic sewage
Internal water supply and sewerage according to SNiP should be arranged in compliance with the following rules:
- As a rule, pipes with a diameter of 110 or even 150 mm are used for internal sewage, an exception can be considered a section of the pipeline, for example, from kitchen plumbing fixtures;
- the minimum recommended diameter for the riser is 110 mm;
- do not forget about clamps. The clamp must be under each connection of the pipeline elements, the maximum distance between the clamps is 0.4 m. When installing the riser, the clamps are installed after 1 m;
- the number of traps is equal to the number of plumbing fixtures;
- the number of corners should be minimal, it is desirable to ensure a smooth connection of pipeline sections, for this you can, for example, instead of connecting at an angle of 90? it is allowed to use 3 knees of 30 ?;
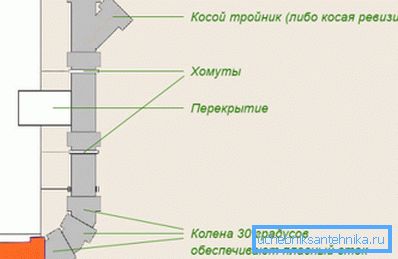
- after each turn a revision is arranged - a regular tee with an opening lid;
- sand trap for domestic sewage - not a required element. However, small volume sand traps (not more than 0.1 m3) can be installed under the sink. This reduces the risk of sewage contamination.
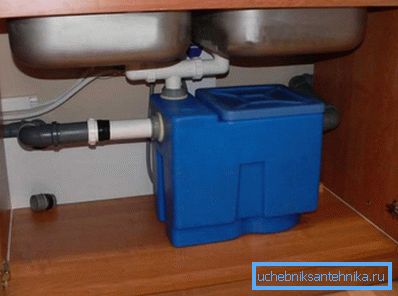
Note! The slope of the horizontal pipes of the internal sewage system can be increased to 3-4 cm by 1 m. Due to the increased flow rate, the blockages of the pipes can be avoided.
The listed rules can be considered universal.
Internal sewage device
In general, the installation of the sewer system begins from the septic tank and to the sanitary equipment. Installation of internal sewage is often carried out in the direction from the exhaust pipe to the plumbing fixtures.
Work is carried out in 3 stages:
- installation of the riser;
- floor layout;
- connection to sanitary equipment, installation of trapikov in the shower, etc.
Vertical riser installation
By the time the installation of the internal sewage system begins, the main construction work should be completed. As for multi-storey buildings, openings should be prepared in the ceilings, in addition, the level of the finished floor should be known.
By itself, the riser is easy to install - just need to connect the sections of pipes in one piece and install tees in the right places. It is also recommended to install revision oblique tees on each floor and in the basement. Thanks to them, the sewage can be cleaned up by hand.
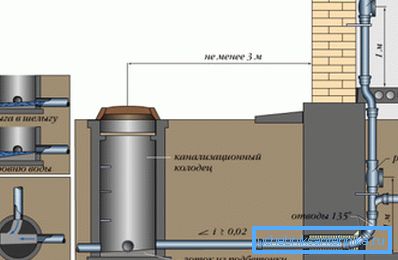
It is recommended to install the clamps so that the ring is directly under the expansion of the socket. Due to this, the pipes are not only not going to deviate horizontally, but also do not sway vertically.
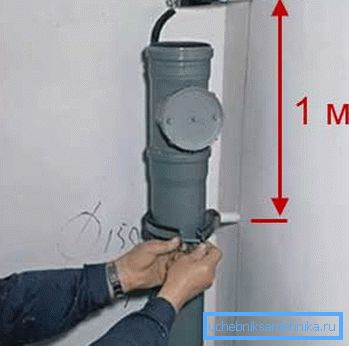
In the open form in private homes, risers are almost never left. They can be disguised, for example, using a small plasterboard partition. After that, you can begin to lay the horizontal pipeline on the floors.
Connection of sanitary devices with a riser
In principle, pipes can be laid in both directions (from the riser to the sanitary fixture or vice versa). At this stage it is especially important to observe the slope of the pipeline.
Note! When installing from a sanitary fixture to a standpipe, the hydraulic lock in the form of an S-shaped pipe must first be connected to it. Due to the water bridge, an unpleasant smell from the sewage will not enter the room, and the cost of this design is low.
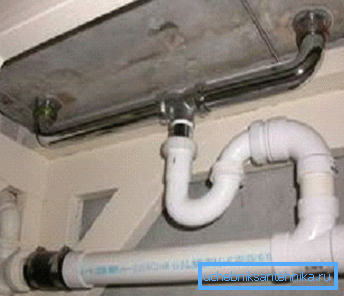
This is followed by a horizontal section of the pipeline to the riser. To ensure the required inclination of the pipe, it is allowed to place gaskets under the pipe if it is not fastened with clamps. The distance between the gaskets should not exceed 1 m.
What should I look for when sewage device
Little things, as always, play a significant role.
Special attention should be paid to such operations:
- pipe cutting. When the work is done by hand, it is most often used either a saw or a string. Before bell-fitting, you need to remove the burrs with a regular knife, and remove the chamfer from the edge of the pipe;
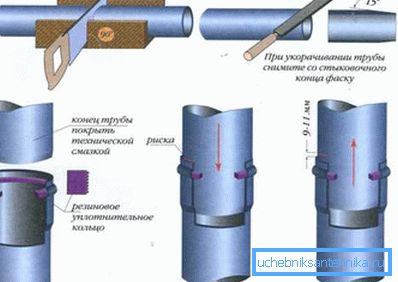
- all connections must be sealed; for this, the surfaces of the pipes are sealed with a sealant before connection;
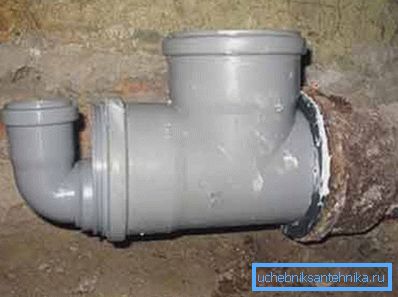
- You can connect plastic pipes, for example, with cast iron. In this case, a rubber cuff is used. First, it is glued with a sealant to the inner surface of the pipe, and then a plastic pipeline is inserted into it;
- when laying pipes through concrete floors, it is recommended to make a hole in diameter larger than a pipe. Then a pipeline is laid through this channel and insulated.
Summarizing
In each house it is necessary to solve the issue of drainage. If the house is only planned internal sewage - PVC pipes will be an excellent choice. Due to high performance, primarily durability, they have become particularly popular in recent years. As for the technology of sewage devices, then, despite the abundance of regulatory requirements, everyone will be able to cope with this task.
The video in this article focuses on the technical side of the issue.