Fittings for toilet cistern: how to maintain cleanliness in
The quality of work of sanitary devices directly depends on the efficiency of biological waste removal from the bowl. The responsibility for this process is borne by the fittings of the cistern of the toilet bowl.
But how to choose a suitable kind of mechanism and maintain its performance with your own hands? You will learn about this by continuing reading.

Types of fittings for drain tank
The design of the tank for the toilet
Before considering the types of drain fittings, let us dwell on the types of existing storage tanks.
In our country there are the following:
- Suspended. This is an outdated method of accommodation, which was widely used in the mid-20th century in the Soviet Union. It effectively washes away waste, but makes a very loud noise during operation.
- Installed on the toilet. This capacity is part of the toilet bowl and is sold with it. The most common design of cisterns, which is widely used in our country.
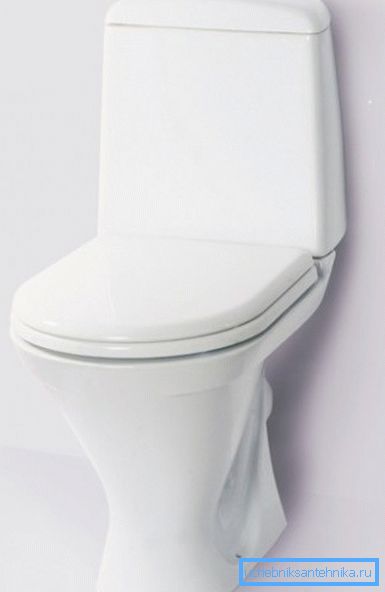
- Hidden. In this case, the container is mounted in the wall and is not visible after the repair. Differs in high cost and high cost of installation.
Purpose of the drain mechanism
Whichever tank you use for the sanitary device in the toilet, the functions performed by the shut-off valves remain unchanged:
- open the water supply and fill the tank if it is empty;
- close the fluid flow when its level reaches the desired level;
- provide quick descent through the drain hole after receiving a command from the mechanical lever.
Any drain mechanism consists of such parts:
- the drain mechanism - it includes a siphon equipped with a lid, as well as a rubber gasket sealing the joint between the drain hole of the bowl and the tank;
- lever adjustment of water flow - is installed on the inlet of the tank;
- float, which is necessary to control the volume of liquid.
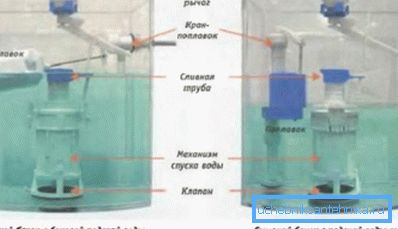
Scheme of work
Drain fittings installed in hanging storage tanks for toilet bowls, which were made in the last century, are completely different from the modern ones. But there is no point in considering its structure, because it is unlikely that you will encounter such a structure anywhere other than a museum.
As for the mechanisms existing in the market now, they are divided into two categories:
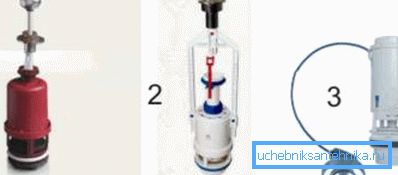
- Exhaust. To drain the toilet, you need to use a special handle located at the top of the cistern to raise the stem, which closes the drain hole. This option is also almost out of use, giving way to a more economical and simple models.
- Push-button. Here, to activate the drain you need to click on the button. They, in turn, also come in two varieties:
- with one button - when pressed, the entire contents of the container is dropped into the toilet bowl;
- with two buttons - depending on which of them is pressed, all the water in the tank, or only half of its volume, is drained.
Note! Now also there are varieties of valves with the so-called stop function. In this case, to release the water, press the button once, after which the drain will be open until you press the mechanism again.
Types of float valves
This element of valves is responsible for the water level in the tank. All existing varieties of floats are shown in the table.
| View | Description |
| Croydon | It consists of a piston and a seat actuated by a lever, at the second end of which a float is placed. The latter, falling and rising, activates the valve of the stop valves installed on the inlet pipe of the drainage tank. Such devices are practically out of use, they were installed in the tanks of the old sample. |
| Piston | Here the axis of the lever is fixed with a pin on the piston. Moving up and down, the lever actuates the piston, which regulates the access of water to the tank. Also in the design there is a rubber gasket that provides tightness. These mechanisms were common at the end of the last century, but continue to be used now. |
| Membrane | The most modern type of valve. Here, instead of the piston, a special membrane made of rubber or silicone is used. A piston with a float, moving up and down, controls the membrane, which in turn regulates the access of water. |
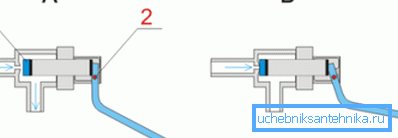
Water connections
It remains to consider how the tank is filled. For this purpose, serves as an inlet pipe, fixed on the tank by two special nuts with rubber seals.
The socket can be placed:
- on the side surface of the container (right or left);
- at the bottom of the cistern.
Service of fittings of a drain tank
Installing a new mechanism
Having decided on the question of how to choose the fittings for the toilet cistern, we turn to the lighting of the process of its self-installation in the storage tank. Of course, you can simply find an advertisement for the provision of this kind of services, call the telephone number indicated there and at the end of the process accept the work.
However, this option can hardly be called economical. Often the price of the services of the wizard for installing valves is several times higher than the cost of the mechanism itself. Therefore, most people mount it on their own. Moreover, the instruction describing the installation procedure is extremely simple.
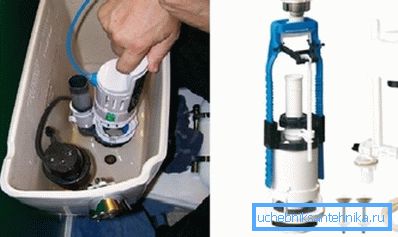
Let us consider step by step how to change the fittings in the toilet bowl.
First of all, you should stock up on such tools:
- rozhkovymi or adjustable keys;
- pliers and screwdriver;
- flexible hose or rigid tube;
- stopcock;
- polymer sealant or FUM tape;
- pads of the desired diameter.
Further work takes place in the following order:
- First of all, you should install the base of the drain node, ensuring its tight connection with the opening of the storage tank. For this purpose, the fittings in the toilet bowl are completed with a special thick rubber gasket.
- After that, the drainage container is mounted on the toilet bowl. Between these two elements, a ring of their thick rubber is installed, preventing the contact of ceramic surfaces. It is necessary to fix the tank with the help of special bolts that come in the kit. Do not apply strong force when tightening, as ceramics may crack.
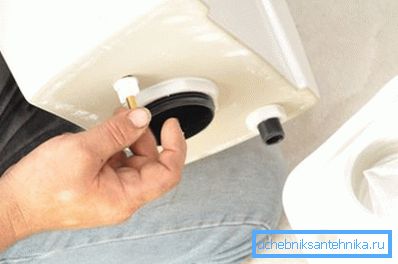
Tip! If you purchased a sanitary device with a bottom connection, the pipe or water supply hose must be mounted before installing the tank on the bowl. It is important to choose high-quality gaskets and carefully fasten them so that the water from the tank does not leak. If the inlet is located on top, then it can be connected to the pipe after the tank is fixed.
- Regardless of the type of water supply, the process of connecting the nozzle with the hose is the same: you need to push the tube into the hole designed for this and tighten the screws that come with the kit on both sides.
- Then the water supply hose must be connected to the water supply network of the apartment or house. It is strongly recommended that a shut-off valve be installed. So you can cut off the toilet in case of repair or any problems with the flush cistern.
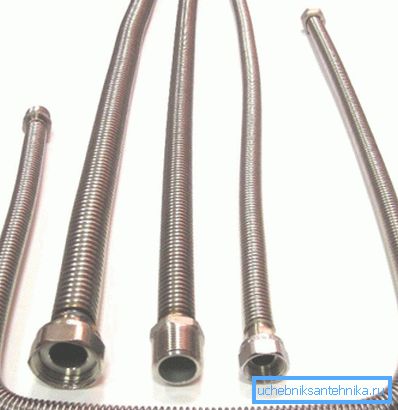
Modern hoses are already equipped with special nuts with seals, providing a reliable and tight connection.
But it is better to additionally use polymer tape or FUM for sealing pipe threads.
- Then the valve is installed in the tank. For fixing, the supplied bolts are used, which are inserted into specially designed holes. At the end of the work you need to put water in the tank and adjust the position of the float. The liquid level in the tank should be 10-15 cm below the top edge.
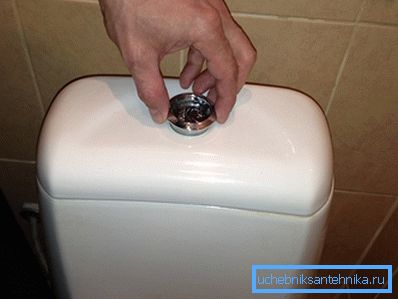
- The last stage is the installation of the drain control mechanism. There is a fitting to the toilet bowl, equipped with a lever, one or two buttons. From this depends on the method of installation. The last option is most preferable, as it allows to significantly save water, which is used to remove biological waste.
Trouble-shooting
Modern fittings for the cistern are so simple and reliable that it works without breakdowns and any problems for many years. However, some parts are still subject to wear and require periodic replacement. The quality of the water circulating in plumbing systems is particularly detrimental to them.
Note! If the drain mechanism starts to work incorrectly after a short period of time after installation, this is most likely due to errors made during the installation process. Check the correctness of the work and, if necessary, correct the shortcomings.
Let us dwell on the most frequent troubles and ways to eliminate them:
- Insufficient or excessive water level in the storage tank. The reason for this lies in the incorrect adjustment of the float, which too sooner or later closes the locking device at the inlet. If you have an old sample drain mechanism (with a “beam”), it is enough to bend the wire a little, which holds the float. In the new devices for regulating the volume of water, a special screw with a thread is provided.
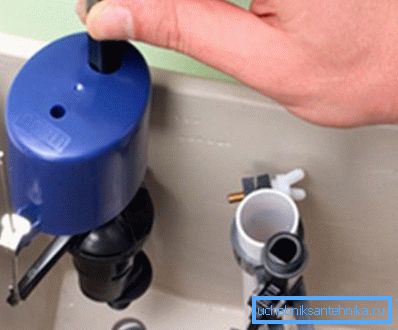
- Contamination of water inlets and outlets. It is necessary to clean them from the solid particles accumulated there. To do this, turn off the water supply valve to the tank, pull out the membrane and rinse it. To ensure the tightness of the drain hole, it is advisable to replace damaged or worn seals.
- Permanent leakage of water from the tank. The reasons for this may be as follows:
- the valve is loosely screwed to the bottom of the tank - in this case, you need to drain the water and tighten the bolts holding the mechanism;
- valve clogging or drying - here you need to disassemble the mechanism and clean the drain device or replace the rubber seals, which have ceased to perform the task entrusted to them.
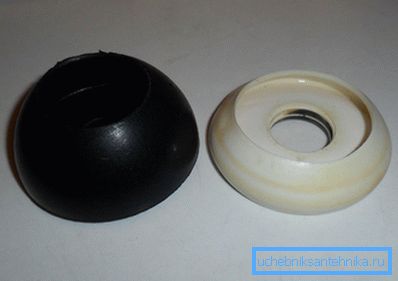
- Leaking under the tank. The problem is in the integrity of the sealing ring between the container and the bowl. It is solved by replacing it. When buying a repair kit, make sure that it fits exactly the size of your toilet model.
Conclusion
Knowing how to replace the fittings in the cistern of the toilet bowl, you can repair the storage tank yourself at home by restarting the operation of the toilet room, without which comfort in a city apartment is out of the question. However, even more trouble can cause blockage formed in the siphon sanitary fixtures or sewage pipes. You can find out how to fix these problems in the video in this article.