Fixing the tank to the toilet: 3 ways to install without
High-quality and trouble-free operation of sanitary devices in the toilet room depends not only on the selected model, but also on the correct installation. Especially carefully and carefully the tank should be fixed to the toilet, as this particular node often causes problems.
The procedure can be done with your own hands, you just need to know the correct procedure.

Purchase of equipment
Before you figure out how to attach the drain tank to the toilet, you should purchase the necessary device. Most people are interested in choosing, above all, the price and appearance of the toilet bowl and water storage tank.
However, the money saved or too elaborate, but the unreliable shape of the product can lead to huge problems in the future, when the spilled water spoils not only your mood, but also the repair from the neighbors below.
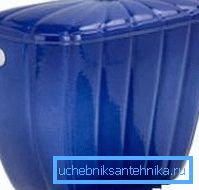
Therefore, when choosing it is recommended to pay attention to the following parameters:
- As the tank is attached to the toilet. It can be integrated with the bowl, hung separately on the wall or mounted hidden.
Note! From the location of the capacity depends on the method of its installation. For example, if in the first case it is enough to buy bolts for fastening the cistern to the toilet (they are most often included in the delivery package), then in the latter one cannot do without a special frame installation.
- How is the water inlet to the tank. There are tanks with back, side and bottom liner. The first species is almost never encountered, and the second is the most common.
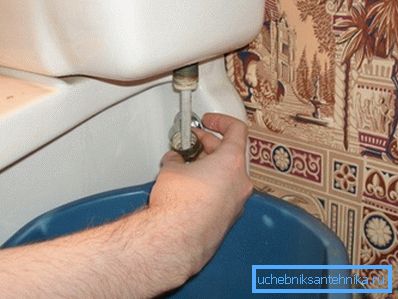
As for the liner below, it allows you to aesthetically arrange the pipe, but complicates the installation. In this case, the fastening of the cistern of the toilet bowl should be done only after the connection of the liner with the incoming branch pipe, otherwise it will not be possible to connect the hose normally.
- What type of reinforcement is used. There are devices with a lever, one and two buttons. The last option is the most suitable because it allows you to economize on water drainage.
In addition to the tank itself, you will need to work:
- stop valves - is installed on the water supply pipe and allows to cut off the toilet from the general water supply network in case of need;
- eyeliner - connects to the inlet of the tank after the tank has been fixed to the toilet bowl (it can be tough - from steel or copper, or flexible - from a rubber hose reinforced with metal threads);
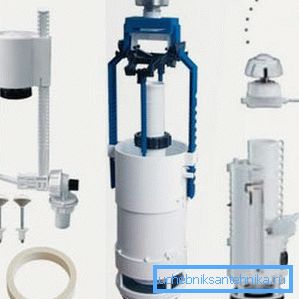
- drain valve - installed inside the tank to adjust its filling and emptying on command;
- sanitary polymer tape or FUM - used for additional sealing of threaded connections.
Installation procedure
Specific instructions for fixing the tank to the toilet depends on what type of device you purchased.
On the modern market of sanitary equipment the following types of drain tanks are presented:
- mounted separately from the toilet bowl;
- installed on the bowl, for which the latter is equipped with a special shelf;
- recessed into the wall.
Consider each option in more detail.
Method 1. Tank
This method of placement is quite rare and even less used in individual construction. However, be aware of it.
Fixing the toilet bowl as follows:
- A special flush pipe, whose diameter is 32 mm, is joined to the bottom of the drainage tank. For this there is a special hole.
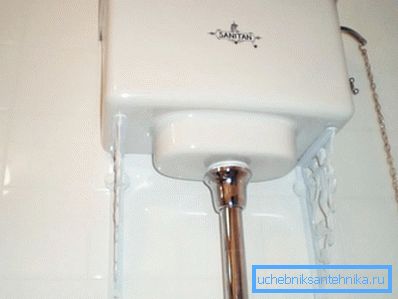
- After that the marking is made. The tank is applied to the wall at such a height that the lower end of the pipe is opposite the inlet of the toilet bowl located on the floor. Then, using a marker or pencil, markings are applied to the surface of the wall.
- Drilling holes for brackets. If the wall of the toilet is concrete or tiled, it is advisable to use a hammer drill with a special drill. So you will facilitate your work and speed up the process, and the resulting hole will be more accurate.
- Correctly select the diameter of the tool. It must exactly match the size of the dowels or anchor bolts used.

- After that, the brackets are screwed to the wall, and the water storage tank is attached to them.
Method 2. Built-in tank
This refers to the design that is installed on the shelf of the toilet bowl.
In this case, the mounting of the cistern to the toilet bowl is performed in the following sequence:
- A rubber gasket is installed on the bowl. As a rule, it is already covered with a special adhesive, fixing it in place. If this is not the case, you must additionally use a special sealing sanitary gel.
Tip! Grease the gasket on both sides, as one is attached to the shelf of the toilet bowl, and the other is adjacent to the cistern. You can also optionally use a special rubber ring that seals the drain hole at the bottom of the tank.
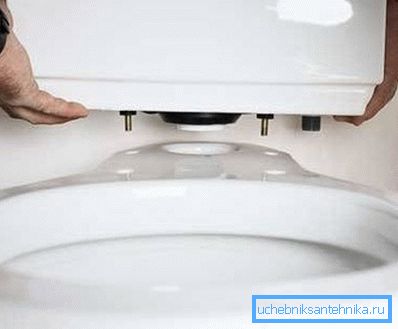
- To fix the tank on the toilet bowl, special bolts with conical rubber gaskets are used. They are inserted into the holes provided for this and are tightly screwed with nuts from the bottom. Do not apply too much force to tighten the nuts. This can lead to breakage of the tank or bowl, as ceramics do not tolerate a strong external effect.
After installation, the rubber parts provide the most tight connection that will not allow leaks after filling the tank with water.
- To prevent water from leaking out of other openings (for example, for the water connection pipe), special rubber stoppers should be used. Before installing them, it is also recommended to lubricate the gel to obtain the most dense connection.
- The next stage is the installation of drain fittings and the connection of water supply. During these operations, you need to make sure that all gaskets, membranes and seals are in place.
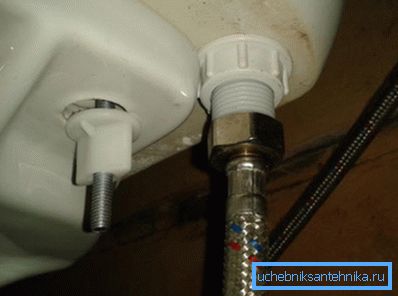
It is recommended to wind the polymer tape on the external thread of the inlet pipe to prevent leakage.
- The last stage - the test. It is necessary to unscrew the stopcock, which cuts off the water supply to the tank, and fill the container with water. To adjust the level of fluid used float mounted on the rocker arm or screw.
Tip! Sanitary gel for polymerization takes some time. Therefore, it is recommended to carry out the tests 1-2 hours after the completion of the installation procedure.
Method 3. Hidden tank
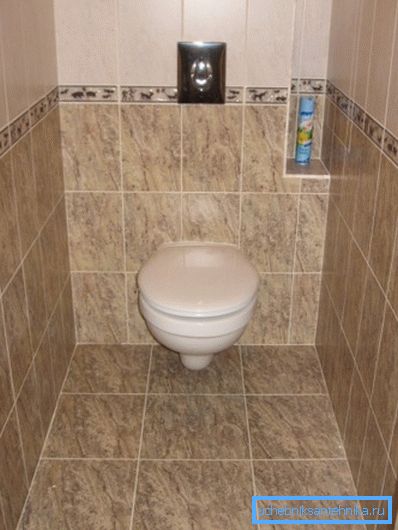
Drain tank, disguised in the wall - quite expensive, but very aesthetic and popular version of the arrangement of the toilet room. In addition, the hidden placement of the tank allows you to save space in the restroom and protect the structure from accidental damage.
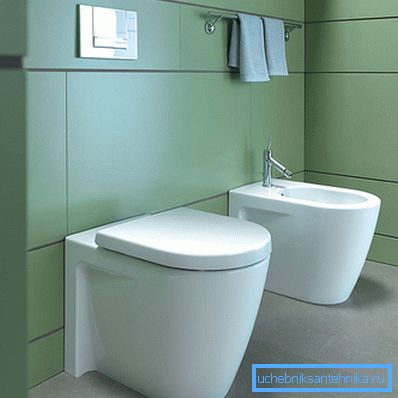
Externally built in the drain tank is different from the classic models:
- it is made from durable polymers and has rather thick walls;
- the shape of the concealed cistern is more extended upwards and to the sides, so that it takes up less space in the wall;
- the shutter release button is not located on the cover, but on the front surface of the device;
- for fixing a special installation is used, which is included in the package.
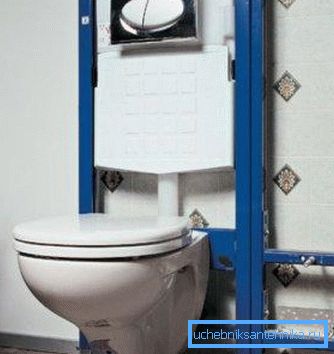
The order of work is as follows:
- A steel frame is installed in the space provided for installation, which will serve to fix both the cistern and the toilet bowl itself. When installing it, you need to ideally withstand the horizontal and vertical, otherwise there will be problems when you fix additional accessories.
- A tank is installed on the frame and water is supplied to it. To do this, it is better to use rigid tubes that provide greater reliability. After all, after facing the hidden tank with tiles it will be problematic to repair.
- As in the previous cases, it is better to connect the supply pipe through valves.
- After installing the tank, the sewage system is mounted, the steel frame is sheathed with sheets of waterproof gypsum board, which is faced with a selected decorative material.
- The last stage is the installation of a button for the toilet, which controls the drain fittings. It is better to use a separate drain, which saves tap water.
Conclusion
Correctly installed toilet cistern will not cause problems during operation. You can not think about leaks and other such troubles. However, in order to use the sanitary equipment in the toilet, it is necessary to firmly and securely fix its bowl on the floor.
For more on this, see the video in this article.