Fixture for the sink - choose the best option
When replacing or installing a new sink, a question arises how to fix it at the required level. Even compact models weigh more than one kilogram, so the mount must be strong enough, at the same time it must be invisible or fit organically into the interior of the room.

Installation Methods
There are several options for installing the sink.
Depending on the method chosen, the load can be transferred either completely to the wall, or to the pedestal or pedestal.
- Hanging on the wall - attachments to the sink to the wall are the brackets on which it just hangs. The entire load in this case is transmitted directly to the wall.
Note! Installation of massive models on the brackets is possible only if the wall is capital, thin partition can simply not withstand the load.
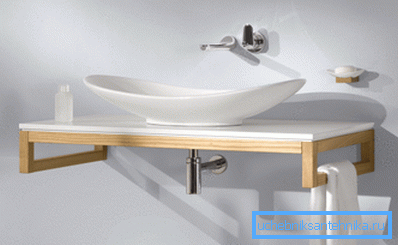
- Installation on the shelf - can be considered the easiest way to install. A shelf is fastened to the wall, and a sink is simply placed on it. As for the shelf itself, if the weight of the assembly is small, then it can be attached to the wall with dowels, but if the plumbing fixture and the shelf are massive enough, it is better to put the shelf on the brackets;
- The models with a pedestal allow you to transfer the load to the floor, because it simply rests on the pedestal. When installing the sink is additionally attached to the wall.
- In the kitchen, the option of installing into the countertop is popular, while the additional attachment of the sink to the countertop is in fact not necessary, it simply fits into the hole in the countertop and, due to its own weight, is securely fixed.
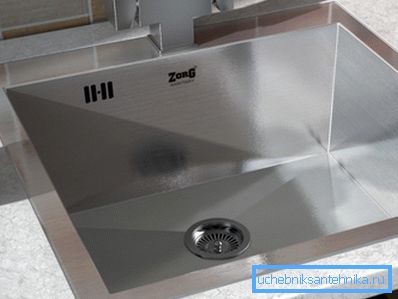
Note! If the sink is selected for the kitchen, then attention can be paid to the model, combined with the countertop (constitute one piece). This will facilitate the installation process.
More about the installation process
Comparing different installation methods, you can note the wall mounting option. At the same time, it occupies a minimum of free space, and under the sanitary device you can always install a cabinet for storing various trifles. Brackets are used for any method of attachment, so these fasteners should be given special attention.
Types of brackets
If a typical model is used, it is possible to get along with the simplest purchased set of fasteners, its price is low, and the carrying capacity is sufficient to withstand not only the weight of the sanitary equipment, but the weight of the person leaning on it. The set includes 2 metal anchors, plastic inserts, decorative caps and nuts.
Much more choice among the overhead brackets. The installation principle is the same: 2 brackets are mounted on the wall, and a sink is installed on them. As an option - on the brackets you can put an elegant shelf, and already on it to place the plumbing fixture.
You can select several types of brackets:
- designer - come with unusual models and it is very problematic to buy them separately. For example, a fixture for a sink in a bathroom can include as few as 2 graceful cast-iron or steel elements, as well as anchors for fixing them in the wall;
- ordinary - are made of cast iron (cast) or steel;
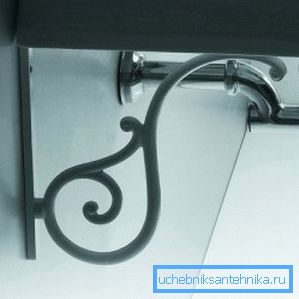
- wrapping - externally, such a bracket looks like a metal frame into which a sanitary fixture is simply inserted;
- occasional mounting options with variable width. In such structures, a sliding hub is installed in the center, and the length of the bracket can be changed, that is, it can be adjusted to fit the new sanitary fixture.
As for the form, the part adjacent to the wall has a G-or T-shape, which allows you to more effectively distribute the load on the wall. Otherwise, it all depends on the shape of the sink, the bracket can be curved, square, rectangular, etc.
Preparation for installation
At the preparatory stage, you need to decide on the height of the plumbing fixture and, depending on the type of wall, select the appropriate mounting method. Fixing the sink to the wall in the bathroom should ensure that the height of the sanitary device, in which a person does not have to lean too much, but it does not make it too high.
As for the comfortable height of accommodation, it is selected individually for each person. One can be guided by approximately such considerations - the upper edge of the shell should be located at a height of approximately 5–8 cm below the human elbow.
Knowing the approximate location of the sanitary device, you can estimate the location of the fixtures on the wall.
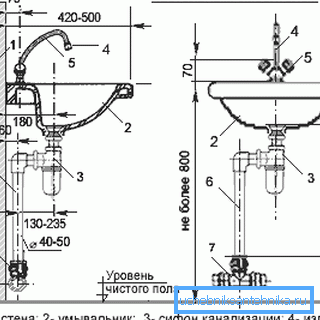
When the work is done with your own hands, you need to determine the type of the wall before you buy the fixture, meaning whether a soft or hard material was used during construction. To do this, you can simply drill a hole with a thin drill; if it entered the wall with little or no resistance, you will have to place the mount in the wall at a greater depth, and perhaps even abandon the brackets.
As for the marking, a horizontal line is marked on the wall - the design position of the upper part of the sink, also note the position of the mounting holes. After that, you need to go directly to the practical part.
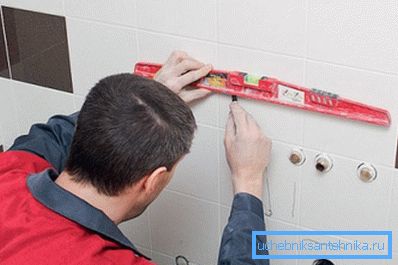
Sink installation
Installation instructions for the sink brackets looks like this:
- holes for anchors are drilled in the planned places. Be sure to go through a layer of plaster and plunge into concrete or brick (at least 4-5 cm);
- then a plastic insert is pushed into the hole with light hammer blows;
- after that, it is the turn of the metal element - it is screwed into a plastic insert in the hole, it expands and tightly fixes the bracket in the hole. You can check the strength simply by tugging on the protruding metal part - the rod should not be loose;
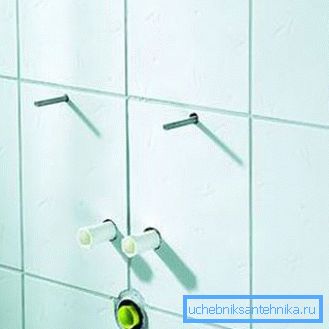
- then the sink is simply put on the protruding brackets and fixed with nuts and plastic decorative moldings.
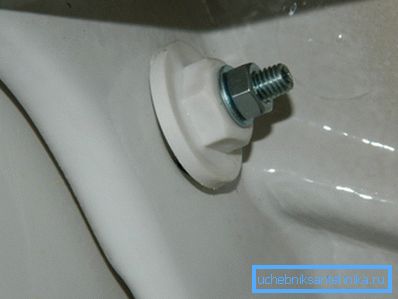
Note! In order to prevent the fragile material from cracking when tightening the nut, it is recommended to use a rubber gasket.
If overhead brackets are used, the work is performed in the same sequence. Santehpribor can be attached to the wall itself only for insurance.
As for other works, it remains to mount the mixer to the sink, organize the water supply to it and connect it to the sewage system. The mixer is installed directly on the sink, and the most important thing here is to make the connection so that the mixer hoses and the drainage pipe to the sewage system do not dangle under it.
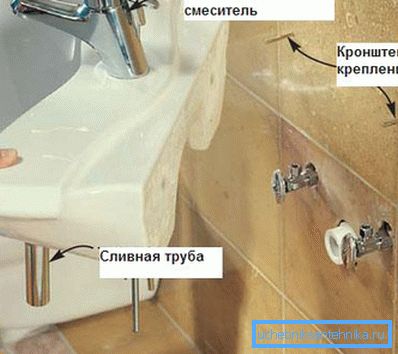
If the space under the sanitary fixture is not occupied by a pedestal, then the best option is when the water drainage is organized directly into the wall, and the supply pipes are also disguised in the wall. If there is a pedestal or pedestal under it, then the pipes can be hidden in it.
Summarizing
Fixing the sink is a simple but crucial step, given that this sanitary appliance weighs not 1 or 2 kilograms, the fasteners must be durable, reliable and must not disfigure the interior of the room. The proposed material describes the most common method of fastening - with the help of brackets.
The video in this article shows an example of mounting a suspended shell on simple steel brackets.