How to assemble a siphon for the sink and generally choose
In this article, first of all, the scheme will be considered - how to assemble a siphon for a standard type sink. In addition, such a key moment as the choice of a product suitable in a given situation will be analyzed. After all, it is quite logical - before you collect an element, you must first purchase it.
It turns out that knowing the basic information about the types of plumbing, you can buy a device, the assembly and operation of which will be as easy as possible.
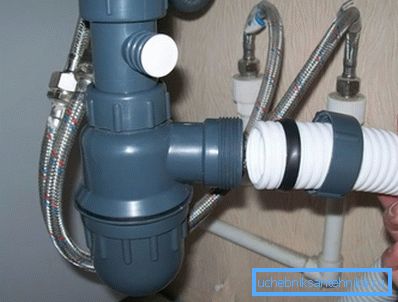
So, with the analysis of this issue and begin.
How to make a choice
Here, first of all, it is important to understand the purpose of the device - if this element is not installed, then the pipes of the main line will be clogged more often. After all, the design of the device provides for a special bend, in the cavity of which all the garbage is trapped. In addition, water is constantly in the same bend, due to which unpleasant odors from the sewage system do not penetrate the room.
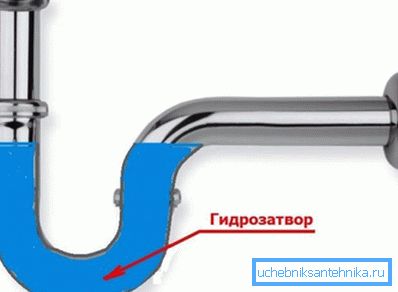
So, as you can see, such a drain is an element really necessary.
Consider in the table below, what are the knees for the sinks.
| Type of products: | Features: |
| Corrugated. | Instructions for the manufacture and installation of such a device is very simple - in fact, it's just a piece of corrugated flexible pipe, at the ends of which there is an adapter for insertion into the sewer system and a mount for connection to the washbasin's drain ring. It turns out that the bend can be created in any size here, and this is convenient in situations where there is a small space under the sink. In general, the product is quite cheap and easy to install, but before installing the sink siphon, remember that the corrugated nipple during cleaning most likely have to be dismantled completely. |
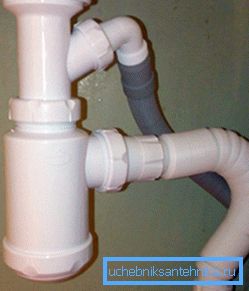
| Bottle | These are the most popular knees, since it is very easy to clean the system here - it is enough to unscrew the so-called bowl of the device, shake out the garbage from it and you can screw the “storage” container back. That is, it turns out that in case of installing such a device, it is not necessary to remove it completely to clean the accumulated dirt. In principle, this is a very good option, however, the element requires a certain amount of free space under the sink, in addition, installation of the product requires skill and accuracy. |
| Pipe. | The variant is a kind of tubes inserted into each other and is usually used for baths. However, if necessary, the piping device can be installed under the sink. This decision may be relevant, for example, in the case when you do not want to put a corrugation, but the bottle drain does not fit. |
In general, with the types of products figured out.
Note! Price drain knees directly affects the quality of their operation. After all, the cheaper the purchased plumbing will be, the lower the quality of the gaskets will be, which means they will have to be changed more often. In addition, cheap construction is harder to mount, because it is very easy to tear the threads on the connections - plastic in fact in such cases is used is not the best strength.
Now you can proceed to the practical part.
Self build system
As an illustrative example, consider how to properly install the siphon under the sink, which refers to the type of "bottle" products.
We took this particular classification because it is it that is collected in most cases and, in principle, it is here that there are the most nuances.
To perform the work you will need a set of tools and consumables:
- adjustable and gas key;
- cross and flat screwdriver;
- tube of sanitary silicone;
- protective gloves and preferably stock up on a respirator.
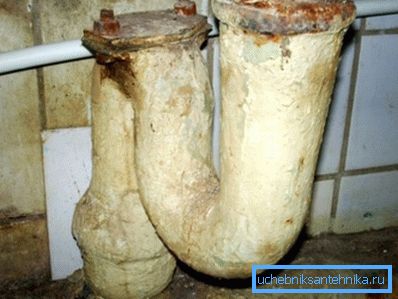
Well, and since we are going to consider how to replace the siphon in the sink, it turns out that before you put in a new device, you will need to remove the old one. If it is the same - of the modern type, then the tool described above will suffice. But if you want to dismantle the Soviet "unit" of cast iron, which is usually set in the bathroom and in the kitchen, then you can not do with screwdrivers alone.
From now on, let's begin.
Dismantling of old plumbing
So, how to remove the siphon from the sink, which is made of cast iron - a step-by-step scheme of work:
- With a screwdriver or a knife, pick out the putty or sealant (most often it is ordinary rags or pieces of rubber)
- We try to loosen all the elements a little.. If it turns out, then you can try to disassemble. If the product is “dead,” that is, it is not susceptible to loosening and disassembling, then proceed to the next item.
- Take the grinder and simply cut off the knee.

Tip: you can do without the grinder - cut the iron with a cloth for metal, and then break it into pieces with a hammer. Just remember that such an aggressive mechanical effect is fraught with the departure of metal fragments and falling on the wall with tiles. Therefore, act as carefully as possible so as not to damage the finish.
Well, as for how to unscrew the siphon in the sink, which refers to the modern folding type, then everything is very simple:
- Remove the nozzle from the sewer pipe.
- Take a screwdriver and unscrew the screw from the side of the shell, which holds the design.
If done, you can proceed to the assembly directly.
Installation of a new knee
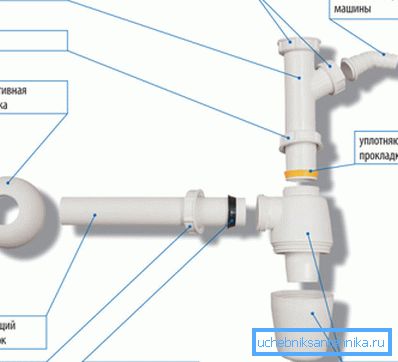
Before starting work, it is important to make sure that all the elements of the device are in stock. To do this, take the scheme (as a rule, it is attached to all siphons) and check whether the presence really coincides with the stated in the instructions.
And if everything is in order, then you can proceed to the installation.
- First, prepare the sewer pipe to enter the pipe from the siphon. Here you need to make sure that the corrugation is quite tight. If there are gaps, then you will have to go to the store to buy a special sealing fitting adapter and then we will insert the nozzle into it.

- Now you should prepare a hole in the sink for the installation of the top of the drain. That is, you need to clean everything from dirt, excess gaskets, etc. And then you need to try to insert the knee ring into the hole - if the diameter is the same, then you have a standard situation, which means that you can safely proceed according to the instructions further.
Tip: if the diameters of the elements still do not match, then this moment should be dealt with closely, because one should not allow water to accumulate around the drain ring - this is unhygienic. There are two options for solving the problem - contact the store asking you to choose a more suitable ring, or “put” the ring on the silicone sealant.
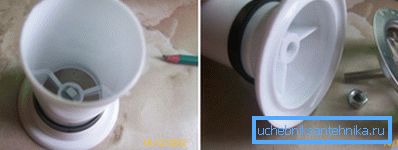
- We assemble the siphon with our own hands according to the scheme, while processing with silicone those compounds that do not have sealing gaskets. The same places where rubber rings are - as a rule, do not need additional processing. At the same time, make sure that there are no “agnails” between the plane of the gaskets and the plastic - cut them with a knife, because of such nuances the level of tightness may be disturbed.
Note! Before you treat the plane with silicone, make sure that the surface is dry. Otherwise, after the sealant dries, there will be gaps between it and the plastic.
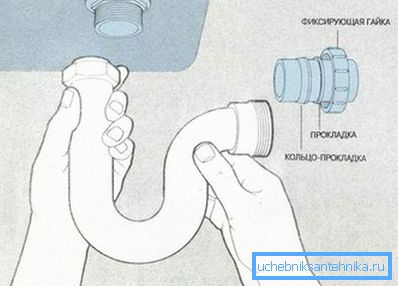
- We attach the top tube of the structure to the bottom of the sink and twist the tube with a metal drain ring. This is usually done with a bolt.
- Insert the attached pipe into the siphon and tighten the large coupling nut.
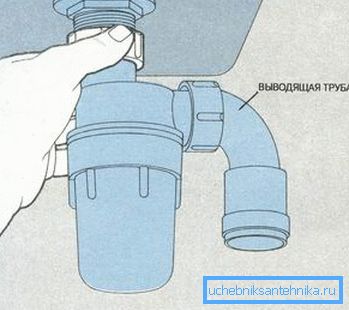
- We insert the corrugation into the sewage system, wait a few hours for the silicone to set (if it is somewhere else), then check the system for leaks.
If during the check everything is in order, then the system can be started to use fully.
Well, as for how to clean the siphon under the sink if necessary, then everything is simple - unscrew the "bowl", clean it and screw it back. Just do not forget that if the compound was previously treated with silicone, then the old sealant will need to be removed during assembly and apply a new one.
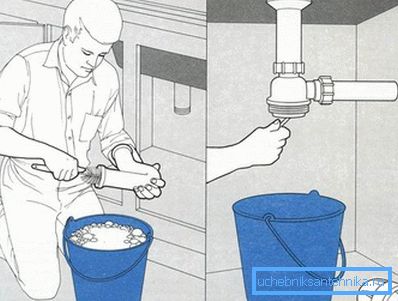
That's all - the review is completed and proceed to the debriefing.
Conclusion
We figured out in some detail how to put a siphon on the sink, as well as how to select it and how to remove an old product, before assembling a new one. We hope that everything is relatively clear to you and now this process will be able to be carried out easier and more correctly.
If you still have questions, check out the tutorial video in this article.