How to connect the shower to the water supply - the basic
Many developers believe that connecting a shower stall to the water supply is only possible for professional specialists. In fact, everything is much easier, even assembling the structure is much more difficult than connecting it to the necessary communications, so we will look at this type of work in more detail, and you can easily figure out all the important nuances that you should be aware of when carrying out this work.
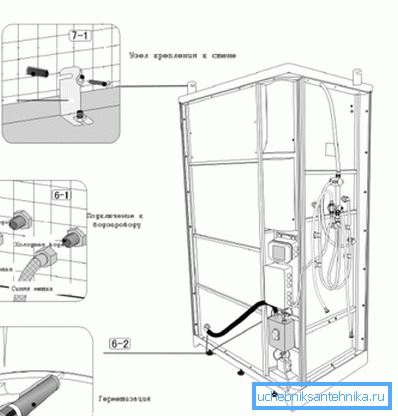
What materials are needed for the work
In order to carry out the installation qualitatively and reliably, it is necessary to have on hand all the required elements, the main of which are the following:
| Liner hoses | Most often, they are bundled, but sometimes their length is insufficient or you want to put a more solid rigid liner. Then it is worth buying these products separately, especially to find them is not difficult, they are in every store that deals with sanitary products |
| Fitting | Their option depends on which pipes are used for liner, the most rational communications are from copper and metal-plastic, they are reliable, durable and can be bent at the right angle, thus avoiding unnecessary connections. The quality of these nodes can not be saved, as this is the most dangerous place in terms of leakage. |
| Adapters | These nodes are adapters that allow you to easily connect the shower to the water supply. Their installation greatly simplifies the work and increases the reliability of the entire structure. Most often they are supplied with the shower |
| Sealing compounds | Many use fum-tape for threaded connections, but professional experts recommend using the composition Unipak. It provides excellent reliability and over time does not lose its properties under the influence of hot water, as it does with tape |
Note! You will also need keys, screwdrivers, and other tools; a specific list depends on the structure to be installed and the characteristics of the room.

Organization of installation work
It is very important to organize the workflow correctly, so we will divide it into two stages - preparation of the system and assembly of the main elements and direct connection.
Preparatory stage
At this stage you need to identify the following features:
- Where the construction will be installed, for example, a shower in a country house without running water is installed in a completely different way than in a city apartment. You will have to install a tank on the roof of a building, or make a well or dig a well to pump water for work.
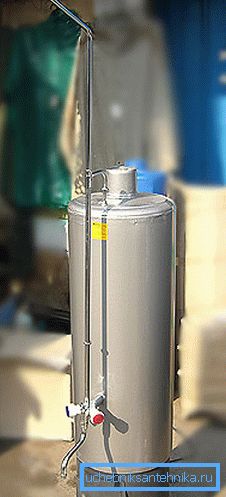
Tip! A good solution can be a shower column, which can work both on wood and from the installed heating elements. Its advantage is non-volatility, besides, for its work does not need plumbing, although the cumulative capacity still need to be installed.
- How much pressure is maintained in your system - it depends on which modes the equipment can support.. Low pressure lines cannot support massage showers and other similar functions, so you will need additional pump installation.
- An important nuance is that the connection to the existing communications is made, or the pipelines will be laid again.. If there is a possibility of distributing plumbing, then you will be able to plan the position of each element in accordance with the design of the booth, this will greatly simplify and speed up further work. It is important to properly draft and take into account all the main nuances.

Tip! It is recommended to install a ball valve on each branch of the pipeline; this will allow in case of emergency situations not all the water supply to be cut off, but only that part of it that is necessary. In addition, you can simplify system maintenance, for example, replacing the cartridge in the mixer: it is enough to turn off one tap and you can start work.
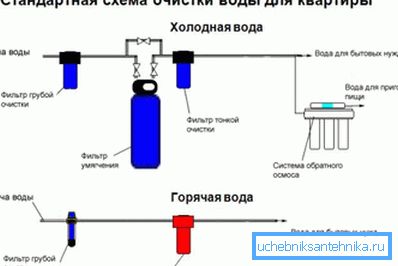
- In order to extend the life of the entire system and prevent its clogging, installation of water filters is necessary, this will avoid the formation of deposits.
Attachment of the structure
Before connecting the shower to the water supply system, it is necessary to install a pallet and assemble the structure. As a rule, these works take up most of the time, so be prepared for the fact that you will have to do so many small operations with your own hands.
If you have already coped with this stage, you can proceed to the connection:
- Connecting the shower to the water supply begins with the overlapping of water at the entrance to the apartment, but if there are separate taps on the taps to the structure, then this will not be necessary.
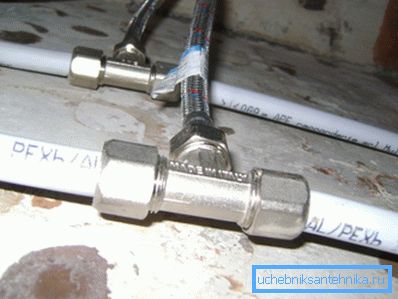
- Further, adapters are connected to the terminals, but if you let them down specifically, you can immediately put an adapter that is located at a certain angle, this simplifies further connection of the hoses.
- The next stage is the attachment of a flexible liner of the appropriate length, at this work with communications should be considered completed and you can proceed to the final stage.
Tip: A wiring diagram for a shower stall to the water supply is available in each installation and operation manual. Read it carefully before connecting the system.
- Next, connect the hoses, do not forget to additionally handle each threaded connection sealing compounds, their price is low, but the reliability of all nodes increases many times.
- The last stage is to check the structure for tightness, to do this, the tap opens and water is turned on in different modes, and you should carefully inspect all the elements and, if necessary, tighten the connections.
Conclusion
The video in this article will help to better understand the process and clearly show the most important stages of work, as well as help to understand the topic under consideration even better. After all, similar work is possible even for those who have never worked with plumbing equipment.