How to connect the toilet to the sewer: the nuances of
When repairing or building a new bathroom, you will necessarily have such an essential need as connecting a toilet bowl to a sewer pipe, that is, simply speaking, this is mounting the device.
At first glance, it is not difficult to do this, but, nevertheless, without certain skills and knowledge, you cannot do this, and surprises in the form of force majeure will await you. We want to tell you about the basic rules and small nuances of installation and show you the video in this article.
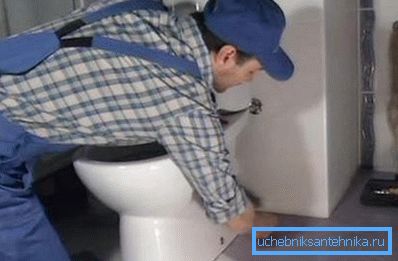
What you need to know
The main types of toilet bowls
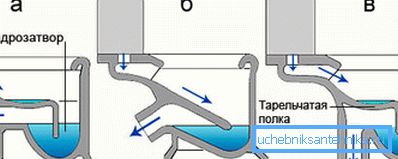
- To figure out how to connect the toilet to the sewage, you need to distinguish them by types of outlets (on the slope), which can be straight, inclined at 45? and strictly vertical, going straight to the floor, as shown in the upper image. It is this factor that will play the main role when choosing not only the device itself, but also the method of connecting it, where you will need either a plastic straight adapter or a corner of 32 ?, 45? or 90 ?, or plastic corrugated short hose.
- This is very important, as the fitting leading to the sewer pipe can exit directly from the wall at an angle of 90? to the floor, from the wall or floor at an angle of 45? or from the floor, but strictly vertically. The fact is that the instruction requires as tighter a connection as possible, therefore, the coincidence of the tilt angles is extremely important here.
- The exception here is a corrugated hose or corrugation, which is suitable for any angle of output and can be compatible with any inclination of the fitting., but this requires a distance for a smooth bend. Imagine that you purchased a plumbing appliance with a direct outlet and you need to connect it to the fitting socket, which is inclined at 45 ?, but the distance from the toilet to the door is very limited, since the latter opens into the bathroom.
- In practice, it turns out that you put on the corrugation and try, that you have the strength to move the toilet to the riser, because otherwise it will touch the door leaf when opening.. As a result, it turns out that the toilet flows at the junction with the sewage system, since the reducing clamp on the corrugation has slipped from the upper part of the outlet pipe from strong tension.
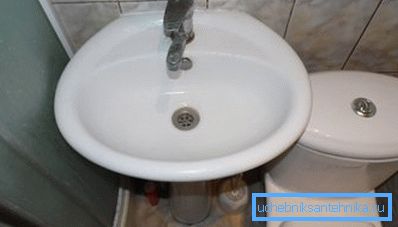
- Another important factor when choosing a device is the width of the cistern, as the toilet can be properly connected to the sewer only at a certain distance.. In small bathrooms, as in the photo above, a wide flush tank can cause a non-standard - you simply cannot move the quantum satis device (as much as you need).
Recommendation. Before you make a purchase, you should determine how the drain for the toilet bowl is located (tilt of the fitting), the free distance to the door if it opens inwards, and the allowable width of the drain tank.
The nuances of editing
Please pay attention! Immediately it should be said that installing the toilet below the level of sewage is strictly prohibited! So how to install the toilet if the sewer is higher, it is possible only on a pedestal, so that the lower edge of the outlet nozzle is at least in the center of the drain point. Otherwise there will be no sewage drain!
First of all, you should pay attention to the readiness of the floor - it must be dry and if before it was done pouring screed or laying ceramic tiles, then for normal fixation will take at least a week of solidification.
Of course, by and large it is better to withstand four weeks, but with a shortage of time, these 7 days of waiting will allow the anchor bolt with dowel to be fixed clearly in the solution without breaking it.
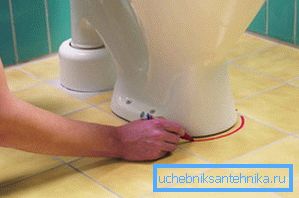
Next, in order to start the installation, you need to make a markup of the final position of the sole, and for this, the toilet needs to be temporarily connected to the sewer system with a corrugation or a rigid adapter to find out its final position on the floor.
To do this, you need to put on the necessary adapter on the nozzle and insert other horses into the fitting socket (without reduction yet) and find the most advantageous position of the device (you can even sit on it for testing). When the position is selected, you need to outline the perimeter of the sole with a marker or pencil and also mark the holes at the edges of the sole for the anchor bolts.
After that, temporarily remove the sanitary device to the side so that it does not interfere with further actions, and proceed to the drilling of holes. If the floor is covered with ceramic or tile, which happens most often, then do not rush to immediately use a perforator - the tile can simply shatter, especially if the glue has not completely dried out.
Therefore, the first centimeter (the thickness of the tile), you better go through a drill or a puncher, but not in the mode of impact, but in the mode of drilling, if there is one.
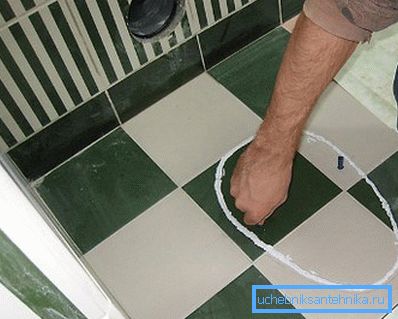
After the holes are ready, you will need to carefully wipe away all the dust from the floor and install the plastic dowels in them flush with the surface of the ceramic / tile.
We have a marking of the sole of the toilet bowl and you need to apply a strip of silicone sealant (preferably white) on its inside - this will hide possible irregularities and roughness on the bottom of the sole and the floor (tile). Thus, you anticipate the prerequisites for the squeak, and the fixation itself will be clear and reliable.
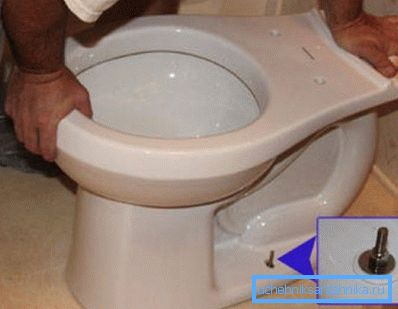
Now comes a very crucial moment - you need to lower the plumbing device with your own hands exactly on the delineated place and at the same time connect the toilet to the sewage system with a corrugation or rigid adapter.
For this operation, it is best to use two people - one will lower the toilet and the second will guide the adapter, but if it is a corrugated pipe, then it can be stretched, inserted into the socket, and then lowered the toilet on the markup.
Note. Do not forget that for a corrugated hose, both for cast iron and plastic sewage fittings, it is necessary to use sealing rubber reduction.
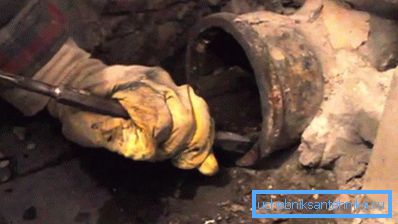
Now let's understand more specifically how to connect the toilet to the cast-iron sewage system. In the fan tee, the cleaning of which you see in the top photo, there is still a direct cast-iron fitting that will disturb you (too long), therefore, it should be pulled out, but it is not always so easy to do - it can be embedded with cement grout and tar tow .
Therefore, it is best to remove it by loosening it and, if necessary, hammer it with a hammer. Sometimes this fitting is broken and then pieces of cast iron are best beaten out with a chisel, but you should be extremely careful not to break the tee, otherwise you will have to change a piece of the riser.
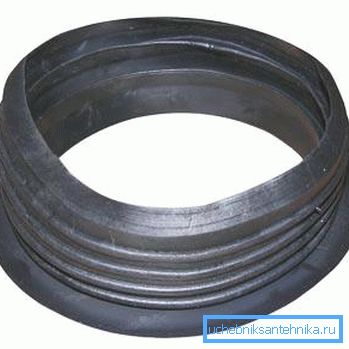
If we consider that the diameter of the sewer pipe for a toilet bowl made of cast iron in the vicinity of the socket is about 130 mm, and the outer diameter of a similar plastic pipe has only 110 mm, then it is quite clear that a rubber reduction will be needed here to seal.
The same reduction is also needed for a corrugated hose, but now, if you insert a corrugation into a plastic bell, then there will be enough of the accordion that is on its end. These compounds do not need to be sealed with silicone.
Conclusion
In conclusion, it should be noted that the price of a toilet bowl mainly depends on the design and volume of the drain tank and quite a bit on the direction and distribution of the drain channels in the appliance itself. But the assembly of the drain mechanism and the connection of the tank itself is carried out according to the instructions given by the manufacturer.