How to disassemble the toilet bowl and collect it during
Plumbing fixtures to meet natural needs during the operation can pass water from the drainage tank. Calling the master will cost money, so it's best to try to fix the problem directly with your own hands. To do this, you need to know how to open the toilet bowl in order to carry out a preliminary inspection.
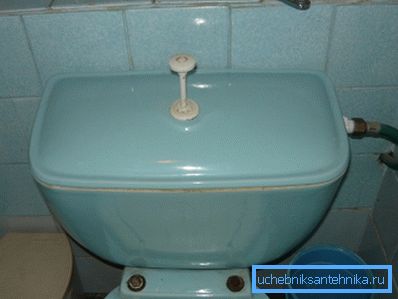
Introduction to the device
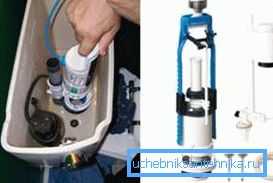
The mechanism of the drainage device, which ensures the discharge of water into the sewer system, is the most complex node. Firstly, the supplied liquid must flow in the right quantity, in order to avoid flooding the room.
Secondly, there should be a quality washout.
- The housing with a lid contains all the main components that make the system function..
- The inlet valve is essential for the timely delivery of water to the inside of the toilet bowl..
- The float is a controlling tool that allows you to determine when a liquid should be poured..
- The rubber bulb provides the ability to close the drain hole so that the water does not flow unnecessarily..
- Traction with a handle is required to carry out the washing operation. Lifting it up, you can easily empty the container.
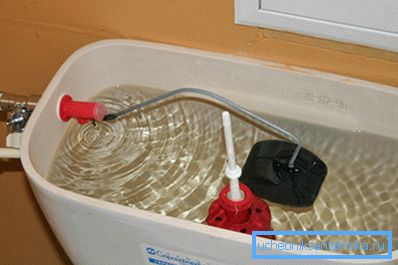
Note! Knowing the device of the drain node, it will be easier to understand how to make a toilet bowl by yourself. If at least one element of the system ceases to function properly, then the process of discharging will be broken.
Disassembly process
Before embarking on such an operation, it is necessary to determine the type of product. The tank for flushing can be located both in the upper part and in close proximity to the main unit. The following is information on how to remove the toilet cistern with the bottom layout.
Basic tools
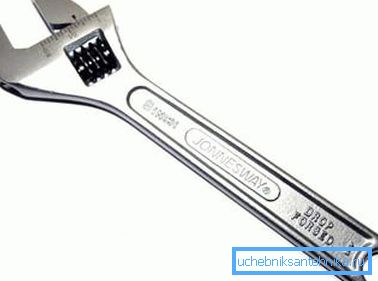
- An adjustable wrench is required to loosen the nuts with which the fixing is carried out.
- Pliers can be useful when working with fastening elements of small size.
- A grinder or hacksaw may be needed to cut badly unscrewed bolts.
- A screwdriver is usually needed to remove plastic parts.
Performance of work
It's time to learn how to open the toilet tank and remove the elements located inside. It is necessary to adhere to a certain sequence of actions, otherwise the capacity may be damaged.
Then the operation of the device will be impossible, and its price is quite high.
- At the first stage, the overlapping of water is carried out directly in front of the sanitary device. After this, rinsing is performed so that the tank is completely emptied.
- Next, under the tank should be installed any support, as when unscrewing it may fall to the floor. Usually, a board of appropriate size is installed at the back.
- Now unscrew the bolts using an adjustable wrench. If this cannot be done, then the grinder should be used, carefully cutting off the fasteners of the drainage device.
- The flush structure is fed slightly backward so that the socket is free from the main cuff of the toilet bowl, through which the connection is made. In many cases, it has to be changed.
- At the last stage, the tank is placed on a flat surface. All parts inside are removed using a conventional screwdriver. Threaded connections are the same everywhere.
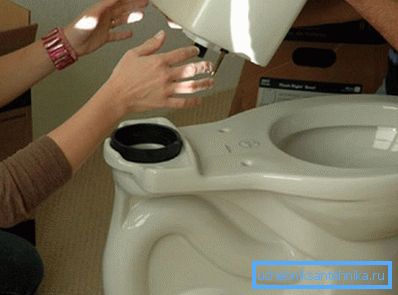
Attention! In the process of work, it is necessary to avoid all sorts of distortions and excessive pressure in those places where the metal contacts the ceramic part, since chipped and cracked surfaces may appear.
Valve adjustment
Before you assemble the toilet tank, you must make a preliminary adjustment, then the device will work properly. To regulate the distance to the drain valve, the cistern of the toilet bowl is disconnected from the overflow pipe. The retainer of the glass is gently pressed, and the stand moves in the desired direction.
As for the adjustment of the liquid level in the tank, it is done without too much difficulty. When the position of the glass will be fixed, a distance of more than 45 mm should remain between the top of the element and the edge.
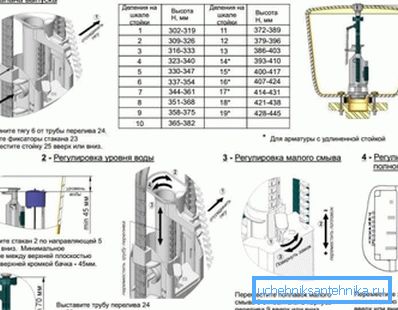
The overflow pipe is installed above the top of the crossbar by 7 cm, but 2 cm below the maximum water level. A small flush can be adjusted by moving the float relative to the overflow bar.
The above information will allow you to understand how to set up a toilet bowl for future use.
Assembly work
After complete disassembly of the tank to drain the water all the parts should take their original places. When removing items yourself, you usually do not need an instruction to learn how to assemble the toilet bowl. This process differs only in the sequence of actions.
Common Malfunctions
- Filling the tank occurs with a strong noise effect, which affects the comfort of living.
- Water from the pipes flows directly into the tank without stopping, and this can lead to overflow.
- Draining is carried out if a lever or a button is repeatedly affected.
- Liquid from the inside flows out, leaving wet marks on the floor and plumbing.
Final part
Independent disassembly and assembly of the cistern for the toilet provides an opportunity to do without the involvement of professionals, which means that the savings will be quite impressive. The device of the tank for water discharge is not really very complicated, so you can always think about self-troubleshooting. Effective assistant in the work can be a video in this article.