How to do the washing yourself: installation, typical
In this article we have to figure out how and in what order the overhead and mortise kitchen sinks are mounted. In addition, we will get acquainted with the most typical malfunctions of these plumbing fixtures and find out how they are fixed.
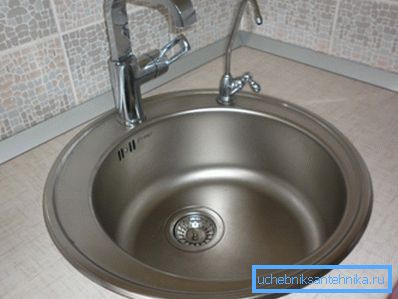
Installation procedure
Let's figure out how to collect the sink and in what order it is better to do this work.
When installing the sink, it is more convenient to perform the main operations in a strictly defined order:
- First, the mixer and the harness are mounted on the sink (release and, if there is one in the set, overflow).
- Then the sink is attached to the countertop or cabinet.
- The flexible hoses of the mixer are connected to the water supply lines.
It should be clarified: for obvious reasons, the first and third items refer only to mixers with onboard installation. Wall models in no way affect the installation of the sink.
- The siphon is installed last.
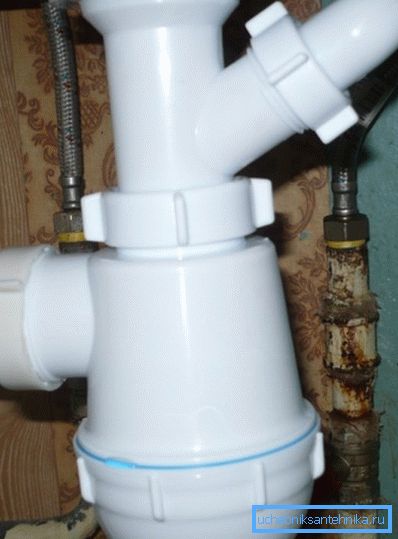
General moments
Regardless of the type of sink there are a number of subtleties that are useful to know when starting work.
Mixer
- In the kitchen, it is more appropriate not a mixer with taps, but a single-lever design. Lever control is useful in that it allows you to turn on or turn off the water with your hands soiled - your wrist or elbow.
- An annular gasket should be present under the mixer body. It will not let the water on the shelf sink to the floor.
- Hoses should not be strung; kinks at an angle close to 90 degrees, they are also contraindicated. The sleeve that connects the sheath with the cap nut is very vulnerable to mechanical stress. If the length of the hoses is not enough - it is worth buying large pair of flexible connections instead of the bundled ones; the price of a set usually does not exceed a couple of hundred rubles.
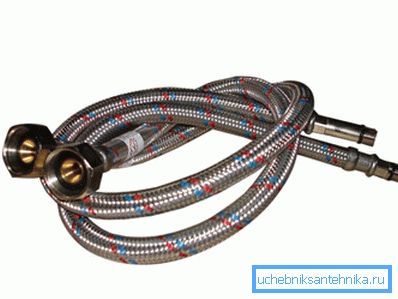
Tip: you can just as well build up the bundled hoses with a pair of flexible connections with papa-mama threads.
Sewage
Connecting the sink to the sewage with your own hands also has several subtleties:
- In most sets of strapping, gaskets under the outlet and overflow are placed only outside the bowl. Inside the grille is pressed directly to the sink material. If you move the ring gum under the release inside, the grill will rise, and water will always be in the sink.
- A torn gasket under the bottom of the siphon can be replaced with FUM tape wound on a thread or with a strip cut from a package of dense polyethylene.
- The corrugated exhaust pipe should not sag. Any counter-slope is a place where fat will be collected from the plates and various garbage, which sooner or later will lead to clogging.
Installation of car wash
The actual installation of the sink depends on its type.
Waybill
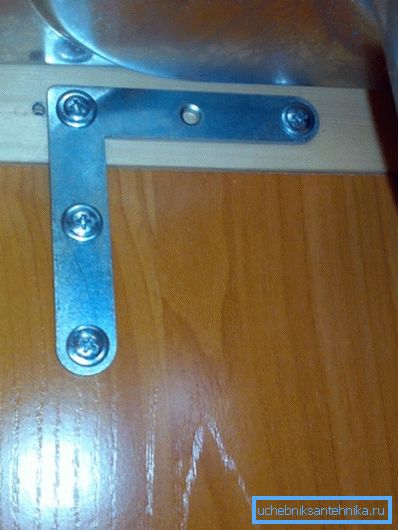
With the use of standard hardware - corners with oblique grooves, the order of operations is as follows:
- We put the sink on the cabinet.
- We put it on the corners protruding inwards. The distance from the corners of the cabinet should be minimal.
- We drill a hole with a diameter of 2-3 mm and a depth of 12-13 mm in the middle of the groove. To measure the depth will help electrical tape, wound at the right distance from the tip of the drill.
Reference: the wall of the cabinets of chipboard has a thickness of 16 mm.
- Screw 16x4 mm screws into the holes, leaving a slight slack under the caps.
- Shift the corners sideways, while pressing the edges of the sink.
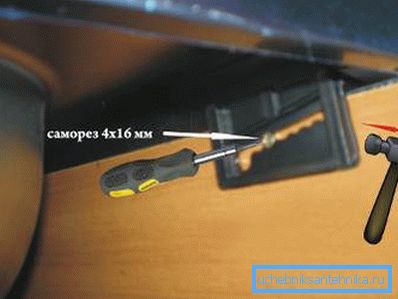
This method is simple, but does not provide reliable and rigid fixation of the shell.
How to make a sink fixed more rigidly?
- We lay along the perimeter of the lintel impregnated with linseed oil for greater water resistance.
- We pull it to the side walls with galvanized plates or ordinary furniture corners.
Mortise
It, as a rule, is placed in the cutout of the tabletop.
The panel where the sink fits in and the stove can be the length of the entire kitchen; most often worktops for the working area are made of laminated MDF (pressed hardboard).
- Putting the sink upside down in the place of its future location, outline the outline with a pencil.
- Removing the sink, retreat from the line 1.5 cm inwards and draw another curve - the contour of the future cutout.
- We drill a hole with a diameter of 8-10 mm inside the contour. It will require the jigsaw saw to start cutting.
- Cut out the cut with an electric jigsaw and, if necessary, process the edges with a file.
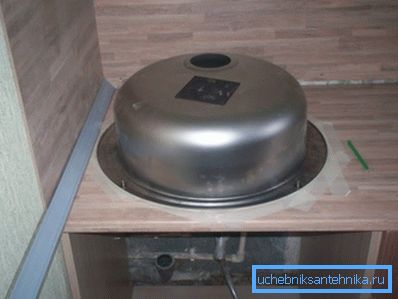
- We protect the edges of the cut with linseed oil, paint or any other water-repellent compound.
Warning: do not try to save time on this operation. Upon contact with water, the laminate will quickly swell.
- We glue the sealing tape along the perimeter of the sink from the bottom, leaving a free strip of 3 mm from the outside.
- We pass this strip with silicone sealant.
- We put the sink in working position and immediately attract it with regular fasteners. Do not overdo it: plastic fasteners are easily broken.

- We remove the protruded sealant with a rag, napkin or toilet paper.
Faults
What does washing repair look like with the most typical faults?
| Problem | Cause | Elimination |
| Leaking under the sink near the mixer when the faucet is open | Broken gasket under the faucet body | Dismantling washing and replacing gaskets |
| Constant flow under the mixer | Damaged hose | Replacing flexible connections |
| Water does not go away | Siphon clogged, exhaust tube overgrown with frozen fat | To clean the siphon, you only need to remove its bottom. Removal of grease from the tube will require its disconnection from the siphon and sewer |
How to unwind the sink for cleaning the issue in the latter case, if the water does not go through the corrugated tube tightly inserted into the socket of the sewer? It is enough to unscrew the flare nut from the side of the siphon and with some effort pull the second end of the pipe out of the socket of the sewer pipe.
Then the contents of the corrugations are shaken out in the trash or tight package.

Conclusion
We hope that our advice and recommendations will help the reader to cope with minor household problems. The attached video in this article will make them more visible.
Good luck in job!