How to fix the sink and connect it to the communications
If you bought a new car wash, it becomes necessary to install it. Of course, this work can be entrusted to a specialist, however, the price of such services is usually quite high, so it is much more expedient to do it yourself. Below we will look at the process of connecting the car wash in detail, and you will see that there is nothing complicated about it.

Installation
First of all, it should be said that the sanitary devices under consideration are of two types:
| Overhead | In this case, the sink is installed on a special cabinet without a tabletop. This design is quite old, however, it still occurs today. Overhead shells are most often made of stainless steel. |
| Mortise | In this case, the device is inserted into the hole cut in the tabletop. Plumbing appliances of this type are of two types:
|
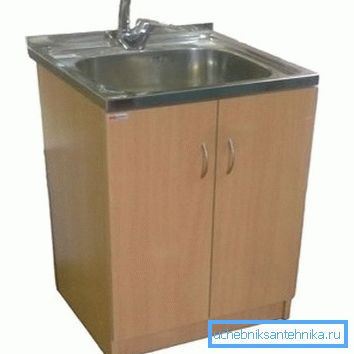
The method of installation of this plumbing, as it is easy to guess, depends on the type of its construction. Therefore, below we take a look at the mounting features of both types of products.
Installation of the crane and siphon
Regardless of the method of installation of the sink, before you install it in place, you should fix the mixer and the siphon on it. Therefore, first of all, we consider how to fix the tap at the sink.
So this is done as follows:
- It is necessary to begin work with fastening of hoses to the mixer. The hose fittings are threaded, so they are simply screwed into special holes in the mixer.
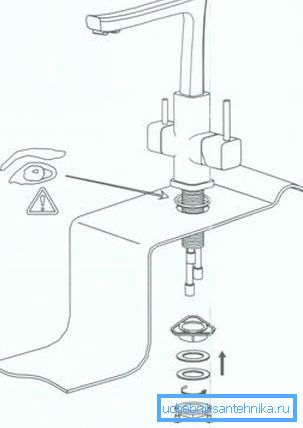
- Then a plastic gasket is laid over the tap hole..
- Next, the hoses are passed through this hole, and the valve is installed in its place.
- A washer is put on the mixer pin on the back of the sink and tightened with nuts..
Note! There are devices that do not have holes for the mixer. In this case, there are two exits - make a hole yourself or install a faucet on the wall. In the case of plumbing plumbing fixtures, the mixer can also be installed on the countertop.
At this the installation of the crane is completed, now you need to install a siphon.
This process depends on the design of the latter, however, most often it looks like this:
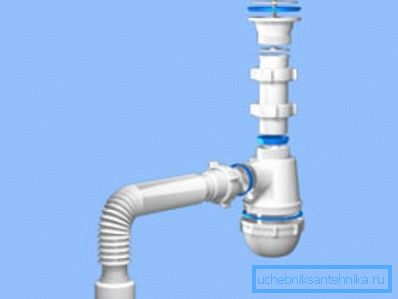
- First of all, a gasket is laid over the hole, an exhaust nipple is inserted, then another gasket is put in and a mesh is inserted from above.
- Further, the siphon itself is screwed to the outlet with a cap nut.
- At the end of the work on the side of the mesh, a bolt is tightened, which securely holds the entire structure.
Note! To ensure tightness, all the joints of the parts must be self-lubricated with silicone sealant.
Now that all the hardware has been installed, you can proceed to the installation of the sink itself.
Laid on sink
The stainless steel sink on the cabinet is set up quite simply, as long as the dimensions of the plumbing fixture match the furniture. Therefore, when buying products separately, you must carefully measure them.
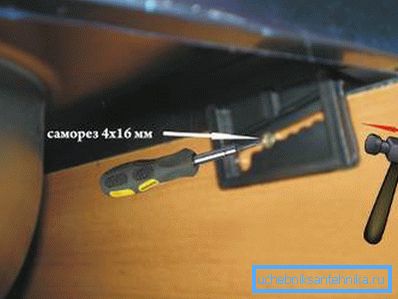
Instructions for installing such a device is as follows:
- Before fixing the wall washer to the cabinet, you need to screw the screws in the upper part of the two inner sides.
- Then the sink is placed on the cabinet.
- Further, on the caps of the screws are attached L-shaped fasteners with oblique slits. At the same time the lugs should fix the sink.
- After that, the mounts are shifted to the side, with the result that the sink is attracted to the bedside table.
- In this position, fasteners must be fixed by tightening the screws.
- Next, you need to put the cabinet in the place of permanent location, wind the nuts of the hoses on the water pipes and insert the discharge pipe into the sewer pipe.
- Place the junction of the sink and the wall should be smeared with sealant.
At the end of the work, you need to turn on the water supply and make sure that all connections are tight.
Mortise
Now consider how to fix the mortise sink in the countertop. It should immediately be said that this work is more complex, however, it is also quite realizable.
It is executed in this order:
- As in the case of the sink, you first need to install a tap and siphon.
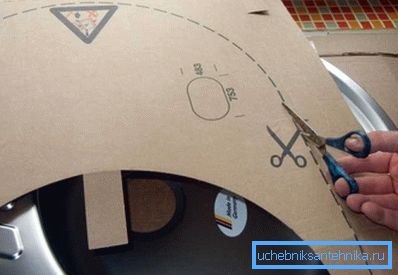
- Then you need to mark the countertop. This operation is very important, as incorrect marking can lead to the fact that the tabletop will be damaged. As a rule, complete with a sanitary appliance there is a template that simplifies this process. If there is no template, it is necessary to mark the contour of the bowl on the cardboard, then attach the homemade template to the tabletop and transfer the contour to it.
- Next, you need to carefully cut a hole along the contour with an electric jigsaw.
- Then, in place of the saw cut and the inside of the side of the shell, silicone sealant is applied.
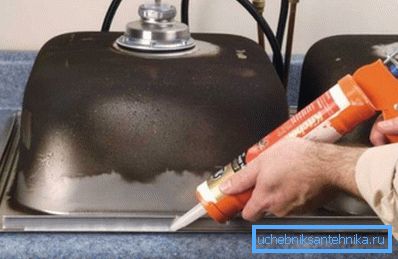
- After that, you need to carefully press the bowl to the tabletop and wait for a while until the sealant hardens.
This completes the installation process of the sanitary appliance.
Conclusion
As we found out, install a self-cleaning under the force of each, even if it is mortise. The main thing - to do the work carefully and slowly, to prevent mistakes. The rest should follow the above sequence.
You can read more information on this topic from the video in this article.