How to fix the toilet on their own and save on a call
In most apartments, tenants install faience toilets. The device is strong enough, but it can crack or break. More often, the drain tank fails, causing a lot of trouble. If you do not know how to fix the toilet yourself, take five minutes to this article. Next, we will convince you of the simplicity and affordability of self-repair.
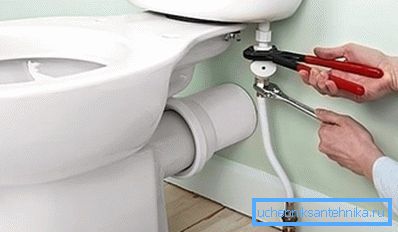
How does the toilet
The toilet is called a two-piece (bowl with flush tank) system.
They are connected to each other in several ways, so before you make the toilet workable, determine the location in your case.
- Combined type. In this case, the drain tank is attached directly to the bowl with special bolts.
- Suspension system. Here the tank is located significantly above the toilet bowl and is connected to the last pipe.
- Built-in construction. In the toilet there is only the lower part, the water tank is mounted behind the back wall and hidden from view.
What's inside
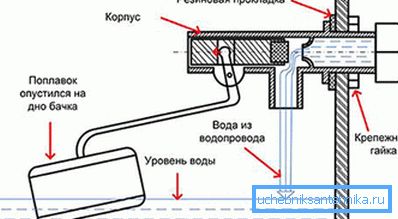
If you are interested in the internal structure of the tank, simply open the lid. At first glance it will be clear - how to assemble the toilet and how to disassemble it, because the design is surprisingly simple.
And it consists of this.
- Float that controls the water level.
- Shut-off pear, overlapping or opening drain on demand.
- Lever overlapping water after filling the tank.
- The overflow opening providing outflow of water at overflow.
- The mechanism responsible for the discharge process. This can be one or two buttons, a lever or a knob (depending on the model of your plumbing).
Note! It is worth noting that in some cases too many unnecessary details may seem. Often, manufacturers unnecessarily complicate the design to overcharge. Therefore, when buying, request instructions on how to disassemble the toilet of this model.
Repair of cracks and chips
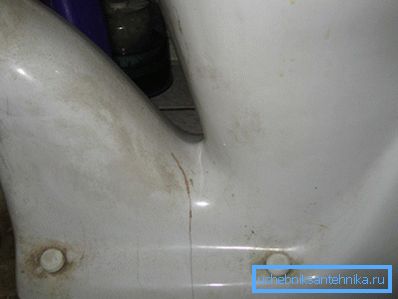
Everyone knows that faience, for all its attractiveness, is quite fragile. With careful treatment, the toilet will last more than a dozen years, but no one is insured against mechanical damage.
After a fall or a blow with a heavy object, you have to wrestle with how to repair a crack in the toilet with improvised means. In case of small breakdowns, you can cope with the problem, but you will have to replace the completely burst device.
Restoration tools and materials
Before you paint the toilet at home, you have to repair all the cracks. Coloring is required when the stains on the surface are no longer cleaned, and the enamel has become porous and rough.
Below is what is needed.
- Silicone sealant for sewage.
- Silicone remover.
- Plastic spatula.
- Alcohol or gasoline.
- Clean dry cloth or napkin.
- Enamel paint (best automotive in cans).
Note! As a sealant, it is recommended to purchase a cartridge with silicone for sanitary purposes. It has fungicidal properties, so it is ideal for this case.
Repair process
Initially turn off the water and dry the places of contact with it. Only after that you will be able to successfully cope with the restoration with your own hands.
If the water does not overlap, you will have to call a plumber.
- Moisten a cloth with gasoline or alcohol and thoroughly wipe the spall or crack and the areas around it. This will degrease the surface and improve adhesion with glue.
- Dry the surfaces well.
- Squeeze the sealant on the joints. Save is not worth it, a thin layer will not give the desired effect.
- Moisten the spatula with warm water and gently press the sealant into the crack, smoothing the surface to the maximum.
- While the silicone is not frozen, wash it off with a spatula, otherwise it will be very difficult to remove it later.

- While the sealant freezes (curing time up to 15 minutes), carefully smooth out the seam with a wet finger, polishing it.
- It is easiest to clean the excess mixture with a cloth soaked in gasoline or a solvent.
- If further staining is planned, ensure the room is ventilated, wear safety glasses, gloves and a respirator.
- Wash your hands with warm water and soap.
- Let the toilet dry for about 24 hours. Only then they can fully enjoy.
As you can see, the price of such repairs is not burdensome for a person with average incomes. The more pleasant that does not have to pay for the work of the master.
Replacement toilet bowl
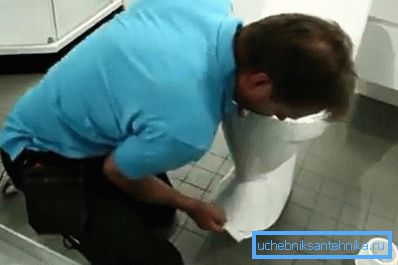
If your system has served its purpose and is not recoverable, you need to change it. In the whole process, the most difficult stage is the dismantling of the old device. But a new one on the freed place is much easier to put. So, how to dismantle the toilet with their own hands without floods, noise and scandal with the neighbors below?
We remove the old device
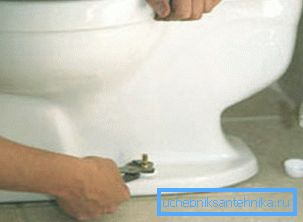
- Shut off the water supply to the tank and drain the rest of it.
- Disconnect the hose supplying water to the drain container.
- Remove the tank itself by unscrewing the screws from the toilet bowl or wall (depending on the method of attachment).
- The hardest thing is to detach the toilet from the floor. Tile around the base will have to gently repel.
- If the device is bolted to the floor, unscrew them with a wrench. Mounting studs are removed worse, you need to pry the bowl with a crowbar and slightly loosening, lift.
- The last is removed by a discharge pipe that goes into a common sewer.
- Before you install a new toilet, a place under it is cleaned of fragments and residues of the solution.
Note! Stock up with dry rags to eliminate puddles. Even with properly performed dismantling of water on the floor can not be avoided.
Conclusion
Easy repair of plumbing in the toilet is quite feasible, because the devices have an extremely simple design. In extreme cases, the replacement of individual elements does not hit hard on the pocket. And even the whole system, if desired, will be able to replace it on their own.
Today, the video in this article has prepared you useful information and instructions.