How to install a pipe for the toilet - help in the hands
Do you want to replace your old toilet or mount it for the first time in a new house, in any case, you need to understand the technology of its connection. However, not every novice builder knows the correctness of installing a sanitary appliance and the features associated with this process. In this article we will help you find the right answer to the question posed, even to the point why you need a toilet pipe.
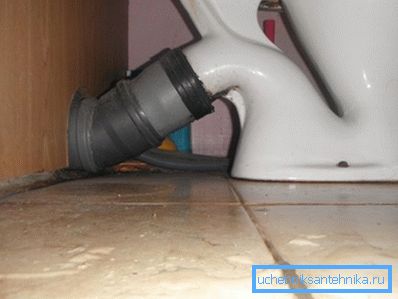
How to start connecting the toilet
To begin, you definitely need to know what type of device you will install.
First of all, they are subdivided according to the form of waste flow:
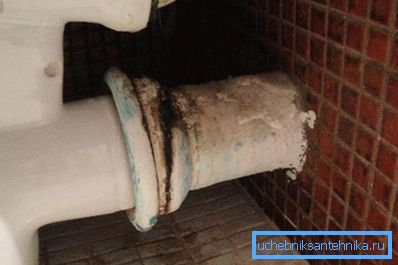
- Vertical.
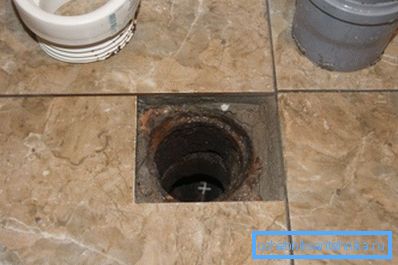
- Horizontal
- Oblique.
Most often in new homes installed horizontal plums, oblique forms of flow characteristic of the houses of Khrushchev times. Stalin's houses are distinguished by vertical release; at present, such a drain is no longer used.
Therefore, choosing plumbing, determine what type of drain installed in your house. Then the connection of the toilet bowl with the sewer pipe is possible to make qualitatively and you do not have to make global alterations of the entire system.
What you need to connect
To connect the toilet to the sewer system, the most commonly used:
- Fun pipe.
- Rubber cuff.
- Corrugated pipe.
Fun pipes
This product allows you to make the connection to the toilet bowl and a single structure. Most often, the fan pipe is made of a material such as: ceramics, faience or porcelain. If you install such connecting materials, then pay attention to the exact coincidence of the size of the docking points, since no adjustment in place will be possible.
Rubber cuffs
These products have different lengths, which allows you to connect the device to the sewage system with different types of wastewater. Cuffs are made of polymer compounds and look like a product with two taps, having shifted axes. Able to make the connection in cases where the diameter of the sewer pipe for the toilet does not match the diameter of the hole in the product.
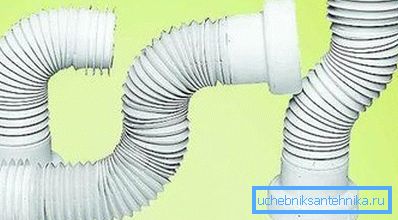
Corrugated pipes
Such pipes are characterized by flexibility, the ability to change the length and shape. The connection is not difficult, so you can easily cope with the installation yourself, a step-by-step process is described below.
Tip! Communications should always be freely available, as they may need to be cleaned or replaced. But from an aesthetic point of view, a large number of pipes in the bathroom is not very acceptable. To date, the obvious answer to the question of how to close the pipes behind the toilet, is the construction of a decorative box or collapsible panel.
Connection Tools
If you are going to do the work of connecting the toilet with your own hands, you will need the following tools:
- Set of wrenches.
- Several screwdrivers.
- File for works on metal.
- Sealants, cement mortar.
- Puncher, pobedit drills, dowels.
- Measuring device (like a tape measure), cutting tool, hammer.
Connect the toilet to the corrugated pipe
The following guidelines will help you make a connection with a corrugated pipe.
Perform all actions in turn, it will provide a quality installation.
Recommended! If you managed to put a floor tile before you installed the toilet - use the simple way to not scratch the floor, the price of which can be substantial. Put a wet rag on every time you move the toilet bowl on the floor.
- A corrugated sliding pipe is inserted into the sewer hole, the joint is lubricated with silicone.
- Install the toilet and make the connection to the pipe, check for leaks. We pour a few liters of water into the toilet and see if it is flowing at the joint.
- We make markup for drilling to install dowels. These places coincide with the holes on the basis of the toilet.
- Move the toilet down to drill the holes in the right places and install the dowels.
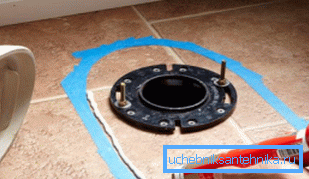
- We put the plumbing in place, connect with the corrugation, test the strength of the connection and wrap the fasteners.
- An important step in testing the quality of the installation is the endurance test. Sit on the toilet and swing in different directions.
- When the product stands firmly, we seal the joints.
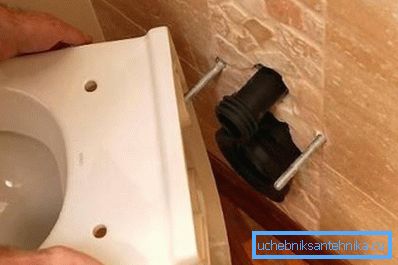
Note! In the event that there is a small gap, it will be necessary to remove part of the tile under the plumbing fixture to make the leveling screed and strengthen it with cement mortar.
The final stage will be the installation of a drain tank. The instructions provided with each product will help you connect the reinforced hoses for the water supply.
How to replace the toilet in the old house
Sooner or later, any plumbing product fails and there is a need to replace it. This situation can be complicated if the dismantling takes place in the houses of the old building, because then it is necessary to replace the toilet with a cast-iron pipe. But, armed with the knowledge and necessary tools, this process does not seem too inventive to you. But if you are overcome with doubts - contact the professionals.
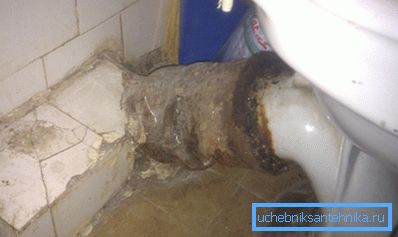
Since the old houses are mainly equipped with oblique drainage forms, the connection of the toilet bowl to the cast-iron pipe is carried out as follows:
- The drain hole of the product is inserted into the sewer pipe. The resulting gaps are covered with cement, making sure that the solution does not get inside.
- It is best to use a rubber cuff, as it is most suitable for oblique types of drains. We put it on the release and put it in the sewer pipe. We seal joints and uneven places with sealant.
- Corrugated products are better to apply in the case when installing plumbing will have an angle to the bell. The only drawback can be constantly stagnant water in the corrugation, as there will be a slight bias. Still such pipes are relevant in those situations when the toilet is set high and the outlet does not fit into the sewer drain.
- To prevent the appearance of third-party odors in toilet bowls with a direct type of drain, you can put on an eccentric cuff for release and then put it on the socket.
Conclusion
After reading the above information, you need to purchase all the necessary materials that are required for the installation of plumbing fixtures, and proceed to work. Do not forget that if you dismantle the old toilet, the water in the riser should be blocked, otherwise you risk flooding yourself and your neighbors.
In the presented video in this article you will find additional information on this topic.