How to install a shower cabin with your own hands in the
As a rule, stores that sell showers provide services for their installation, however, the cost of the work of specialists is a significant addition to the price of the appliance itself. Therefore, in order to save money, many people decide to install it on their own. Next, we will look at how to mount the shower cabin with your own hands, and you will see that there really is nothing too complicated in this.
General information
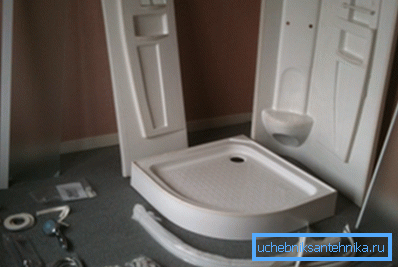
Before considering how to install a shower cabin in an apartment with your own hands, let us familiarize yourself with the basic elements of which it consists.
So, the design is assembled from the following nodes:
- Pallet - can be solid (self-supporting) or consisting of a frame and a bowl.
- The wall and side panels are usually made of glass and plastic.
- Doors - mounted on special rollers with fasteners.
- Roof - is a ceiling panel, may have a different design, depending on the model of the booth.
Tip! Before you install the shower stall with your own hands in the bathroom, you must first assemble it in a spacious area. This will allow you to deal with all the nuances of installation and then install the booth in a close room without any problems.
Assembly
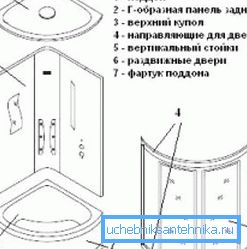
Starting to install the booth, first of all you need to study the assembly scheme, and also make sure that the kit contains all the necessary details. It is necessary to begin work with a choice of a place for the device. Moreover, it is first necessary to bring the sewer pipe and plumbing.
Pallet Mounting
Any showers with their own hands begin to be mounted with the installation of the pallet. Depending on the plumbing model, this process may vary.
However, in general, it looks like this:
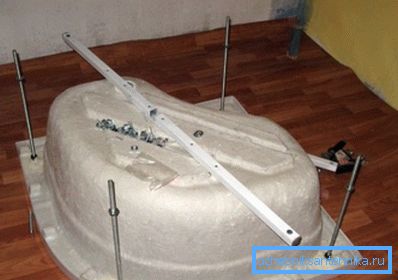
- First you need to install siphon on the bowl, which can be bundled or purchased separately. The principle of installation of the drain system does not differ from the installation of a siphon on other plumbing fixtures.
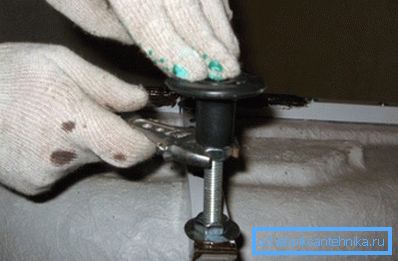
- Then the bowl is set on the legs.. To do this, you need to twist the long studs in the seats, then put washers on them and tighten the nuts.
- Next, special supports are put on the studs., which serve as a frame design.
- After that, the pallet legs are screwed into the welded washers of the frame.
- The next step is to connect the drain to the sewer. For this, a special rubber adapter is used. All joints must be treated with sealant.
- Next, the pallet is installed close to the wall and set by level by adjusting the legs.
- Then the joint between the walls and the pallet is filled with sealant.
- A decorative panel is attached to the installed pallet. (apron) that hides the frame.
- At the end of the work you need to check the drain - type water in the bowl and make sure that the connections do not break in.
This completes the installation of the pallet.
Installation of walls and doors
Installation instructions fences often looks like this:
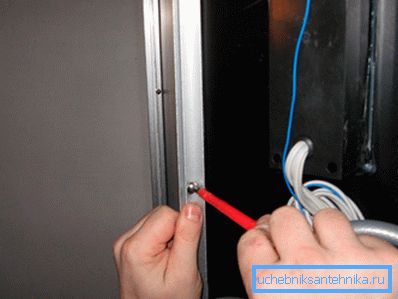
- First of all, guides are fastened to the pallet using self-tapping screws according to the diagram, as a result of which the frame of the future cabin is obtained. Self-tapping screws should not be too tight at once, so that there is a gap to adjust.
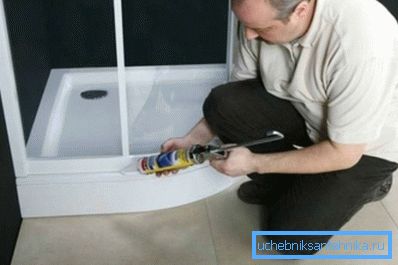
- Then the panels are installed. It should be noted that at this stage, the shower cabin is also being sealed with its own hands - the workplaces of the glasses are processed with silicone sealant, after which sealing gums are put on them. In addition, silicone is applied under all guides.
- Next, the panels are installed in the guides. It is important not to confuse the top and bottom of the glass. The top is usually different in that it has more openings.
- The same principle is established shower panel, which contains the basic equipment of the booth.
- Further communications are connected using flexible hoses, as well as electricity is supplied for electrical equipment.
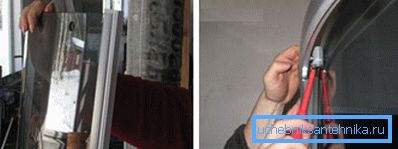
- Then set the sash. To do this, they also need to put on seals, then fix the rollers. After that, the rollers are inserted into the guides.
It should be noted that the principle of installation of rollers for different models may differ, therefore, the work must be performed in accordance with the instructions from the manufacturer.
Note! When applying sealant it is necessary to ensure that it does not fall into the grooves for water flow.
Installing the ceiling panel
After the walls are assembled and the doors are installed, the ceiling panel should be assembled by installing a shower head, speakers, a backlight lamp and a fan. The assembled "ceiling" is attached to the guide screws, while all the joints are also coated with sealant.
During the installation of the top panel, the shower head is connected to the nozzle and electrical appliances are connected. After completion of all work, it is necessary to check the operability of the connected equipment, as well as the tightness of the booth.
So, the shower cabin in the house is installed by hands. It should be noted that it is allowed to start its operation only several hours after installation, when the sealant dries.
Over time, it may be necessary to disassemble the shower stall with your own hands, for example, to replace sealing rubber or broken elements. This procedure is performed in reverse order. Moreover, the disassembly requires special care, since the silicone to some extent glues the adjacent parts.
Assembling a shower stall at the dacha
Getting used to bathing in the shower, people often cannot deny themselves this pleasure even at a country site. In addition, to collect a summer shower in the country can be, they say, from scrap materials.
Finally, consider the manufacture of a shower cabin with your own hands.
The process consists of several stages:
- Preparation grounds;
- Manufacturing frame;
- Arrangement and trim booths.
Before you get to work, you need to decide what to do with the shower cabin. Perhaps the best option is the bar 100x100 mm.
Note! Before building a shower cabin with your own hands, you need to find a suitable sunny place with the possibility of arranging a drain.
Cabin using a beam is made as follows:
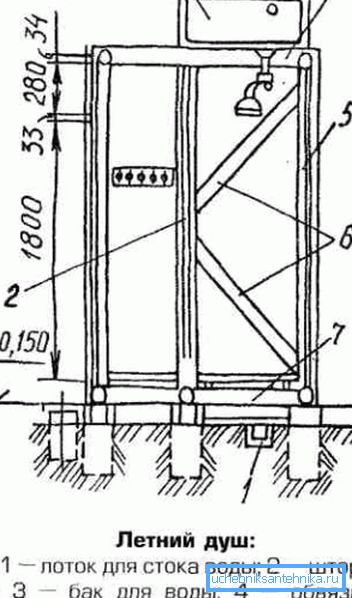
- The first is a columnar foundation. For these purposes, pipes are driven in to a depth of about a meter and poured with concrete. The pillars are located strictly vertically, and, their ends should be in the same horizontal plane. After the pipes are filled with concrete, metal reinforcement pins should be inserted into them for subsequent fixation of the grillage.
- Then a concrete screed is made between the pipes with a slight inclination towards the drain.
- Further the foundation is connected by a grillage from a bar. Previously it should be holes in it to put on the pins.
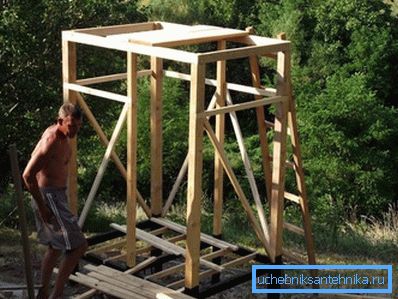
- Then in the corners are installed wooden racks, which are fixed to the grillage with screws and metal corners. To give the structure strength, the racks are additionally connected to the base with diagonals.
- Next, the upper strapping of the supports is performed with crossbars, as well as their reinforcement with braces.
- After that, a tank and the necessary fittings are installed on top of the booth. Capacity for a shower with a watering can and other accessories can be purchased in specialized stores.
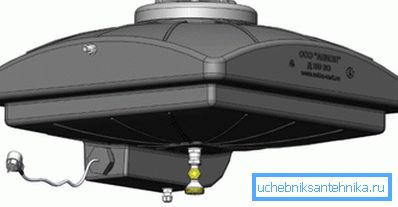
And on sale you can find even heated tanks. Their price depends on the manufacturer and configuration.
- In completing the work, you must complete the floor, laying the boards on the grillage, and also sheathe the frame. You can use boards, clapboard, decking or other material as a covering.
Tip! If there is no bath on the site, you can purchase and install a steam generator for the shower cabin with your own hands, which will allow not only to wash in it, but also to steam.
This is where the simple summer shower assembly process is completed.
Conclusion
A shower cabin can be easily installed, so every home master can cope with this task. The only thing is that all actions must be carried out slowly, carefully and in accordance with the assembly scheme. As for the booth at the summer cottage, it can be made entirely independently of wood and other building materials.
From the video in this article you can learn some additional information on the topic voiced above.