How to install a suspended toilet: an overview of technology
In this article we will look at what constitutes such a non-standard accessory as a wall-hung toilet. We will understand how it differs from the standard appliance, and also look at how the installation of a suspended toilet can occur.
This review is useful to you in any case. Even if you plan to hire masters, then at least you will understand how well they act. After all, there are a lot of nuances.
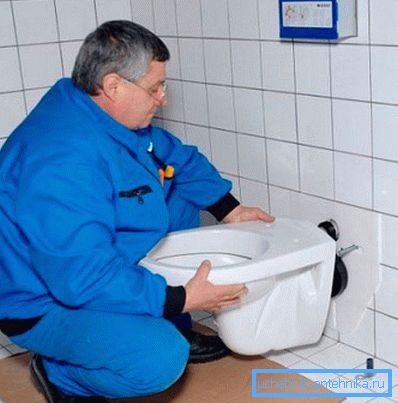
Well, if there is a desire to save money and work with your own hands, then the article will at least help to understand the details and step-by-step actions.
But we will begin not with editing, but with comparison.
What is better - wall or floor toilet
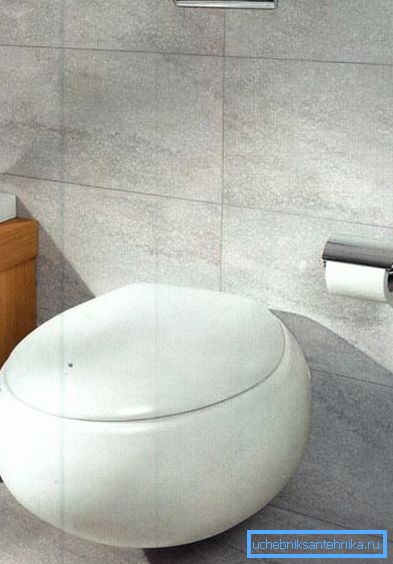
All data are shown in the comparative table below.
| Wall construction: | Outdoor: |
| They have a unique appearance due to the fact that the hanging bowl looks quite unusual. In this case, a hanging cistern for a toilet bowl of this type is most often hidden inside the wall, which of course visually increases the space. | We can say that the design, the appearance of floor-mounted appliances, in a sense, has become boring. That is a special highlight in the interior of the bathroom, in this case, you do not bring, alas. |
| To install the structure, a wall or other support with high bearing capacity is required. The toilet itself can withstand a weight of up to 400 kg. However, this quality, of course, is canceled if the plane on which it will be held is made, for example, from drywall. | The installation instructions for the product do not provide for any special requirements for the floor and walls, and this, of course, is a huge plus. |
| Installation work is quite expensive, and it lasts longer. Due to the fact that almost the entire system (including sewage pipes), it is imperative to hide it either inside the wall or install a niche for them. Yes, in principle, you can leave the communication outside, but then what's the point in a wall unit? After all, the main purpose here is a beautiful appearance. | Assembling a floor accessory is, in fact, a few hours of time. Indeed, in most cases, you do not need to chisel, deepen, etc. It is enough to attach the seat to the floor, attach the tank and sewer pipe. That is, installation of the floor construction of the toilet bowl is easier to perform. |
| The price of products is quite high. Usually wall-mounted appliances are at least 2.5 more expensive than floor plumbing. | The cost of the goods is quite acceptable for everyone. There are budget solutions, middle class and elite devices. |
| Since the suspended toilet device assumes that the tank will be hidden inside the wall, and also covered with a sound-insulating layer, then there is one important plus - the maximum noiseless drainage of water. | In this case, to reduce the noise from the circulation of fluid is possible only by isolating the pipes of the riser and sewage. But the tank itself, unfortunately, is not subject to sound insulation. We can say that the main way to solve the problem here is a rather dense door to the toilet. |
Note! It is considered that hanging products save space, but very often this is just a marketing ploy. After all, if there is no possibility to hide the tank and the carrier frame inside the main draft wall, then you will have to make a false wall or a carrier block, which by and large will take almost as much (if not more) of valuable space as a conventional toilet.
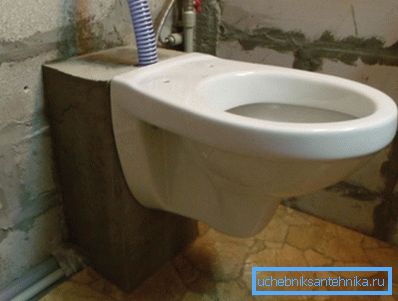
That is, in general, it turns out that the main advantages of overhead plumbing are beautiful design and minimal noise.
With the theory finished, now let's move on to practice.
Installation of the system step by step
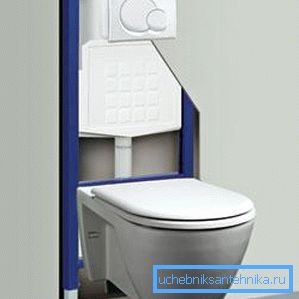
Before installation of a suspended toilet bowl will be considered, it is worth getting acquainted with what actually this device consists of elements.
Actually a few elements:
- Steel frame. That it is attached to the plane of the wall, and the seat is fixed to the frame.
- Plastic drain tank. Externally, the tank is much narrower than the standard floor options, since the depth of its mounting location usually does not allow the insertion of wide tanks. On the front wall of the tank there is a cutout for mounting the trigger mechanism.
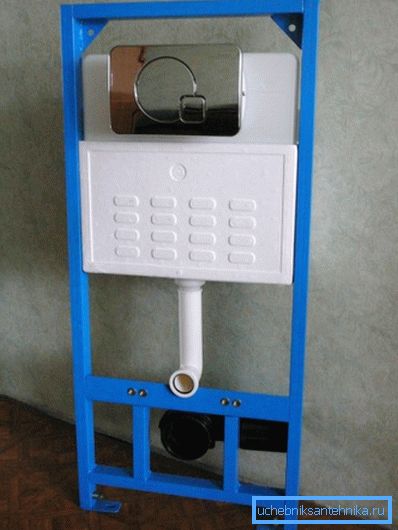
- Directly bowl toilet bowl.
- Connecting kit for wall-mounted toilet. The kit usually includes corrugations, pipes, gaskets and various adapters.
- Fasteners for fixing and connecting structures.
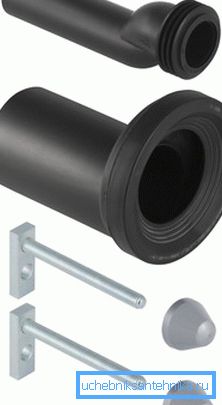
In principle, this is all.
Preparatory work and mounting frame
Preparation consists in such actions:
- If the wall is brick and has a sufficient thickness, then we take a punch and we drill a lot of holes around the perimeter of the place where the frame will be located later. After that, you need to gouge a niche using a perforator. If the wall is concrete, you will need a Bulgarian.
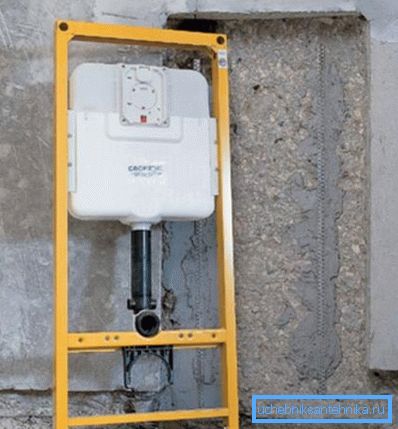
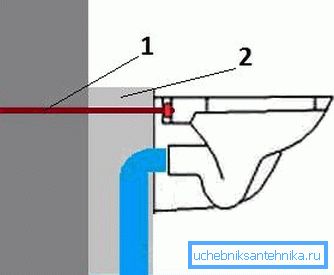
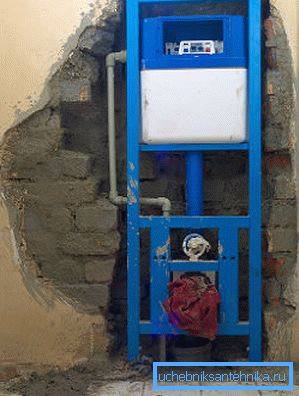
- If the niche is ready, we insert into it a tank, a frame and fasten the metal with dowels to the plane of the wall. At the same time, it is important to maintain an even vertical position - for this, use an ordinary building level.
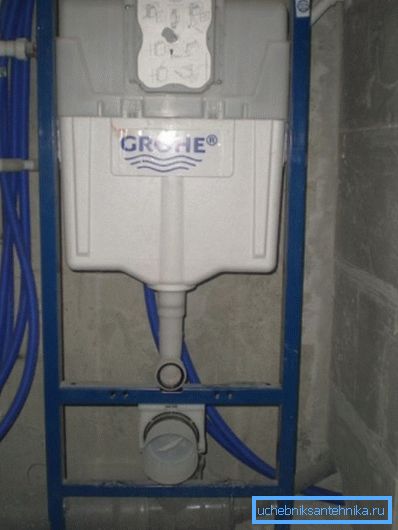
- Next, adjust the position of the fasteners on which the height of the bowl depends. In principle, you can, of course, make any desired height (focusing on the growth of the owners of an apartment or house), but the standard parameter is 40-43 cm.
- After the installation is fixed, you need to bring to the desired point the hole of the sewer pipe. Most likely, it will also need to make a strobe under it.
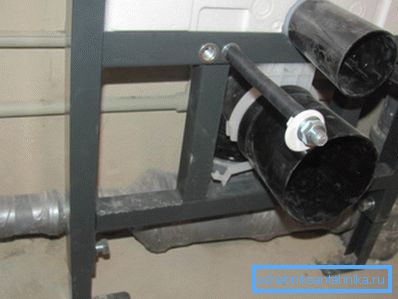
Tip: if your walls are made of foam block or plasterboard, then, of course, you can not hang a frame with a bowl on them. In such a situation, it is better to pour a concrete rectangle, which will stand on the floor, as it were, and adjoin the wall, and hang the structure on it. Just be sure to connect the concrete to the wall with metal reinforcement or bolts.
Next, you need to bring water to the tank. Now everything is done with flexible hoses, but in this case, since the design is rigidly fixed and will not move - it is better to use stationary pipes. Moreover, ordinary pipes last much longer - and this means that the risk of disassembling the facade finishing wall in this case is minimal.
Well, before you install a suspended toilet "for good" and close it with tiles or something else, you need to hang the bowl, connect the drain and check all connections for leaks. And, of course, the efficiency of water circulation is also checked at this moment.
If the test run is normal, then proceed to the next step.
Covering the frame and installation of the seat
Well, it turns out that the simplest steps remain:
- We sew a niche with drywall. It is important to use only moisture-proof sheets.
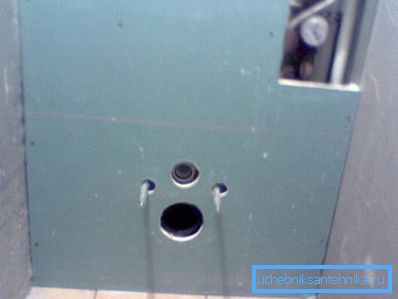
- Cut a hole in the area of the drain tank for mounting the drain mechanism buttons.
- Cut holes in drywall under fasteners, which will hang the bowl. Do not forget about the holes for pipes.
- We tile the plane with tiles or just paint.
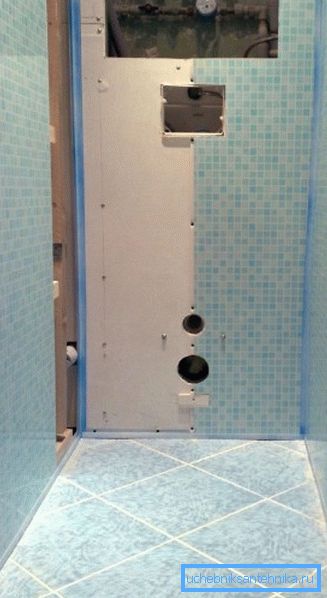
- Fasten the bowl and connect it with corrugation to the sewage system, as well as supply the water supply pipes from the tank to the corresponding openings of the bowl.
Such is the instruction.
It turns out that we hid the main part of the structure under the wall, and only the bowl remained outside.
This review is completed, and you can go to the conclusions.
Conclusion
As you can see, the installation of a suspended toilet is not something “military”, but there are still some nuances in this matter. In principle, we reviewed the main points, we hope that in general the “picture” is more or less clear. If you want to know even more, then watch the additional video in this article.