How to install the toilet on the tile
Although this installation can be called a creative process, nevertheless, many are interested in the instructions on how to properly install the toilet on the tile, so that later no force majeure arose.
And, although in most different cases there are some nuances that have to be solved on the spot, there are still general developments, although some of them cannot even be called rules. So, let's watch the video in this article together and learn about the many years of experience of plumbers.
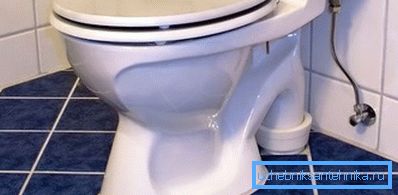
Mounting and differences
Types of toilet bowls

First of all, it should be noted that before deciding how to install the toilet on the tile with your own hands, you need to choose the right one and in most cases it depends on the configuration of the drain outlet of the device. So, the discharge of sewage in the toilet can be straight, inclined (45?) Or into the floor, therefore, being guided also by the inclination of the fitting coming from the sewer riser, you need to choose the angle of withdrawal.
For example, in order to move the toilet as close as possible to the sewer riser, you will have to shorten the distance between the outlet and the socket of the fitting to the maximum.
- So, if the socket is flush with the floor tile, then it is best to choose the option in.
- If it goes under an inclination, then option b is more suitable..
- And if the socket sticks out of the wall, then a more appropriate option.
But there is not always an urgent need to save space in the bathroom or toilet, therefore, most often for installation choose options a and b.
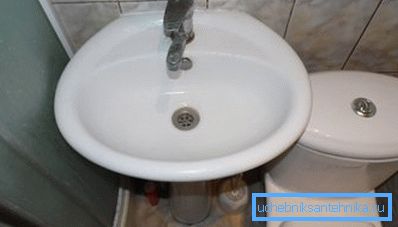
For small bathrooms, the size of the cistern in width is very important, as it may simply not fit. For example, in the same row may be a shower, sink and toilet, as seen in the photo above.
The width of the bath is 180 cm, the width of the sink on the side is 72 cm, the width of the tank is 37 cm, but the cabin itself has 80 cm! So, (72 + 37 + 80) -180 = 9, and even 2 cm of gap between the booth and sink, total - 11 cm extra, which overlapped due to the fact that the tank entered under the bowl.
Note. As you can see, the configuration of its outlet for sewage and the width of the cistern is very important for the installation of a toilet bowl.
Assembly work
Recommendation. When the installation of the construction takes place on a ceramic or tile, it is very important that after the finishing work at least two weeks pass (in a good way - four weeks)! The fact is that the installation of the toilet bowl takes place with the help of anchor bolts, which are fastened to the floor with a plastic dowel. If the screed under the tile is damp, there will simply be no fixation.
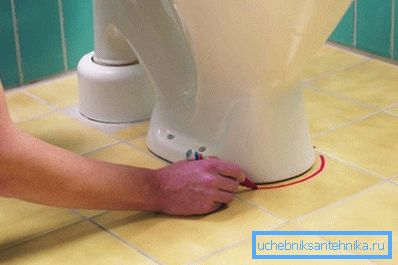
- If you have already chosen the structure you need, based on the tips given above, you need to mark the floor on the base, that is, outline it on the perimeter with a pencil or marker, and mark the bolt holes. But again, before making the markup, you need to connect the output to the fitting of the sewer riser with a corrugated hose or a plastic corner, find the most advantageous position and only then do the marking of the floor.
- After the marking is completed, disconnect the nozzle from the fitting and remove the toilet to the side so that it does not interfere with further work. In those places where anchor bolts should be attached, you make holes, and the tile is best to go through with a drill or a perforator, but in the drilling mode so that it does not burst.
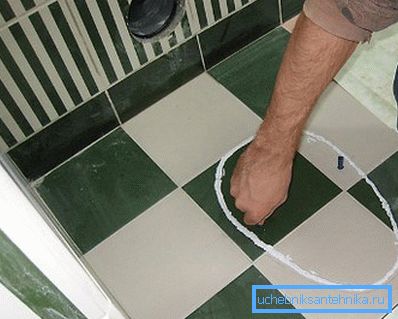
- After that, carefully sweep up all the garbage and insert plastic dowels into the holes. On the outlined perimeter of the sole, apply a strip of silicone sealant - this will hide the small irregularities that may be on the ceramic of the sole or on the tile itself.
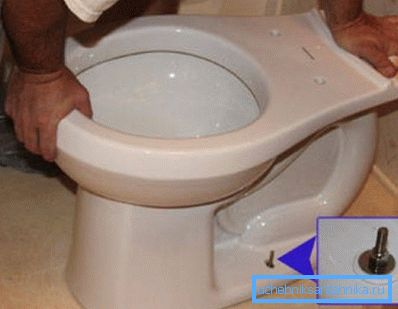
- We continue to consider how to install the toilet on the tile and now comes the most crucial moment - this is the installation of the device according to the marking on the silicone sealant. In this case, most likely, you will have to simultaneously fix a corrugated hose or a plastic corner to the fitting of the sewer riser, so it’s better to do this installation time together, with an assistant.
- If the marking is done correctly, then everything is the same, you will only have to tighten the anchor bolts in the dowels. But at the same time, be careful not to squeeze the bolt - if this happens, the ceramic sole can not stand and break in the area of the hole.
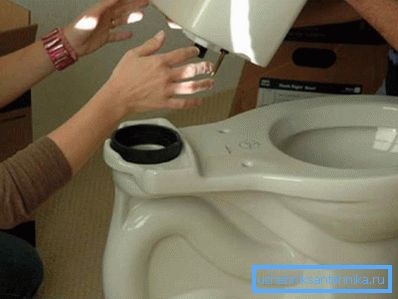
- The mechanism of the flush tank needs to be assembled and fixed in advance — this is not difficult to do, especially since the plant usually attaches instructions in pictures. Pay attention to the quality of the gasket between the tank and the disc support - if it looks like foam rubber, it is better to use silicone to seal the joint. Silicone and gaskets for mounting bolts can also be used, although this is usually not required.
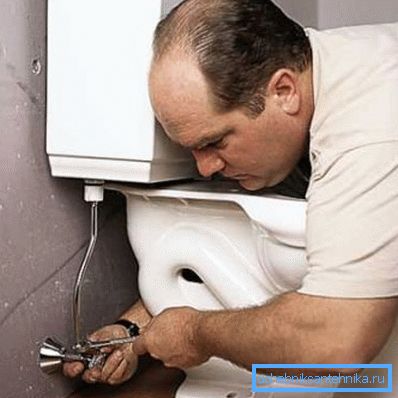
- It is best to equip the place where the hose is connected to the water to be drained with an angle or conventional shut-off valve - this will allow you to shut off the water autonomously in case of a device change or minor repairs. Hose is best to choose from corrugated steel or metal-plastic (they are the most durable).
Conclusion
It should be noted that the price of the toilet most often corresponds not only to its size, but also to the quality of the device itself. That is, by paying a bit more expensive, you thereby acquire a tank with a high-quality drain mechanism, which will last for a very long time, and also the drainage channels of the toilet bowl itself will make it possible to wash its insides well around the perimeter.