How to install the toilet on your own and save money
In the new housing or in the overhaul of the old, in most cases, the need to install plumbing fixtures. Thinking about how to install the toilet - close to the wall or sliding it to the middle of the room, you can call on the help of specialists from the housing department.
However, the device can be supplied independently, thereby saving a lot of money. How to do it, and will be discussed in our article.
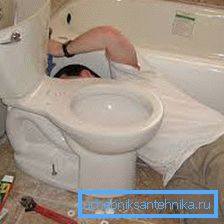
Preliminary actions
Before you install the toilet, select its model, which is most suitable for the conditions of your home.
Selection and purchase of sanitary equipment
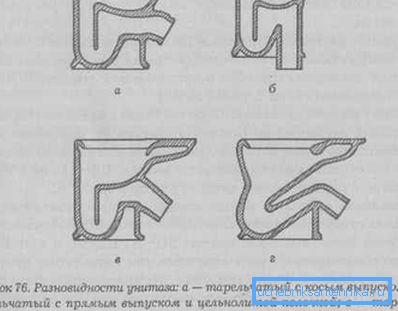
The location of the drain outlet, distinguish between models of devices:
- With horizontal output.
- With oblique (oblique) outlet (angle of 30/45 degrees).
- The vertical exit of the toilet bowl is suitable only when the drainage pipe is located in the floor..
According to the configuration of the cup, these types of toilet bowls are distinguished:
- dish-shaped;
- visor;
- funnel-shaped.
In this case, the device’s tank can mate with its base or be mounted on the wall separately.
To fix the device to the base can also be different. There are models of toilet bowls with four or two straight sections of fasteners. In addition, manufacturers produce and devices for which you need to pre-fix on the basis of special corners.
Note! Before you install the toilet yourself, you need to take into account the size of the bathroom. After all, it may happen that after its installation it will interfere with closing the door or will not allow to supply the rest of the plumbing equipment.
Dismantling the old device
- Shut off the water supply to the appliance tank.
- Click on the drain valve and wait until all the water flows out of the tank. Disconnect the hose connected to it.
- Now you can shoot the tank. Often, its mounting bolts “boil”, that is, having rusted, they do not roll. To "break" them, you need to hold the bolt head with an open-end wrench (if it is a screw, then with a screwdriver). At the same time, from the opposite side, unscrew the locknut with a wrench. You can pre-use aerosol lubricant (for example, WD-40) or kerosene, to soak the scum.
- Next, you need to twist the mount at the toilet. They can be an anchor with nuts or dowels with screws.
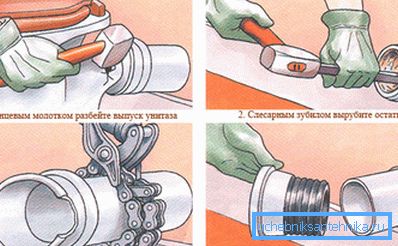
- Then it is necessary to disconnect the drain pipe of the device from the sewer pipe. Previously, this mate was often made with cement.
- Prick the cement with a chisel, holding it across the putty. Do it at two sites. Next, shake the device with effort.
- Drain should rotate and loosen. You will need to pull out the device and remove it from the toilet.
Installing a toilet bowl
After dismantling the old device, you can put your own hands on a new toilet.
The main stages of work
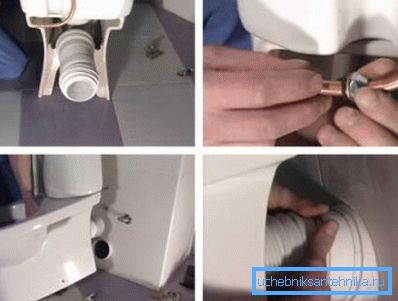
- First, it is necessary to install a corrugated or rigid pipe on the drainage outlet of the toilet bowl to mate with the sewer pipe.
Note! Ideal when the appliance enters the sewer drain without the use of transition elements. In this case, only a rubber-bordered seal is used. However, this is not always the case.
If such a seal is used, it is impossible to fix the interface section of the toilet bowl drain and sewage drainage with cement.
- Then preparing the input for water. For this is taken reinforced hose. It is screwed on one side to the water supply valve, and the other to the entrance on the toilet bowl.
- Further, the instruction prescribes to start fixing the device to the wall or floor. Details of the process will be described below.
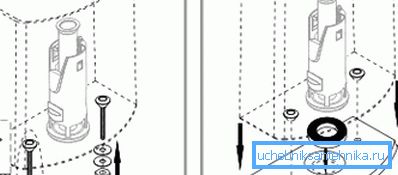
- After that, parts of the toilet bowl are assembled: a tank is installed on the fixed seat and bolted to it.
- Next, the tank drain mechanism is assembled, its operability is checked and adjusted. To do this, turn on the water and wait until the tank is full.
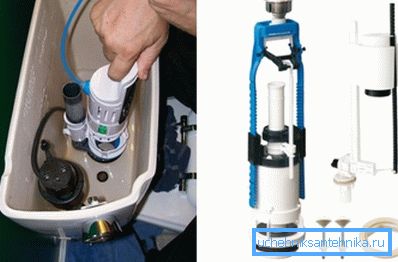
Adjustment will give the opportunity to set the level of water set. For each model of the toilet, manufacturers attach a separate instruction for assembling and setting up the drain mechanism of its tank.
- The final stage of work - screw the seat. For fixing it, the upper side of the bowl of the toilet bowl structure, closest to the tank, is equipped with holes, and the toilet seat itself is completed with bolts or anchors.
Fixation methods
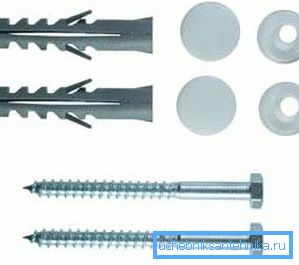
There are 4 main methods of fixing the toilet to the base.
- The use of dowels with screws. Before you install the toilet on a wooden floor, it should be noted that in this case this method is optimal.
- Fastening the device to the anchor, sealed in a screed.
- Installing it on a taffeta (wooden plank) pre-filled in the subfloor using screws.
- Adhesive fixation, usually with epoxy resin.
During the overhaul is best to use an anchor or a taffeta.
- In the first case, when filling the screed, in accordance with the future location of the fastening holes on the basis of a toilet bowl, anchors are located.
Note! It should be noted that they should protrude by 5/6 cm above the base floor. Otherwise, you cannot screw the nuts on them.
- When fixing the toilet, under the anchor nuts must be put on the rubber gaskets. They will protect ceramics from cracking when tightening fasteners and will not allow rusting on them to form.
- The best option is to purchase nickel-plated anchors. Their price is higher, but you can easily unwind such fasteners, if necessary.
Taffeta is adjusted to the dimensions of the base of the toilet.
- In the chessboard, in a checkerboard pattern, carnations are beating.
- This must be done in such a way that they act from the opposite side.
- Further, the taffeta is turned over and placed on the place of the future installation of the toilet bowl.
- After that, the floor of the bathroom is poured with a coupler. It should reach the top edge of the board.
- When the concrete is dry, you can put the device.
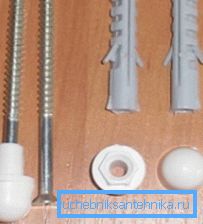
If the floor cladding has already been done, for example, tiled, wooden floors, then fixing the toilet with dowels is best.
So you do not spoil the finish.
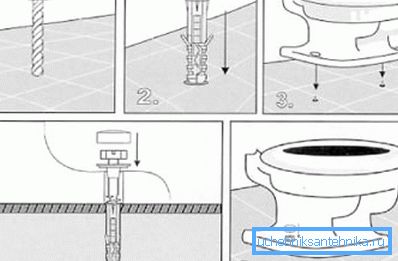
- First, after the fastening points are marked, the holes are drilled.
- Further, plastic dowels are pushed into them.
- After that, the seat of the toilet bowl is put in its place and fastened with screws.
- Do not forget to put on rubber fasteners.
- The base of the toilet, before it is mounted, it is best to put on the sealant. So the fixation will be more durable.
And, finally, in a private house, you can do without anchors, screws and bolts, and just glue the toilet. This method is optimal if the side of the device is remote and fixed separately from the base - on the wall.
First you need to handle a large sandpaper installation site of the device to improve the coupling of floors and epoxy resin. Next glue is applied with a layer of 3/4 mm on the floor and the base of the toilet bowl. Then the seat is firmly pressed to the place of installation and left until the resin dries.
Conclusion
Putting plumbing appliances on their own, when repairing housing, is not so difficult. The main thing is to strictly follow the instructions of specialists and manufacturers.
It should, and take into account the specifics of the toilet.
For example, before you install the toilet on a warm floor, it should be noted that the best way to do this is to glue it. This will prevent damage to the heating system. The video in this article contains additional information on today's topic.