How to install the toilet when performing repairs in the
When carrying out construction or repair work, many homeowners are often interested in the question: how to equip a toilet in an apartment, or how to properly install a toilet in a private house in order to ensure its trouble-free operation throughout its service life?
Immediately it should be noted that the implementation of this work must be approached wisely, since an improperly installed toilet can later lead to leakage of sewage, as well as disruption of the entire home sewage system.
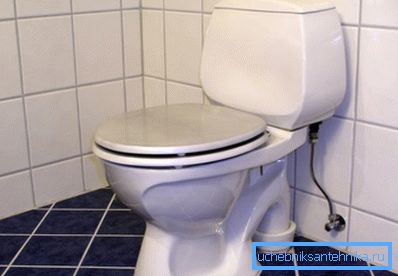
Installation and connection of a new toilet bowl
Despite the apparent complexity, with certain knowledge, all the plumbing and installation work on the installation of the toilet can be done by any housemaster in a few hours, and all the necessary materials for this can be purchased at any hardware store.
In order to make it easier for the landlord to cope with this simple task, this article will provide a step-by-step instruction that details all the technological steps of installing and connecting the toilet to the plumbing and domestic sewage systems.
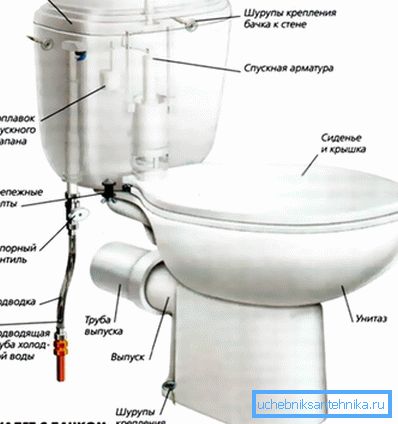
Preparatory work
The installation of a new toilet bowl should be carried out on a solid, level surface, therefore, installation should begin after the floor covering is fully equipped in the toilet. Taking into account the factory recommendations and the general rules for installing a toilet bowl, the most suitable surface for installation and fastening is ceramic or porcelain stoneware floor tiles laid on a finished concrete screed.
In some cases, especially with regard to the houses of the old housing stock, the toilet was originally installed on a thick board embedded in a concrete floor, and was attached to it with thick screws or screws.
This method is considered less reliable, moreover, during the operation of the toilet, the board, as a rule, becomes unusable, so you should get rid of it during the repair.
- If there is an old half-rotten board under the toilet, it should be destroyed with a hammer and chisel or chisel, and then completely remove the remains of wood debris.
- In the cavity formed in the concrete floor, pour the cement-sand mortar with a filler from small screenings, and leave it for 3-5 days until completely dry.
- With the help of adhesive construction mixture to lay the floor tiles, and after complete curing of the adhesive, you can temporarily install a toilet on it, without attaching to the floor.
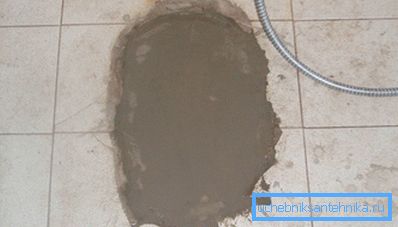
Note! The time of complete maturation of the concrete solution is approximately 28 days, therefore, the capital attachment of the toilet bowl to the freshly cast concrete floor can be performed only after this period.
Installing the toilet bowl
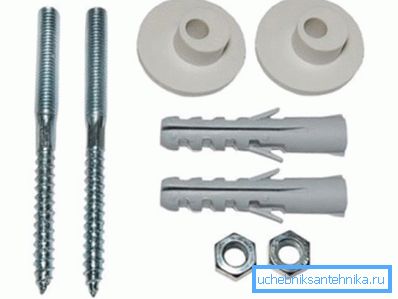
For fixing ceramic toilet bowls to the concrete floor, in most cases special combined sanitary studs with a diameter of 8 mm are used, in the amount of 2 or 4 pieces. They are usually included in the package, so their price does not matter.
The plumbing pin is a galvanized steel bar, on one side of which a metric M8 thread is cut, and on the other hand, a large-pitch screw thread designed for screwing in plastic dowels.
To grip the tool, in the middle or in the threaded end of the rod, there are notches for a spanner key, or a figured recess for the end hex.
- Before you fix the toilet, you should accurately determine its location in the bathroom. This should be done not only on the basis of personal preferences, but also taking into account the location of the drain pipe relative to the sewer pipe.
- Having set it in place, you need to outline its outlines with a simple pencil or marker, and also mark the location of the mounting holes on the floor.
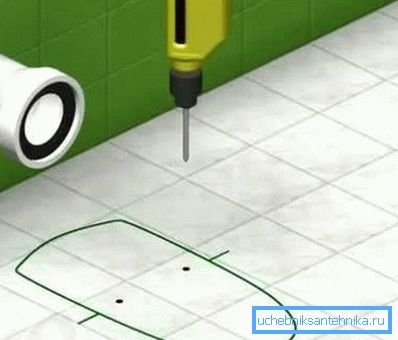
- Using a special drill on a tile with a diamond or pobedit tip, drill holes with a diameter of 10 mm., the depth of which should be slightly more than the length of the mounting dowel.
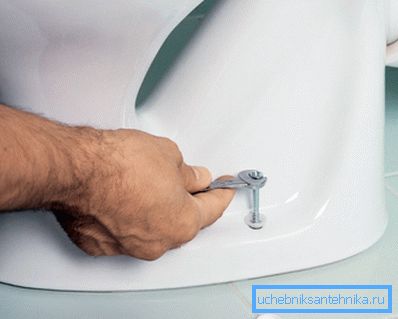
- Insert the plastic dowels tightly into the prepared holes in the same level with the floor, and then use a wrench to turn the plumbing pin into them so that the length of the metric threaded part is several centimeters above the floor level.
- Align the mounting holes with the studs coming out of the floor, put the toilet into place, then screw the brass or galvanized M8 nuts onto the studs using plastic washers, which must then be closed with plastic decorative caps.
Tip! In order to make the toilet more tightly and evenly pressed to the floor, before installing it, you can put a gasket, pre-cut according to the shape of its base, from thin rubber sheet or linoleum on a polymer base.
Sewerage connection
When performing plumbing work, you need to understand that proper installation of a toilet bowl with your own hands must ensure that the drain connection is completely sealed to the inlet of the sewer pipe.
This is achieved through the installation of special bell-shaped connecting elements, which, depending on the specific conditions, can be of several types:
- Rigid PVC plastic adapters with rubber gaskets are used in the case of direct positioning of the drain ceramic pipe in front of the sewer pipe.
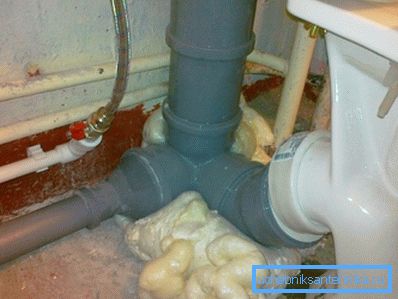
- Adapters with an eccentric are used with a slight displacement of the axis of the nozzle horizontally or vertically relative to the receiving socket of the sewer pipe.
- The flexible corrugated pipe is used in case of a significant displacement or removal of the toilet bowl, in any direction with respect to the inlet of the sewer or vertical riser. How to install the corrugation on the toilet, you can see in the figure below.
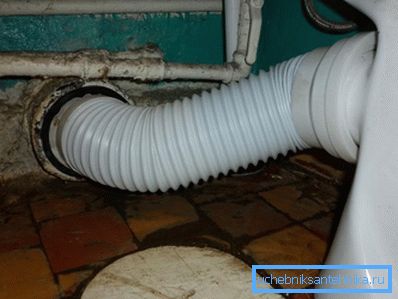
Tip! Due to the large number of small folds, the corrugated pipe is prone to the formation of oozy and fatty deposits, and also contributes to the accumulation of small debris, so if possible, it is recommended to use rigid connecting elements.
Installation and connection of the flush tank
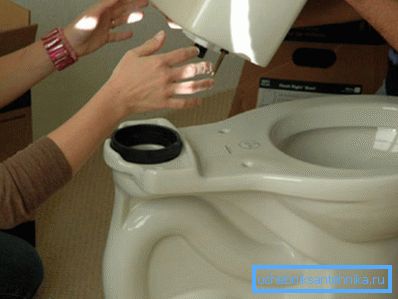
All modern models of compact toilet bowls, as a rule, are supplied from the factory with a flush cistern with installed stop valves, therefore, to install it, you just need to attach the cistern to the toilet cistern, and connect it to the water supply system using reinforced flexible connections.
- Install a pad of flexible porous rubber (included in the delivery set) on the seat of the drain tank, then install the tank from above and fasten it with two bolts and nuts with wide washers, evenly and alternately tightening them from two sides.
- To the threaded inlet fitting, use a union nut to attach a hose of a flexible eyeliner of such a length that it is not loose, but does not sag too much.
- Open the water inlet tap and adjust the float gate valve so that when filling the drain tank it completely blocks the water supply.
- Run a few flush toilets in maximum mode, after which make sure that there are no leaks and secure attachment of the toilet to the floor.
Conclusion
When installing the toilet, you need to keep in mind that all threaded connections must be sealed with a special fluoroplastic tape (FUM), and when assembling the socket connections use sanitary silicone sealant.
To get a visual idea of how this is done, you can watch the video in this article or explore similar thematic articles on our website.