How to make a sewer in the house: a step-by-step
If you need to make a sewage system in a private house with your own hands is quite real. Of course, this task is quite laborious, and it is best to plan it along with the construction of the house, but with proper preparation even the beginner will cope with it.
Below we describe the algorithm of works on the arrangement of the drainage system, which takes into account the peculiarities of a private house.
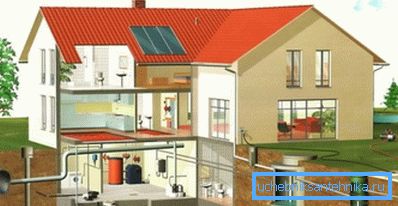
Outdoor system
Septic tank or cesspool
Arguing how to make sewage in a private house itself, many overlook the fact that intrahouse communications as such represent not the most large-scale area of work. In fact, it is far more laborious to equip a reservoir for sewage, since the possibility of connecting to a centralized sewer is by no means always the case.
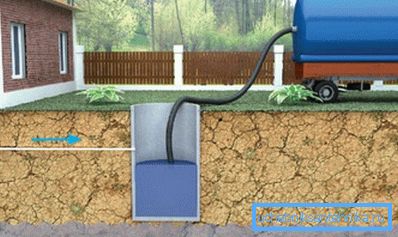
Depending on the principle of operation, tanks are divided into:
- Accumulative - filtering and non-filtering cesspools. Such structures have a fairly simple structure, but require regular (with intensive use - several times per season) pumping.
- Recycling - septic tanks and biological treatment stations. Arrangement of such systems will be more complex and costly, but they can work either without pumping out at all or with pumping out once every three to five years.
Tip! Arguing how much it costs to make sewage in a private house, you need to take into account the cost of its maintenance. And if you consider that the price of a single cleaning of one pit can reach 3 thousand rubles (renting a sewage truck plus recycling a certain amount of waste), then sometimes it is more profitable to install a more expensive septic tank.
We construct the septic tank according to the following scheme:
- In the selected place (it must comply with sanitary standards and be located away from the water intake) we dig a pit with a depth of about 3 m.
- The bottom of the pit is carefully aligned.
- Inside we install a formwork of wooden shields, forming two chambers: a sump and a filtration well.
- Fill the formwork with concrete, reinforcing the structure with steel reinforcement if necessary.
Tip! It is also possible to assemble septic tank chambers from concrete rings or old tires of large diameter. Sometimes chambers are built of brickwork, but for this purpose it is better to use a used building stone, otherwise the price of the structure will be too high.
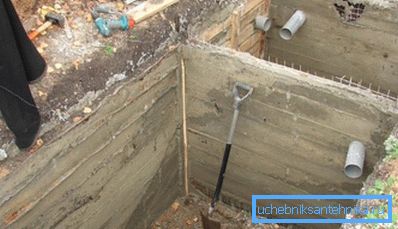
- The bottom of the first chamber, the settling tank, is carefully sealed with clay, after which we concrete.
- At a height of about 1.7 - 2 m from the bottom, we install an overflow pipe connecting the sump to the filtration well.
- At the bottom of the filtration well we fall asleep a layer of coarse gravel. Also in the lower part of the chamber it is possible to drill several wells of small diameter and fill them with large pebbles, so the liquid will be absorbed into the soil much more intensively.
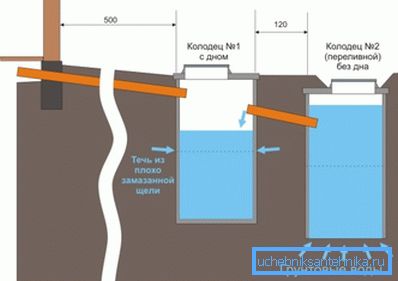
From above we mount the overlap of thick boards covered with a layer of concrete or soil. In the ceiling we leave a hole for the hatch (pumping out will be performed through it), and also install the ventilation pipe.
Pipeline laying
The story of how to make a sewage system for a private house would be incomplete without describing another element - the pipeline connecting the house itself with a septic tank.
Instructions for its installation is as follows:
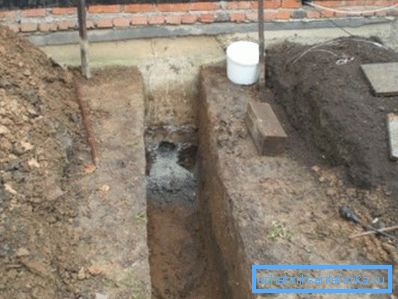
- We dig a trench from the sewage tank to the building. Its depth should allow the pipe to be laid below the level of soil freezing, otherwise in winter ice jams and rupture of the pipeline walls are possible.
Note! Where this is not possible, it is necessary to isolate the external section of the sewer network in high quality or to lay a heating cable nearby.
- We try to plan the pipeline itself with the minimum number of twists and turns.
- The bottom of the trench is carefully leveled, after which we form a cushion of sand-gravel with a capacity of up to 15 cm in its lower part. We moisten and sand the backfill.
- Then, moving from the septic tank to the house, we begin to lay pipes (preferably polymer, with a diameter of 50 or 110 mm). The optimum slope of the pipeline is from 3 to 15 cm per linear meter.
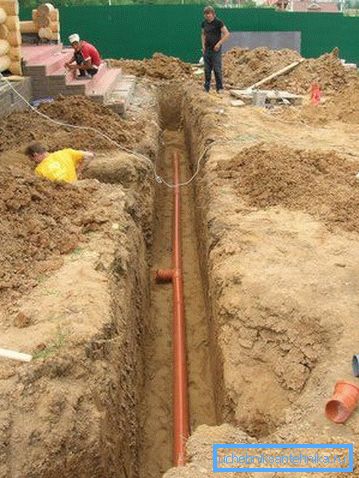
Note! When installing pipes with a large slope, the speed of the flow increases, and solid particles wear out the internal surface of the pipeline much more strongly, which leads to early wear of its elements.
- We connect the joints of pipeline parts as tightly as possible. At the same time, we closely monitor the absence of protrusions or burrs on the inner surface: the smallest irregularity risks becoming a place for the formation of blockage in the sewage system.
- If the pipe has a considerable length, then every 10-15 meters it is necessary to equip the so-called inspection hatches. We also install revisions at every turn, since this is where cleaning is most often required.
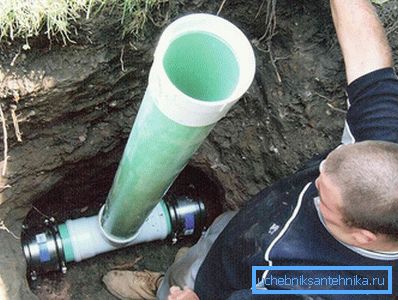
The sewer pipeline is brought into the house through a hole in the foundation, after which we carefully seal this area.
Internal system
Basic plumbing fixtures
With the outer part of the system sorted out, it's time to go inside the building.
When we do sewage in a private house, we first need to decide what devices will be installed there. In accordance with this list, we will plan the configuration of the pipe layout and its diameter.
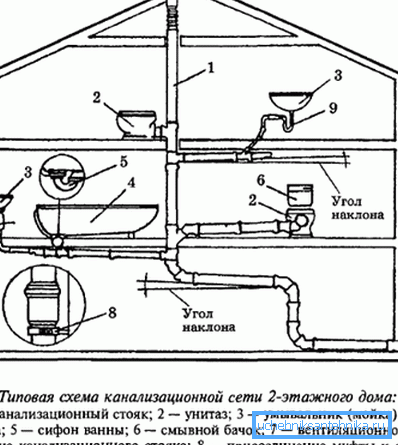
The list of domestic plumbing depends on the type of construction. In a country house, we usually confine ourselves to one or two sinks and a toilet, while in a large house there may be a bath (and not one), a shower stall, several latrines, etc.
The process of installation of devices is not difficult, but to connect them into a single system, you should follow some fairly simple rules. In the table below we give the diameters of the pipes to be used during the connection:
| Design | The optimum diameter of the pipe, mm |
| Main riser | 90 -110 |
| Toilet | 90 -110 |
| Combining several devices on one sink | 70 - 85 |
| Shower cubicle or bath | 50 |
| Wash Basin, Sink, Bidet | up to 45 mm |
Tip! The greater the release of the device, the closer to the riser it should be located. It is advisable to install the toilet in close proximity to a large-diameter vertical pipe.
Pipe layout
Having decided what devices we will have, and how we plan to assemble them, we can proceed to the laying of the pipe system. It is best to do this before the beginning of the finishing: the process will be less laborious, and masking the elements of the sewage system will not be expensive.
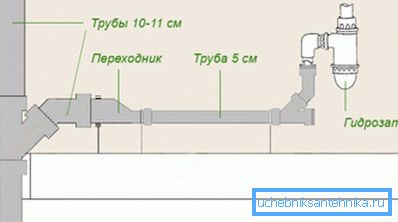
We work as follows:
- On the plan we denote the installation sites for the sources of sewage. Approximately we calculate the required length of pipes, the number and configuration of fittings. We buy the necessary materials with a margin of about 15-20%.
- First, in the wall niche or in a separate box, we mount the riser, which in the lower part is connected to the outlet pipe. On the riser we provide areas for connecting the horizontal parts of the wiring.
- In the upper part of the building we equip the outlet of the fan pipe for ventilation.
- Next, cut off the connecting pipes with a hacksaw in accordance with the required dimensions, carefully clean the edges and connect them with fittings with horizontal sections.
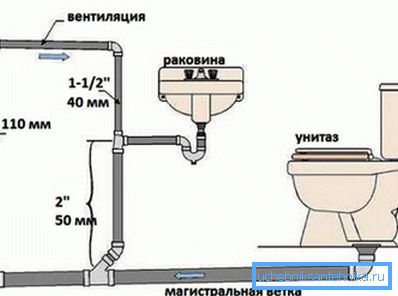
Tip! Before you make a sewer in a wooden house, you need to pre-cut through the walls of the channels through which the pipes will pass, and install fixing rings in them. This will allow us to protect the sewer system from deformation due to shrinkage of the walls of the building during drying.
- Pipe from the points of discharge to the riser must be laid with a slope. For internal parts of the sewage system, the optimal slope is about 2 mm per linear meter.
- With open laying, all parts are fixed to the walls with fixing clamps on anchors.
- In some cases, a hidden gasket provides for sealing the sewage system laid in the gates with a solution, but in this case it is necessary to leave at least one inspection hole in each section.
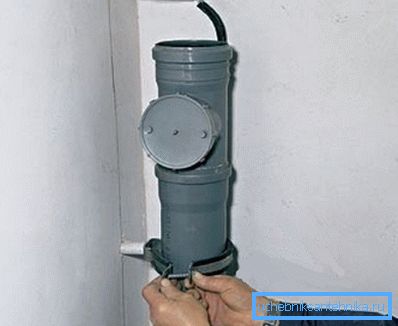
After completion of all installation work, we are obligatory testing the sewer network, filling it with water. Detected leaks are eliminated by carefully sealing the joints with a waterproof sealant.
Conclusion
You need to think about how to make sewage in your house, even at the design stage. Then we will be able to foresee a number of nuances that will facilitate the installation of a drainage system (see also the article Sewer ladders: main types and their description).
In more detail, this issue is covered in the video in this article, so before starting work, it is worth studying it very carefully.