How to make a shower tray from a tile with your own hands,
Modern closed shower enclosures are an excellent alternative to outdated bulky reclining baths, however, despite the convenience and functionality, the main disadvantages of such devices are their relatively high price, as well as the fact that even a small compact shower enclosure requires a significant amount of free space for its installation.
The most successful solution to this issue should be considered a home-made shower tray for tiles, which can be easily installed in a separate or combined bathroom of a residential apartment, as well as in a bath or bathroom in a private house.
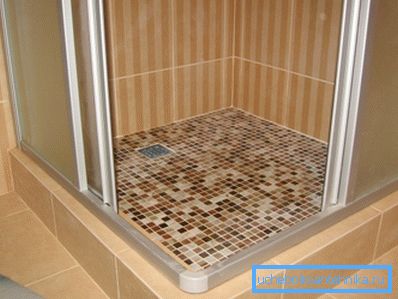
Arrangement of built-in tray in the bathroom floor
In addition to low manufacturing costs, the built-in shower tray under the tile has a number of other indisputable advantages that make it more convenient and advantageous to use compared to standard shower boxes and factory-made cabins.
- The shape and size of the homemade pallet can be made so that it will make the most efficient use of the useful floor space of the bathroom or bathroom.
- The low location and low board height make it possible to install a shower cabin in rooms with low ceilings.
- The front surface of the ceramic tile has high strength, and also withstands the effects of alkaline, acidic and abrasive detergents, therefore, has a high durability, and is also easily amenable to daily care.
In order for the reader to be able to independently implement such a solution in his apartment, this article will describe in detail how to make a shower tray from tile using inexpensive and affordable building materials.
Preparatory work
During the adoption of water procedures, this device will experience significant mechanical stress, and in addition, its sides and the base will constantly come into contact with water, so before you make a shower tray from a tile, you must perform a preliminary preparation of the surface of the subfloor and the adjacent bathroom walls rooms
- First of all, you need to completely free up the room, and remove lagging ceramic tiles, peeling plaster, or other old floor covering from the floor and walls.
- To clean the dust-free porous surfaces of mineral materials with a penetrating primer containing antifungal and antiseptic additives.
- After the primer dries, perform a waterproofing of the surface with a shower, thoroughly soaking the floor, walls, and the corners between them, heated by bitumen mastic, and lay one or two layers of roofing felt on the floor.
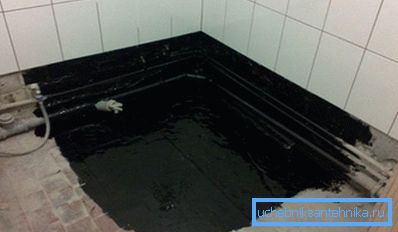
Tip! If the previously laid ceramic tile on the bathroom floor is in good condition, does not fall off anywhere, and is securely fixed to the concrete base, it can not be removed, and a waterproofing coating is applied on its surface.
Installation and connection of the drain system
First of all, you need to install and connect to the domestic sewage system, drainage and drainage of waste water, since such a device of the shower tray from tiles involves a non-separable structure, and accordingly, access to the drain communications after pouring the finished concrete floor will not be possible.
- Install a drain ladder in the center or in one of the corners of the future shower cabin, and fasten it to the sub floor so that its upper plane is located at the level of the intended final floor.
- With the help of sewer pipes with a diameter of 50 mm, connect the drainage drain with the common vertical sewer riser of the apartment.
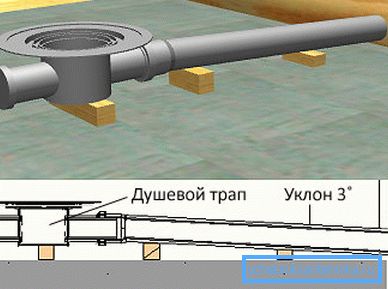
- Using wooden bars of the required cross-section as spacers, ensure the slope of the drain pipe is at least 2 ° -3 ° to the horizon, directed towards the general sewer riser.
- Check the efficiency of the drain, and ensure that there are no leaks, pouring 1-2 clean buckets into the drain hole of the drain.
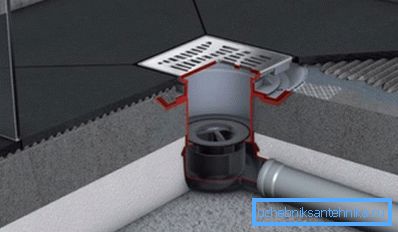
Tip! In order to ensure the tightness of the socket connections of sewers, it is recommended that the joints be coated with silicone sealant before final assembly.
Forming a pan bowl
The side walls and the bottom of the shower base must be able to withstand the weight of an adult, and in addition have a substantial margin of safety, and besides, it is good to withstand significant rapid temperature changes, and not to collapse under the influence of water.
Taking into account these factors, in order to make a shower tray from a tile with your own hands, you need to use high-quality silicate or kiln bricks, a masonry cement-sand mortar, and a liquid concrete mix to fill the floor screed.
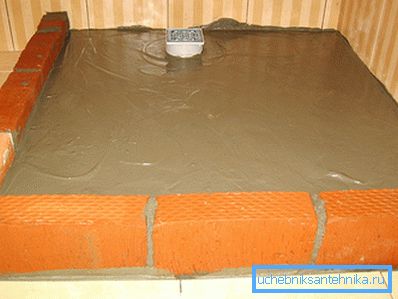
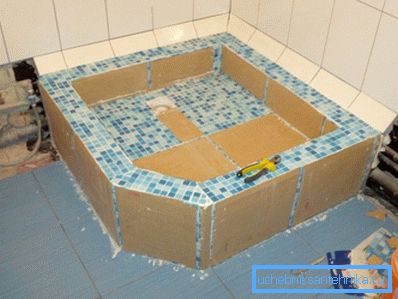
- On the contour of the proposed shower stall, lay the sides of the bricks to the desired height, bonding them together with the help of masonry cement-sand mortar.
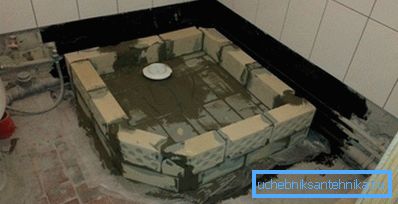
- Inside the formed bowl, lay a single layer of foam or extruded polystyrene foam as a heater on the base of the floor 40-50 mm thick.
- On top of the foam lay metal reinforcing mesh with a mesh size of 30-50 mm, and pour a layer of concrete mortar with a thickness of at least 40 mm.
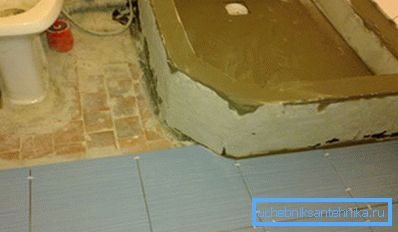
- The joints between the bricks carefully cover the cement-sand mortar, and perform grouting, until a smooth, even surface is obtained, without cracks and cracks, and a self-leveling compound is applied to the concrete screed, on which it is necessary to form a uniform slope on the floor towards the drain hole.
- After the final setting and complete drying of all mortars, evenly cover the entire bowl of the pallet with bitumen mastic, or other liquid waterproofing composition.
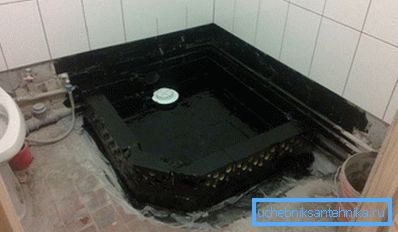
Tip! In cold rooms located on the ground or basement level, for extra comfort during water treatment procedures, a shower corner with tiles in a pan can be equipped with a water or electric underfloor heating system before pouring the screed.
Finishing finishing work
In order to give the finished product a finished appearance, as well as to provide additional protection against moisture and external factors, it is most advisable to use the outer lining with ceramic tiles or decorative mosaics, which you can easily put your own hands on using a special adhesive mixture on the cement basis.
- Laying ceramic tiles need to start from the far corner. To do this, apply a layer of adhesive to the concrete or brick foundation, then remove its excess with a notched trowel, and press the tile evenly over the entire area.
- Thus, the entire surface needs to be laid. To achieve a uniform uniform gap between all the tiles, you need to use special plastic crosses, and control the vertical and horizontal position with the help of a building level.
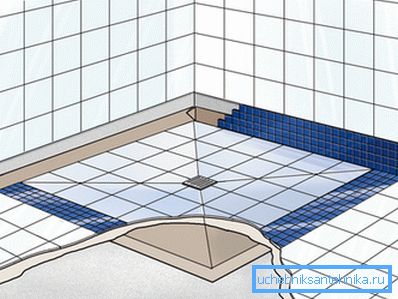
- The installation of a decorative mosaic is similarly done, with the difference that for convenience of work, it is fixed on the mounting cloth mesh, so it is easy to cut it with a knife to the desired shape or size.
- After all the decorative mosaic or ceramic tile for the shower tray is laid, you need to grout the joints using a special waterproof trowel compound, made on the basis of microcement.
- It must be diluted with water in accordance with the instructions for use, and then wipe thoroughly into all the seams and joints between the tiles, using a special rubber spatula.
- Without waiting for complete solidification, you need to remove the remnants of the grout from the front surface, then wash it with water, and wipe dry with a soft cloth.
Tip! Before finishing, the entire bowl of the shower tray on top of the waterproofing layer must be covered with a special mineral compound called “Betonokontakt” and serves to improve the adhesion of the liquid adhesive mixture to bituminous waterproofing materials.
Conclusion
In conclusion, it should be noted that such pallets are, in fact, a universal technical solution that can be used as the simplest shower by installing a lightweight protective screen on its sides, and you can equip a full-fledged shower box by installing a multifunctional enclosed shower cabin of suitable size and forms.
To get a visual idea of how professional masters do this, it is recommended to watch the presented video in this article, as well as to study additional information that can be found on this site.