How to replace sewer pipes: independently change the cast
In such a case as the replacement of sewer pipes, there is no doubt that there are many nuances and difficulties that the master needs to know about. Yes, and without an understanding of the essence of the work, it is unlikely that it will be possible to make a replacement with really high quality.
In this article, we will talk about how to change old systems with new ones, why you should choose plastic materials for installation. In addition, we will also understand which rules you should definitely follow and what you can save on.
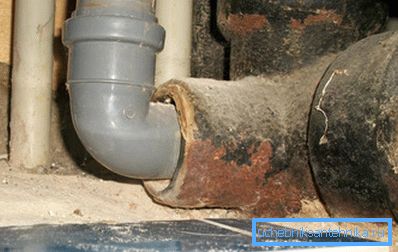
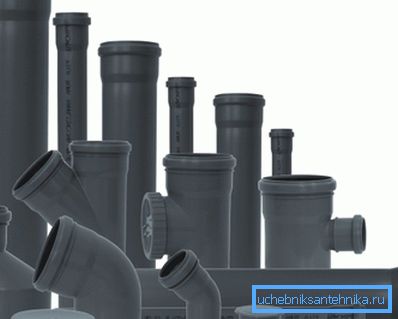
First consider the most important point.
What are good plastic products
In the comparative table below we gave all the data on this material.
| Product Property | What does this mean in practice? |
| 1. Low weight. | This quality allows the system to be mounted on absolutely any walls, without inventing various reinforcements. That is, plastic without problems can be fixed both on the brick plane and on the plasterboard partition. And try to hang the iron rail line on drywall? |
| 2. Large assortment of fittings. | This means that a lot of different adapters have been invented for such systems. This corner, and crosses, and tees with taps, plugs, etc. And such elements of sewer pipes allow you to build a highway with any configuration. |
| 3. Smooth surface structure. | The plastic plane really has this quality - it really is very smooth. Due to this, there is practically no garbage inside the pipes, and there are no fatty growths. |
| 4. To build the system does not require special skills. | That is, it is not necessary to use electric welding or any soldering irons to connect the elements to the master. Products are simply inserted into each other in series and everything. Thanks to this concept, the assembly becomes very fast and significantly cheaper. |
| 5. Resistance to corrosion. | Plastic does not rust, is not afraid of temperature fluctuations and does not become brittle with time (like cast iron, for example). And this means in practice that the “route” of such products will last a really long time. |
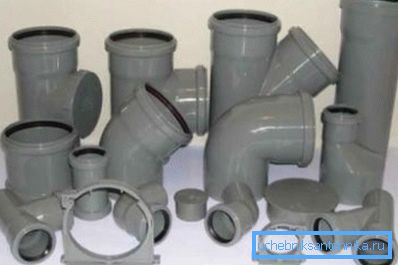
Pay attention to a small lack of plastic - the material is not very resistant to significant mechanical shocks. Therefore, in those places where there is a risk of receiving such strikes, the highway must be further protected. As a rule, in such cases, boxes are used, or the “route” is simply simply buried inside the walls.
In principle, it turns out that changing cast iron to plastic is very advisable. At least because it will be less frequent to clean such sewage system and it will last longer. And this, note, despite the fact that the price of plastic products strongly "does not bite."
Well, now let's consider how to actually change the old system for a new one with your own hands.
Sewage Replacement
It is worth noting that as a good example, we take the disassembly and assembly of the main riser, and not the entire trunk line as a whole. Because, in fact, this is the most difficult moment.
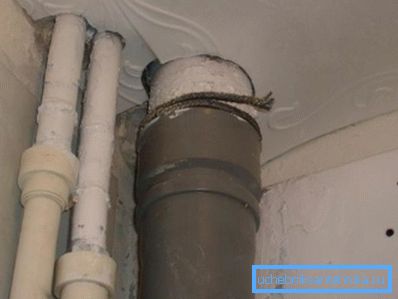
So, replacing cast iron sewer pipes with plastic ones - how is this done?
It all begins, of course, with the dismantling of the metal line.
Dismantling the cast-iron riser
The very first thing to do is to coordinate with the neighbors above those days when you will change the riser. Indeed, during such work, they will not be able to use the sewage system (for obvious reasons).
Pay attention also to the fact that the dismantling of the old cast-iron riser can be so large that in many cases it will not be possible to change the pipes only in your apartment - the neighbors will have to do it as well. Therefore, do not rush to immediately break the line - if you have any doubts, it is better to take a one-time consultation from a specialist as to the best way to proceed in a particular situation.
But, in principle, the replacement of the sewer pipe in the toilet is done in approximately the following sequence:
- On the plane of the floor and ceiling, as if around the place of entry of the riser into the ceiling, we destroy the integrity of the cement mortar or polyurethane foam. Such a step will allow us to shake the pipe a little if necessary.
- Take the grinder, a large disk for metal and cut the riser across (approximately in the middle). Moreover, if the toilet is lined with tiles, then it is desirable to cover it with a film or an old blanket - sparks from the grinders may leave traces when they hit the surface of such a floor or walls.
- After the cross-section is made, the upper half of the pipe should be moved to the side and using the loosening method try to remove it completely.. After this, the same should be done with the lower half of the riser.
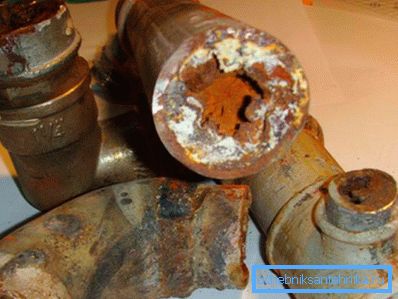
In principle, this dismantling is completed. In most cases, only the cast-iron entry point on the floor remains from the old riser. It will continue to include a new plastic pipe.
We now turn directly to the installation of the highway.
Build a plastic system
Step by step instructions here will be something like this:
- We are determined in which directions we need to bring branches. Usually, this is a diversion to the toilet, bathroom and kitchen - while the bathroom is usually connected not to the main standpipe, but to the fitting that leaves the toilet. Accordingly, we need to insert into the main cast-iron drain tee-cross. The upper end of the fitting will go to the ceiling, the lower one will be inserted into the cast iron, one side tap will go to the kitchen, and the second to the bath with toilet.
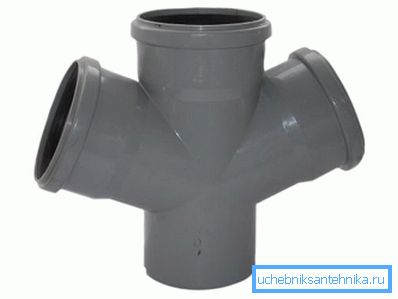
- After the bottom sewer fitting is installed, the main riser pipe should be inserted vertically into it. Usually it has a length of two meters and a diameter of 100 mm. So, we need two such products to assemble the system.
Note! The top pipe, most likely, just cannot be inserted like that, because it will have to be cut off and connected to the highway in the higher apartment. And you need to cut the plastic so that the adapter fitting can be inserted afterwards between the top and bottom pipes.
- So, we have the lower part and the upper part inserted, and between them there is a gap for fixing the adapter. Usually in such a situation, plastic products can be diluted to the side - we do this, insert the adapter and gradually reduce the main line into one straight line. If this is hard to do, then try to lubricate the inner plane of the fitting with sunflower oil.
- Now we need to “connect” the sewer for the kitchen. To do this, insert into the appropriate outlet adapter, which has an exit point of smaller diameter than the main riser. And already to this point we connect pipes with a diameter of 50 mm., And we take them to the kitchen room.
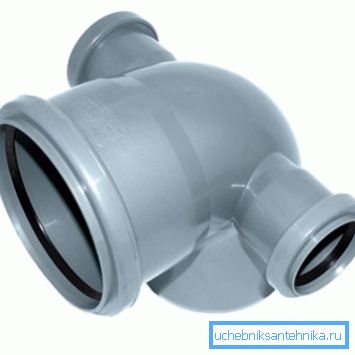
- Next, insert into the free opening of the tee fitting adapter with a side sewer drain. The main hole here will be for the toilet, and in the side branch it is necessary to insert pipes from the bathroom, which also usually have a diameter of 50 mm.
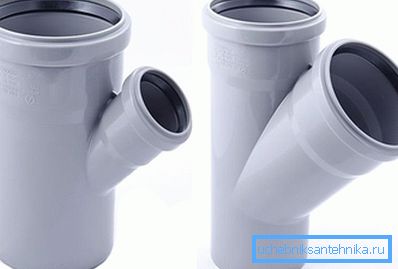
This is where the sewer pipe replacement is completed. We hope that the principle and scheme of work are approximately clear.
Let's summarize the article.
Conclusion
We thoroughly figured out how to replace the cast-iron sewer pipes on plastic products. As you can see, there is nothing difficult in this matter and everything is completely realistic to do by yourself. So you can safely try to apply the information provided in practice.
Well, if the information seemed to be little, then check out the video in this article.