Independent replacement of the toilet in the apartment
Both during capital repairs and partial repairs, many tenants are wondering how to change the toilet in an apartment or house (install a new one) and what needs to be done to prevent the wizard for repair and installation later.
Such a process cannot be called too complicated and, if desired, any average resident can cope with it, but for this, in any case, certain knowledge of some nuances is necessary. Installation of the toilet can be made on any smooth and rigid horizontal surface (wooden floor, screed), but we will tell how to do it on the tile and show you the video in this article.

Installing a toilet bowl
Preparatory work
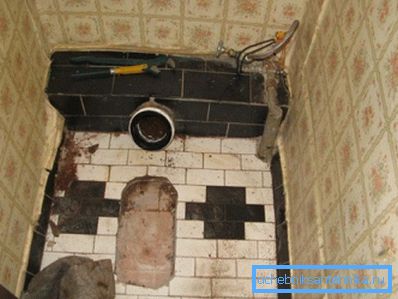
- If you live in an old apartment, where the toilet was installed on the construction project plan, then no instruction is provided for its accurate replacement - there is only one way out - hard dismantling.
- There are very few cases where the device is removed completely, without damage. - most often he cracks the sole, and sometimes it happens that to dismantle you need to break the entire knot into pieces. The last option is inevitable when the builders simply poured the entire sole with cement-sand mortar.
- When, after dismantling, you are not going to lay tiles on the floor, in any case, you need to make the surface even, therefore, remove from the old installation site all the garbage and pieces of wooden timber that you most likely will find there.
- Clear the formed deepening of dust, prime and fill with cement-sand mortar or fine-grained concrete. The term of complete drying of such a screed is 28 days. But you can do the editing in about one or two weeks.
Installation
Note. Some Network users are interested in how much it costs to put a toilet in an apartment, but this is an incorrect question. First of all, the cost of installation depends on the availability of sewage and cold water supply to the installation site, as well as on the degree of floor preparation. So, with the question of how much it costs to change the toilet in an apartment, it is better to contact a particular master who can determine this by location.
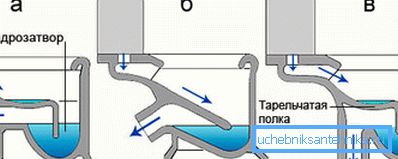
First of all, you need to clearly understand which device you are buying and which one you need in your situation, so that later there will be no problems during installation and operation.
The most important difference that you should pay attention to when selecting and installing is the angle of inclination of the outlet nozzle, and there may be three such positions and they are shown in the upper figure.
This is very important, even if you will connect to the fan tee a corrugated hose and here's why. Imagine that there is not very much space in the toilet and you need to move the toilet as close as possible to the standpipe, but at the same time the socket of the tee comes out horizontally and the outlet has a slope of 45 ?, and a corrugation is used as an adapter.
If the distance is reduced, the tube will contract and cause the cuff to slide down from the bottom of the output.
Note. A similar situation will be outlined if the socket of the fan tee is at an angle of 45 ?, and the output on the toilet is straight. Only here the cuff will crawl no longer from the bottom, but from the upper side of the discharge pipe.
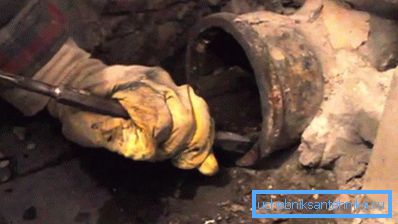
Before installation, you need to prepare a fan tee and if it is from cast iron, then there will definitely be an additional straight adapter, which you will need to pull out and replace with plastic, since it is too long.
This is best done by loosening, since it is pressed into the socket of the tee with cement mortar and / or tarred cabbage and this usually takes a lot of time, sometimes even more than an hour. If the adapter bursts (be careful not to burst the tee socket), then you will have to break it into pieces with a hammer and a chisel.
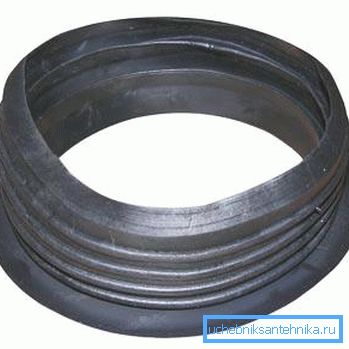
After you free up the socket of the fan tee, it must be carefully cleaned of debris, so that the rubber reduction, which is necessary for the installation of an adapter made of plastic, can fit tightly there. Install this reduction and the plastic adapter immediately.
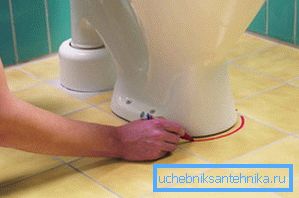
So, we continue to study how to change the toilet in the apartment itself and proceed to marking the floor under the bottom of the appliance, which can be done either with a pencil or a marker, depending on the coverage.
For marking, you need to put on the output and insert a corrugated hose or a rigid straight or corner adapter into the socket of the adapter (depending on what you will use) to accurately determine the position of the toilet bowl.
After you do this, outline the sole, mark through the holes for bolting and move the toilet aside so as not to interfere with the further process.

Drill a hole under the dowels of the anchor bolts on the marks, only the tile is better to go through the electric drill, but if it is a hammer drill, then in the drilling mode, without a blow, you will exclude the possibility of its cracking. Insert dowels in the holes and sweep away all the dust.
Now, inside the delineated perimeter, apply a strip of silicone (preferably white), as shown in the photo above - this little trick will eliminate the creak and smooth out all possible irregularities.

Now you need to do the same actions with your own hands as you did before marking - connect the toilet to the fan tee with a plastic corner / adapter or corrugated pipe, just put it exactly on the silicone strip so as not to smear it on the floor.
After you lower the device to the floor, you need to bolt through the holes in the sole into the previously installed plastic dowels. Tighten these bolts (usually they need a spanner or open-end wrench for 10), but do not squeeze. In order not to crack the ceramic sole.
After that, the toilet can be considered installed and you will only have to be screwed to it and connected to the cold water pipeline drain tank, where the drain mechanism itself, as a rule, is already set up from the factory (it needs only to be screwed to the bottom hole).
When installing the tank, pay attention to the quality of the large gasket, which is located between the tank and the cupboard shelf - if it looks like a sponge (has a porosity), then the junction should be smeared with silicone to avoid leakage.
Conclusion
Different toilets have different prices, but you should first of all be guided not by this, but by the technical parameters of the device, one of which (output slope) we have already mentioned earlier. Also look at which side the water hose is connected to and take into account the width of the tank so that it fits in size (also read the article Self-repairing a toilet bowl - easy and cheap).