Installation of car wash: the stages of a long way
How to install the sink on the cabinet or in the tabletop? Are there any subtleties in the installation of the mixer on the stainless steel sink? What is better - to use a regular mount or come up with some other way of fixing the sink?
Let's try to answer these questions.
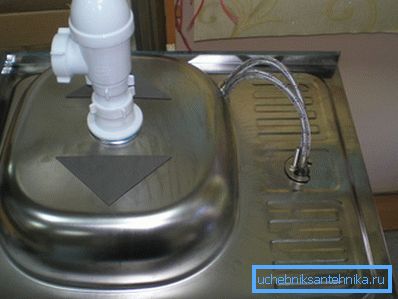
About classification
A complete list of all types of car washes will probably take more than one page. However, most of the market is occupied by mortise and overhead sinks made of stainless steel and artificial stone. In the first case, the motive determining the purchase is the relatively modest price of the product; in the second - a solid appearance and lack of noise from the water.
By the way: the problem of noise in a stainless steel is solved by a sticker on the back of the bowl of the layer of any foamed insulation.
Let's look at how to install both types of sinks for a more problematic material - stainless steel. The sink made of artificial stone is massive and not prone to deformation, thanks to which it is securely held in the groove of the tabletop with its own weight.
It should be clarified that all stone and porcelain stoneware shells seen by the author were embedded. Overheads, if they exist in nature, are incredibly skillfully hidden.
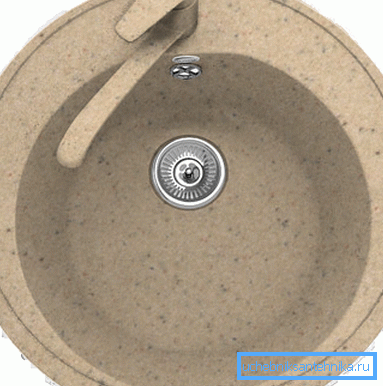
Mortise cleaning
Tools and materials
Installing a stainless sink will require the simplest of tools.
| Tool or material | Function |
| Jigsaw with a saw on wood | Slot slot in worktop |
| Drill with a drill diameter of 10 mm | Drilling a hole for a jig saw |
| Masking tape | Protection of the tabletop against damage by the jigsaw |
| Fastener kit | Shell mount |
| Silicone sealant | Sealing the joint between sink and countertop |
| Drying oil | Protection from the water ends of the groove |
| Two adjustable wrenches | Installation and connection of the mixer |
| Phillips or flat screwdriver | Installation of strapping sink (release and overflow) |
Useful: when choosing fasteners, pay attention to the amount of plastic and steel in it. The more steel and the thicker the metal parts, the greater the chances for the mounting kit to survive the installation. The abundance of plastic in fasteners - evil in its purest form.
Worktop preparation
The instructions for marking and cutting a groove are quite simple.
- Putting the sink on the countertop, draw a pencil around its outline.
- Removing the sink, we repeat the contour, retreating from it 1.5 centimeters inward.
- On both sides of the line, glue the surface with masking tape.
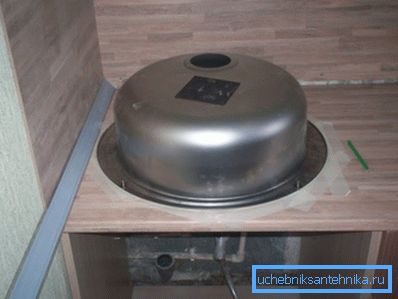
- Drill a hole inside the contour and cut out the groove. Move the jigsaw skis as slowly as possible: if you climb out of the contour of the groove, it will not be easy to hide the cut.
- We remove the inevitable burrs and saturate the butt of the cut with linseed oil.
Installation of the mixer and strapping
It will be the next step: after the sink is fixed, the installation is much more problematic.
- We wind the threads of the flexible hoses with FUM tape or polymer sealing thread and twist them into the mixer housing. Yes, yes, we are reeling, despite the presence of regular rubber seals: they are likely to be squeezed out during assembly, but the reel will perform its functions.
Important: hoses can not be screwed, holding them by braid. You are likely to tear the sheath out of the sleeve. The hose is screwed in only with a key.
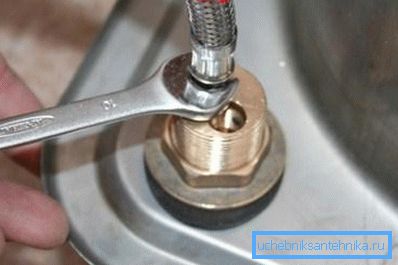
- Alternately, thread the hose nuts into the hole for the mixer in the sink.
- We pull the body of the mixer to the sink. For this is a wide nut or plate with one or two studs. An annular gasket should be installed between the body of the mixer and the sink, ensuring no leakage.
How to install the mixer to the sink as tough as possible, if it is made of thin metal? It is enough to make a liner with a hole from thick (15-18 mm) plywood and put it on the back side, pulling the mixer straight through it. It is better for plywood to precollate: this simple operation will not allow it to swell and rot when in contact with water.
The assembly of the strapping has only one subtlety: avoid considerable effort, tightening the fastening screws. Pry out the middle of the grid is much easier than it might seem.
Fastening and sealing
- Glue the standard sealing tape, retreating from the edge of the sink 3-4 millimeters.
- Plant fasteners in the grooves of the sink.
- Apply around the perimeter of the sink, outside the sealing tape strip of silicone sealant.
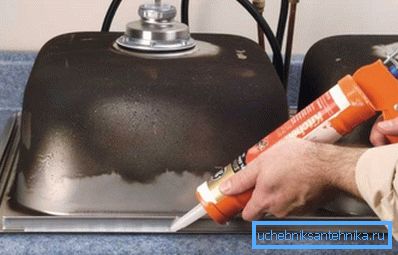
- We put the sink in place and, hooking the teeth of the fasteners to the table top from below, tighten the screws.
- Carefully remove the extruded sealant.
It remains only to connect the flexible pipes to the water supply pipes and install the siphon. The work is done.
Laid on sink
Staff fixture
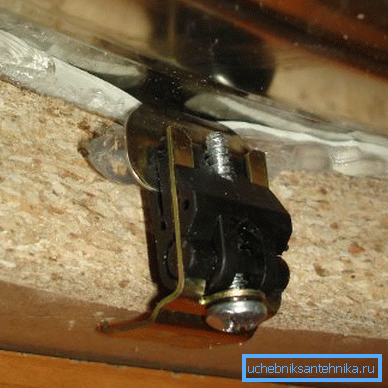
How to install a stainless steel sink on the cabinet using a standard mount? It is a plastic corners with inclined slots.
The procedure is as follows:
- Sink is established on a curbstone. On its edges from within fasteners keep within.
- At the lower point of the oblique groove of each fastener is marked and drilled hole 3/4 wall thickness in 3 mm drill.
Tip: in order not to drill the cabinet through, stick a piece of electrical tape on the drill at a distance of 12-13 mm from the edge.
- We pull down fasteners with 4x16 mm self-tapping screws. The corner should move with little effort relative to the point of attachment.
- Shift the corners, pressing the sink to the cabinet.
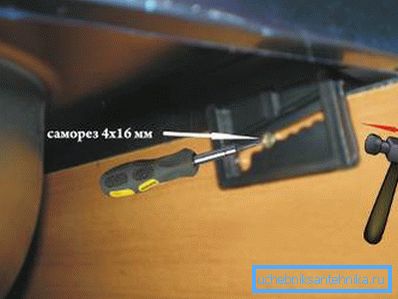
It is easy to notice that in this way the invoice washing of a hidden installation is installed without much time and effort; however, it has a very unpleasant flaw: the mount is not very strong. Especially if the corners attract the sink only to the side walls: even with a little effort, it will move in a horizontal plane.
Alternative mount
How to install the sink on the cabinet more securely? It is enough to purchase a rail of such a section so that it fits tightly behind the bends of the edges of the sink, and four galvanized overlapping plates or corners with holes for screws.
Next steps:
- Cut off the rail around the perimeter of the sink.
- We saturate it with drying oil and dry it. The wood should not rot.
- We lay the rail for the bends of the stainless steel and attract to the walls of the stand with overlays or corners.
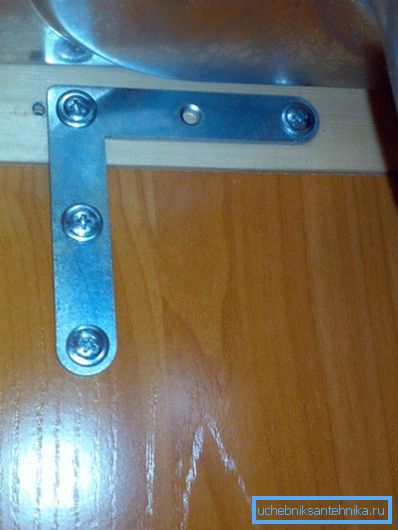
Useful stuff
Finally - a series of tips that may be useful during the shopping trip and at different stages of work.
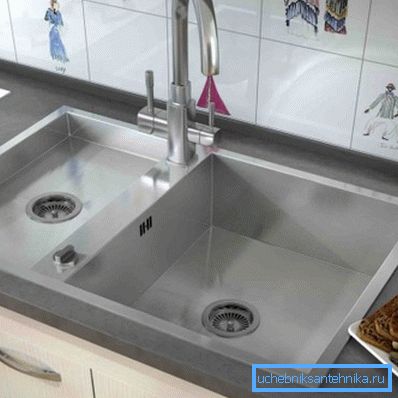
- Sink with two bowls is convenient.
- The presence of overflow is welcome. Many communal tragedies began with a clogged rag issue.
- For the kitchen more practical single-lever mixer. It can be opened without smearing it, even with dirty hands - wrist or elbow.
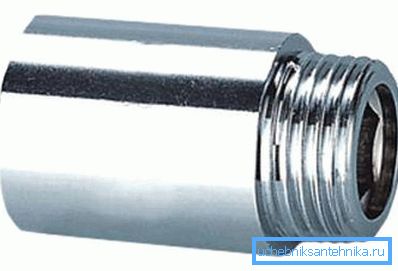
- If you have to fix flexible hoses to a steel pipe with uneven, rust-corroded edges - increase them with a pair of sleeves with kegs or half-inch extenders. Unlike the rusty edge of the pipe, they will perfectly press the gaskets under the cap nuts of the flexible hoses.
- It is better to equip the supply lines to the kitchen sink with a pair of separate valves. If the mixer is broken, you can use the water in the bathroom.
- Do not bend the hoses and do not put them tightly. The fewer bends and stresses, the longer they will last.
Conclusion
We hope that the simple recommendations given in this material will be useful to the reader. More visually to get acquainted with how installation of a sink the hands is carried out, video in this article will allow.
Successes!