Installing a toilet bowl with your own hands: how to equip a
No major overhaul in the bathroom and toilet is complete without replacing the plumbing devices there with new ones. This process is not particularly complicated, but the price of installation services, which is set by specialists in repair of premises, is often too high. The way out is simple - do-it-yourself toilet bowl installation.
The instruction, describing the process in detail, is presented below.
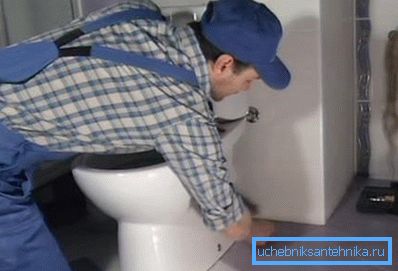
Toilet installation procedure
Dismantling the old structure
Before you begin the story about how to install the toilet with your own hands, you should understand the procedure for dismantling the old device.
The procedure is as follows:
- First of all, you need to turn off the water supply. If a tap is installed on the tap, you can use it. If not - it is necessary to block the water throughout the apartment. To do this, you will need fittings installed on the riser.
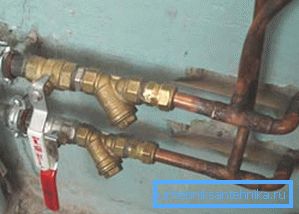
- After that, the eyeliner is unscrewed from the tank inlet and the container itself is removed. In most models, it is fastened with two bolts, the nuts of which are on the underside of the toilet bowl.
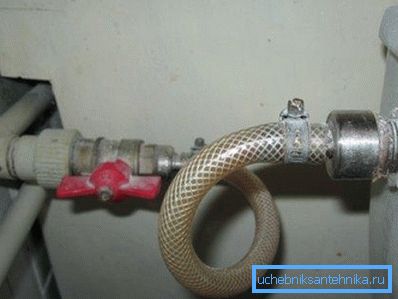
To facilitate unscrewing, attachment points can be lubricated with kerosene or sprayed with WD-40 liquid. If you want to use the product in the future (for example, in the country), use a key or a screwdriver carefully so as not to damage the ceramics.
- Having completed the dismantling of the tank, take up the mounting of the toilet bowl. It is most often bolted with anchor bolts or studs with dowels. Here, too, be careful if you do not want to split the leg.
- The most difficult process is uncoupling the throat of a sewer pipe. After all, old toilet bowls, as a rule, were sealed with tow or paint or cement, so don’t hope for an easy solution.
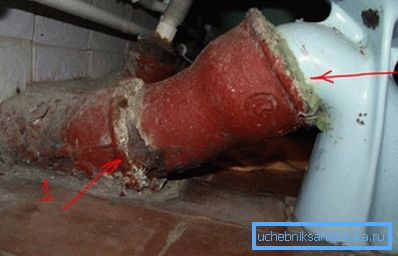
It is best to arm with a hammer and chisel, which in several places gently knock on the cement joint (until a crack is formed). Then you need to grab the bowl and lightly swing the exhaust pipe to the right and left until it comes out of the pipe.
Tip! If you are not going to use the toilet in the future, all these difficulties can be avoided. It is only necessary to take a heavy hammer and split the ceramics, then getting rid of the remnants. Here it is necessary to be careful not to get hurt by sharp edges, on which microorganisms dangerous for health can live.
- As soon as the toilet is removed, close the sewer opening immediately with a piece of cloth or stopper. The fact is that the gases that accumulate in the sewage not only smell bad, but are also poisonous. Moreover, they are explosive.
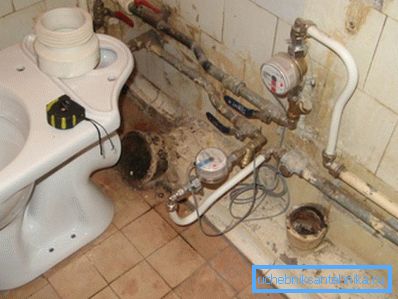
When disassembling the toilet bowl, carefully handle the drain pipes, especially if they are cast iron. The broken sewer detail will have to be changed, and this process is very laborious and expensive. Although, if you already took up the repair in the toilet room, it is advisable to upgrade the sewer system.
It is best to change the cast-iron pipes to PVC. They look better and due to the smooth inner surface they are much less likely to be clogged with waste.
The procedure for installing a new device
Now install the toilet: with your own hands, you must first prepare a platform for it:
- if the lavatory has been renovated and the floor is tiled, there is no need to take any additional steps;
- if you just change the toilet, then you need to carefully clean the place of its installation from fragments of ceramics, frozen pieces of concrete and various irregularities, otherwise the new device will sway because of the loose fit of the base.
Having prepared the basis, we begin installation of a toilet bowl:
- First of all, a plastic cuff is put on the drain neck. It is best to use a corrugated pipe, as it can take any shape you need.
Tip! Do not bend the corrugation too much. First, because its walls become thinner and can break, and secondly, too strong bends can cause blockage.
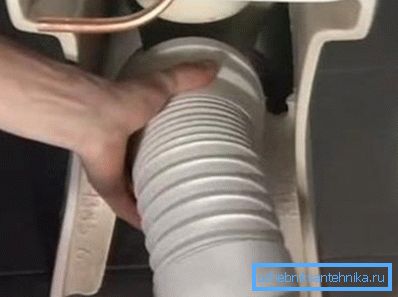
- To ensure tightness before putting the cuff on the toilet, the surface of the outlet of the latter is preferably smeared with sanitary gel, which, frozen, will ensure complete tightness. In the same way docking with the sewer pipe. Remember that if you use rubber or plastic parts, you do not need to caulk them in the drain hole using cement mortar or tow with red lead. It is enough to use silicone gel.
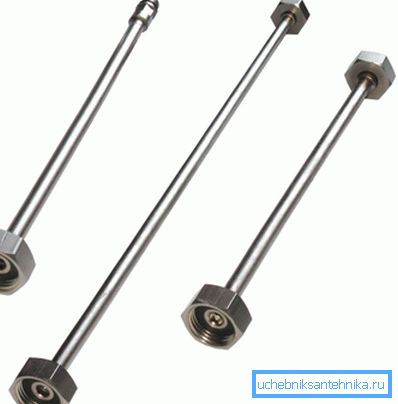
- Finished with sewage, go to liner. For its arrangement it is possible to use rigid tubes made of steel or copper, or flexible rubber hoses reinforced with metal threads. Both options are equally reliable, the choice depends solely on personal preferences.
Note! It is advisable to install shut-off valves - a tap, which can be used to shut off the flow of water to the toilet drain tank in case of an accident or for repair, to drain the water pipe before connecting the supply pipe.
- The next stage - consolidation. You will learn more about how to install the toilet in a wooden house with your own hands, as well as installing the device on tiles or concrete, in the next section.
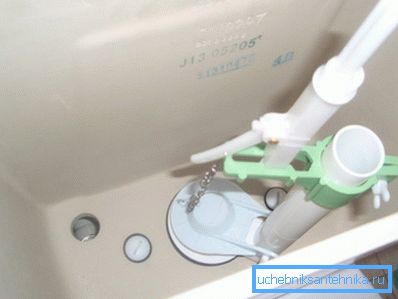
- After installing the toilet mounted valves in the tank. The order of work depends on what design you have purchased. The most effective and economical drain mechanisms are equipped with two buttons. They can be used to regulate the volume of water entering the toilet bowl.
- The last thing to do is to screw the toilet seat.. To do this, use the hardware that comes in the kit. Bolts are pushed into special holes in the bowl, after which nuts with petals are screwed on the bottom.
Methods of fastening the toilet to the floor surface
Installation on concrete
If the replacement of the toilet bowl is combined with a major overhaul in the toilet, then to fix the toilet bowl on the floor it is better to use anchor bolts or specially equipped wooden base.
To do this, during the filling of the screed, you need to pre-mark and drill holes in which to insert anchors. They must protrude above the base to a height of about 5-6 cm. Otherwise, their length may not be enough to wrap the nut, and the work will have to start from scratch.
As for the board (it is called taffeta), here the order of work is as follows:
- a large number of nails are driven into the wood so that they protrude a few centimeters from the other side;
- after that, the taffeta is placed in the place where the toilet will be installed, and a concrete floor screed is made so that the surface of the concrete is flush with the surface of the board;
- upon completion of the finishing works, the toilet bowl cupboard is simply screwed to this board with wide-head screws.
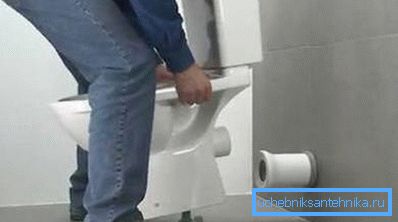
Screws toilet bowl is screwed to the wooden floor. Taft in this case, for obvious reasons, is not needed.
Note! The methods described above are rarely used in modern construction, as there are more simple and effective options for fixing sanitary fixtures.
Tiled surface mounting
To do this, use special studs with dowels. It is necessary to buy fasteners with special rubber washers under the heads to prevent cracking of the ceramic of the toilet bowl during the twisting of the studs.
In addition, it is desirable to purchase nickel-plated mounts that are not subject to corrosion. At the end of the life of the toilet, they can be easily turned out without the use of hammers, chisels and other radical means.
To install dowels in the floor surface, drill holes of a suitable diameter. They must be deep enough to firmly hold the toilet in place, but not too long, otherwise the integrity of the equipped waterproofing layer will be broken.
Tip! If the floor in the toilet is lined with quality tiles, you can use a special epoxy resin to fix it. It forms a strong seam that will securely hold the product in place. Minus - the impossibility of dismantling without destroying the toilet. Plus - the perfect beautiful connection without extraneous elements.
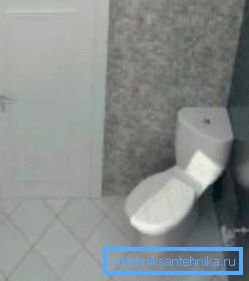
By the way, with the help of epoxy resin, you can solve the problem of how to install the toilet at an angle with your own hands. When installing such a device, as a rule, it is inconvenient to tighten the nuts at the base, so the use of adhesive is an ideal option.
Conclusion
As described above, the devices are fixed on the floor. However, the installation of a suspended toilet with their own hands is completely different technology. To do this, you must either use a special installation, or cast a solid monolithic structure that can withstand the heavy weight of a seated person. For more on this, see the video in this article.