Installing the tank on the toilet: a step by step process
Installing the flush tank on the toilet does not require special skills or expensive tools, and therefore it is made by hand without any problems. We will tell how to install the tank on the toilet and properly configure its work.
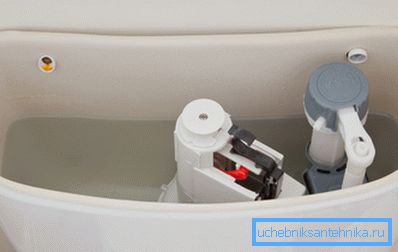
Installation of cistern
Device and mechanics
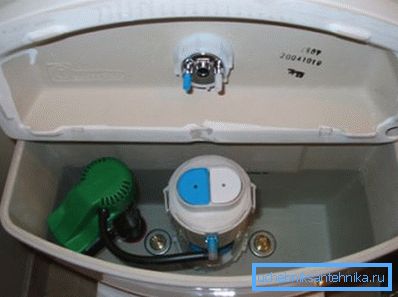
First you need to figure out how to assemble the drain mechanism. Make it simple enough, most often you need to assemble plastic parts according to the manufacturer's instructions.
The designs of the drain mechanisms, though similar, are incredibly diverse in details. Therefore, to consider them all in the framework of this article will not work, and we limit ourselves to a description of the assembly of the most common and simple configuration.
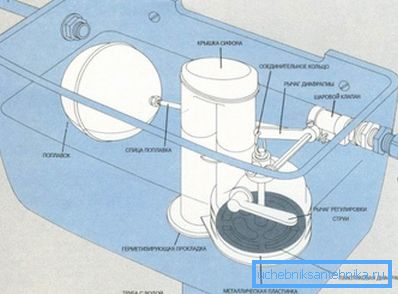
Mechanics consist of three main parts:
- Drain device. Designed to open the passage and drain water into the toilet bowl by pressing a button. Also equipped with overflow protection;
- Push button mechanism. Required to control the drain valve by pressing a lever or key. Often has two modes of operation: economical and full;
- Valves. It is necessary for closing the tap through which the tank is filled with water after flushing. Equipped with a float device that opens and closes the tap depending on the water level.
The principle of operation of the mechanics is as follows: water flows from the water supply system into the tank until its level reaches the set height.
As the water sets, the float rises and moves the needle, which is attached to the ball valve and rotates it. When the tank is full, the ball turns and closes the flow.
If the tap is broken, water flows through the hole on top of the siphon and flows into the bowl of the device. This allows you not to worry about the fact that the faulty mechanics will flood your apartment.
If it is necessary to make a flush, we press the button that moves the lever. The lever is connected to the membrane and lifts it, thereby opening the passage of water into the bowl. Water enters the toilet and flushes its contents down the drain.
Meanwhile, the float lowers and opens the tap, water begins to flow into the tank. A special tube directs the jet so that it presses on the membrane and closes it, as a result, the tank is filled, the valve is turned off and the device is again ready for operation.
Assembly drain device
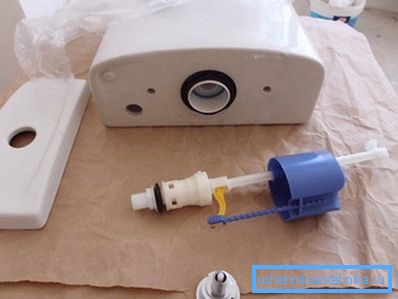
Assembly begins with a trigger mechanism:
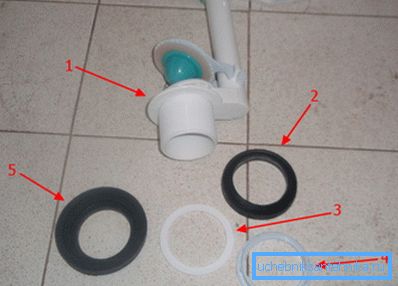
- Water drain valve;
- O-ring rubber cone;
- Plastic washer;
- Plastic nut;
- Soft rubber ring for sealing compound.
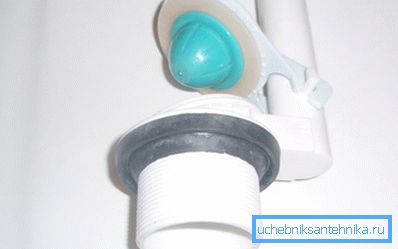
Take the valve (1), and from the side of the thread we put on it the tapered ring (2) so that the cone is on the bottom:
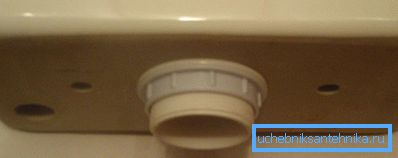
Now take the tank and insert the drain siphon into its bottom hole. From the bottom of the tank we put a washer (3) and nut (4) on the threads. Tighten the nut with your hands, the keys do not use:
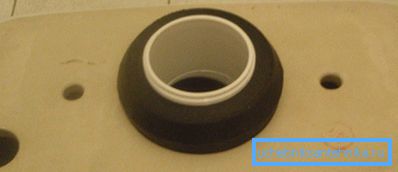
Then we take a soft rubber sealing ring and just put it on the nut. It should be worn without bends:
Note! Plastic fasteners are hand-tightened. Such a stretch is enough, and the excess force is able to break the fasteners.
Installing the tank on the bowl
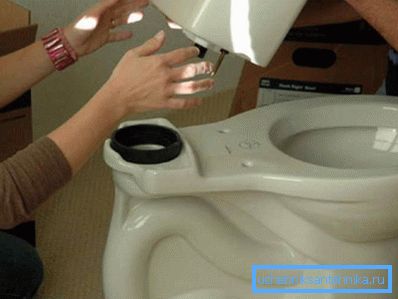
So, we mounted the sink, now we put the tank on the bowl and fix it. For this, we use plastic fasteners that came with the device:
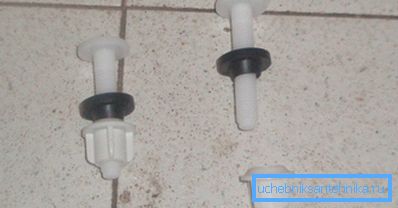
Sealing gaskets put the cones down on the bolts. Then we take the tank and install it on the bowl so that all the holes coincide. From above we insert bolts with cones down:
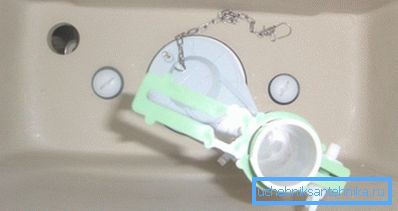
Now we move under the tank and wind the nuts on the bolts. We tighten hands up to the stop, we watch that the tank stood exactly. You can use the construction level.
Note! If metal bolts and nuts are used, do not forget about the rubber washers and gaskets. Ceramics should not be in contact with metal.
Push-button mechanism and shut-off valve
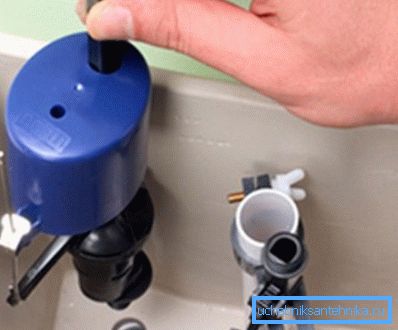
Now proceed to the installation of the remaining mechanics on the installed drain tank. First we take the push-button mechanism and unscrew the button.
Then insert the push-button mechanism into the bracket on the toilet cistern drain valve in the lower part. We put a chain on one of several holes on the yoke, you shouldn’t stretch it:
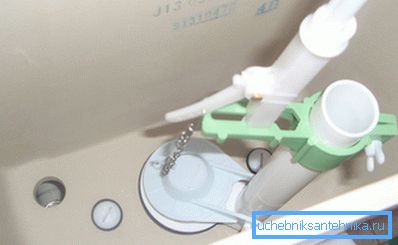
Further, the instruction for installing the toilet bowl requires mounting the locking mechanism:
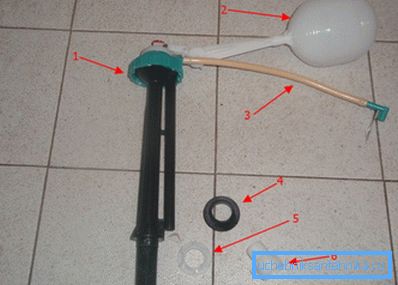
- Shut off valve;
- Pear float;
- Tube for locking the drain valve;
- Rubber gasket;
- Plastic nut;
- Adapter for connecting plumbing. (See also the article Water pipes: features.)
Take the locking valve (1) and put a gasket (4) on its threads. Insert the valve into the hole in the bottom of the tank, the seal should be a cone down:
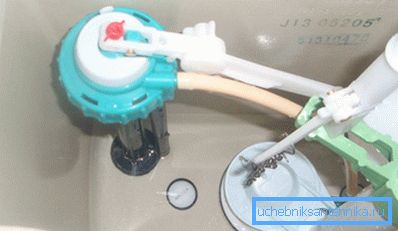
Now we move under the tank again, where we screw the nut (5) onto the valve threads and tighten them with our hands, then wind the adapter onto? inches to connect plumbing. We bring the pipe and connect it with an adapter:

Note! The thread on the adapter is better to seal with tow or FUM-tape. Tighten the key should be, but carefully: the thread can be torn off.
Finally, turn on the water supply and adjust the level. To do this, use a screw on the boom of the float lever, changing the position of the pear in height:
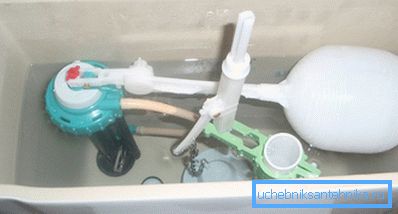
Note! Normal water level is 6 - 8 liters. In this case, the water does not reach the overflow hole on the siphon.
Conclusion
Despite the fact that the price of work of a professional plumber can reach 1000 rubles or more, self-installation of a cistern on the toilet is not difficult. The video in this article demonstrates the process as clearly as possible.