Installing the toilet on the tile - the main methods and
As you know, plumbing installation is done after finishing and finishing works, it has its advantages and disadvantages, because you can easily damage the finish. And if the traditional installation with dowels is well known, then few people are familiar with installing a toilet bowl on a tile without drilling. In this article we will look at both options, you need to choose the one that suits best.

Basic requirements for work
Whichever way you choose, the end result must meet several basic requirements:
| Attractiveness | The result should be neat and aesthetic - without chipping on the products and cracks on the tile. Any flaws degrade the appearance, remember this. |
| Reliability | The equipment must stand firmly and motionless, if the toilet bowl staggers on the tile, then over time it may just crush it and you will have to replace the tile, removing the toilet bowl and removing the remnants of the old finish |
| Convenience | It is necessary to install the structure so that it is convenient to use, if the room is narrow, then it should be located in the middle. |
| Hygienic | So that dirt and moisture do not accumulate under the base, it is best to treat the junction with cement mortar or sanitary sealant, this will allow you to easily maintain an ideal order in the room. |

Types of installation
As noted above, there are two basic mounting options, and both have their own characteristics, we consider each of them separately.
Fixing with dowels
Let us see how to install the toilet with your own hands on the tile in accordance with the technology and recommendations of the equipment manufacturers:
- For work you will need a hammer drill, drill the tile (10 mm) and on concrete (8 mm), as well as a key for screwing in fasteners and a pencil for marking.
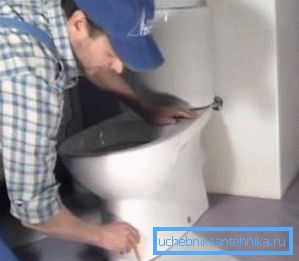
- First, the toilet is installed and connected to the sewer system., while it must be set as accurately as possible, exactly as it should be. After that, its location is drawn up with a pencil, and mounting holes are marked. After finishing the markup, the equipment must be removed and removed.

- Next, a drill on ceramics in the tile makes holes for the marks made. After that, a drill on the concrete is placed on the tool and a hole of the required depth is drilled at the base (in order not to drill too deep, you can stick tape on the drill or construction tape as a guide).

- After that, plastic dowels of the appropriate diameter are driven into the holes., most often they come complete with equipment, but you can purchase them separately.
Tip! It is better to purchase a special fixing set, there will be not only dowels and screws, but also rubber washers and decorative plugs covering the heads of fasteners.
- Next, plumbing is installed, and mounting screws are baited.. Before you fix the toilet on the tiled floor, you should check its position, if there is a misalignment, you must put a plastic plate under the base. After that, you can finally tighten the fasteners, but you should not be especially zealous, as you can crush ceramics.
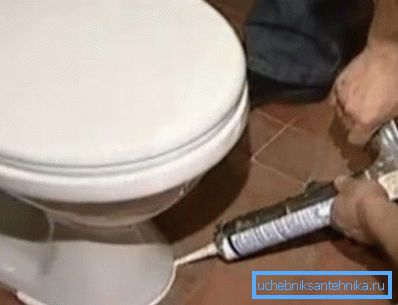
- The last operation - the seal adjoining the base and floor, If earlier cement mortar was used most often for this, nowadays it is much easier to use special sanitary sealant for sewage pipes - its price is low, but it can resist moisture and mold for many years.

Without drilling
This option is used with no tool or if the base is too strong and difficult to drill.
Consider how to install the toilet on the tile in this way:
- At first, the structure is exposed as it will stand, the base is outlined with a pencil, and the toilet is removed.
- After that, inside the delineated area with a hammer and chisel, notches are made so that the surface becomes uneven and the setting of the mortar improves. The work is carried out carefully, because during its operation, the fragments fly in all directions and can get into the eyes.
- Cement mortar is diluted to the consistency of thick cream, it needs about 1 liter. Mix the composition should be carefully, so that it does not contain lumps.
- Further, the sole of the toilet bowl is wetted, it is rather rough, therefore the solution keeps on it very well.
- The prepared mixture is laid out in an even layer along the marked perimeter, after which the toilet is put on it and pressed with a little effort. It is important to set it as accurately as possible so as not to move later. The excess solution is removed, they can later sew seams.
Tip! You can use instead of cement special adhesive compositions that are sold in finished form and provide excellent adhesion to almost any surface. One of the best options - a two-component composition for marble and granite, it has the highest strength.

We figured out how to glue the toilet to the tile and how to do it as reliably and efficiently as possible. The choice of the composition is yours.
Conclusion
Whatever fastening method you choose, it is important that the structure is strong and motionless. The video in this article will vividly show some important points of the workflow and will help to understand the topic even better.