Laying sewer pipes in the house: a step-by-step guide to the
Own home or cottage is the dream of many people today. The hustle and bustle of big cities is tiring and, on coming home, I want to feel like a full-fledged owner. But at the same time private property should be equipped with all the benefits of civilization. And laying of sewer pipes in a private house is one of the most important stages of arranging such a comfortable stay.
Contrary to popular belief, it’s not as difficult to mount a sewage system with your own hands as it seems. Of course, it is necessary to sweat, but the result is worth it. The general technological instruction that we set forth in this article does not require fundamental knowledge. It is enough to master the initial skills of construction and own a plumbing tool at the household level.
Separation systems
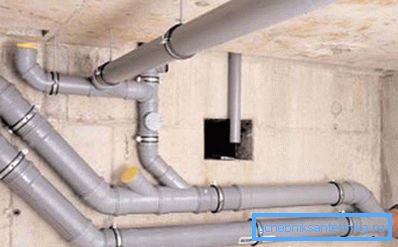
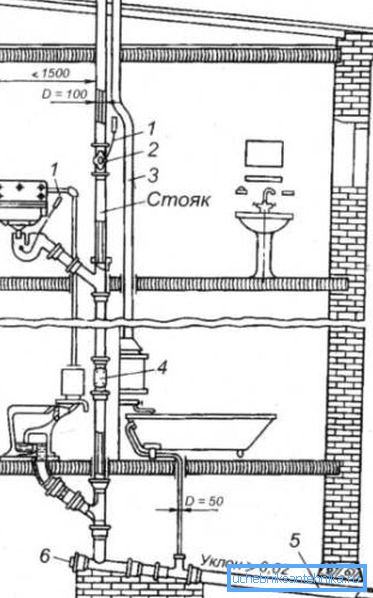
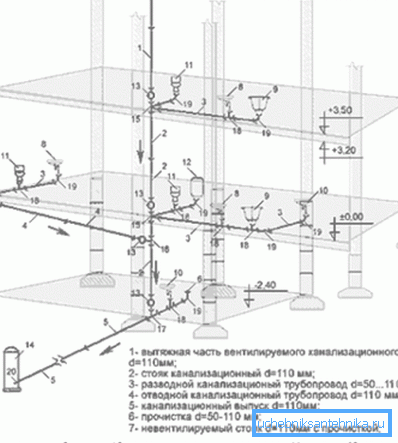
In low-rise private construction, the construction of any sewage system can be divided into 2 stages. The first is the installation of piping inside the building. That is, the installation and fixing of the risers, plus the supply of drain to all points of operation of sanitary equipment. This can also include a distribution node in the basement of the building.
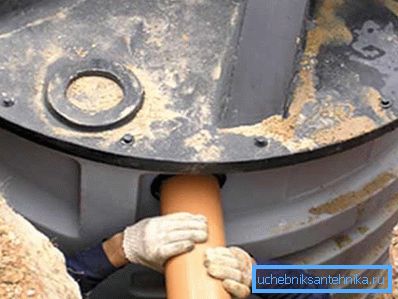
Everything that is outside the basement, experts refer to the external system. It includes a line from the house to the drain. Plus, this also includes drain pits, septic tanks or more modern and expensive stand-alone filtration stations.
Installation of the internal system
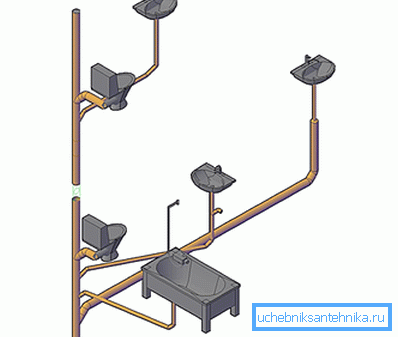
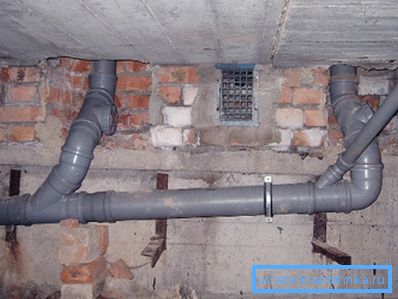
Any specialist will tell you that structures of this kind should be placed as compact as possible. Ideally, 1 line is made and all discharge points are mounted near it. In this case, the more complex the system configuration, the higher the likelihood of blockage and installation errors.
Of course, there are certain standards of GOST, which indicate what cross-section of pipes must be taken for systems of different lengths. But from experience we can say that the more a section is taken, the safer it will work. For private buildings with a low number of floors, the size of the central highway starts from 100 mm. The minimum cross-section of the pipe for wiring in rooms 40 - 50 mm.
Important: Avoid sharp corners when designing and installing structures. The maximum recommended knee bend angle is within 45 °. On large bends, the probability of clogging of the sewer system increases.
We make a sketch
Experienced masters know well how to lay sewage pipes in a private house, which is called an eye, but if you do not have the necessary experience, it is better to draw up a phased plan with detailed drawing.
- We would not advise you to blindly trust those documents to the house that already exist.. It is better to take a tape measure, a pencil, a sheet of graph paper and measure all the rooms in which the drain will be mounted. Do not forget to take into account the thickness of the walls and walls.
- After this, the first thing you need to decide on the location of the central riser. As a rule, it is mounted behind the toilet, and the distance from the toilet to the main should not exceed 1 m.
- Next draws to each point.. In parallel, it should be noted how many and how specifically you will need knees, bends, fasteners and other related materials.
- If you are a happy owner of a two-story house, then our advice to you is to make sanitary facilities on both floors, and it’s better to have them in one riser.
- When the house is finished, go to the basement and draw the local junction. At the last stage, you need to decide how it will take place and in what place on the roof the vent pipe will be taken out.
Choosing pipes
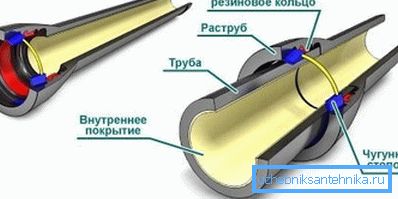
In the relatively recent past, sewage systems were installed exclusively with cast-iron pipes. The material is certainly good and durable, but heavy, brittle and the price it bites, plus to this, cast iron is susceptible to corrosion.
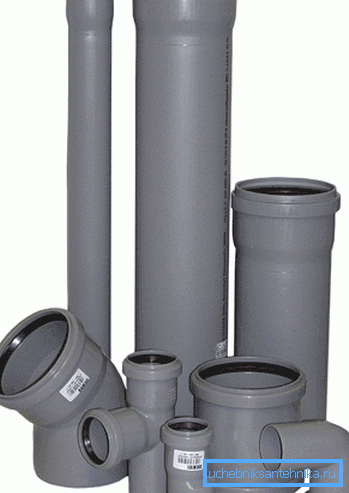
Now the sales leaders are polypropylene (PP) or polyvinyl chloride (PVC) pipes. Due to the smooth inner surface, such drains are much less often clogged. The material is very light and easy to install.
Important: for internal distributing of the sewerage pipes of gray color are used. For laying in the ground material is taken bright, usually orange. In addition to differences in colors, external wiring pipes have higher performance characteristics.
Installation Tips
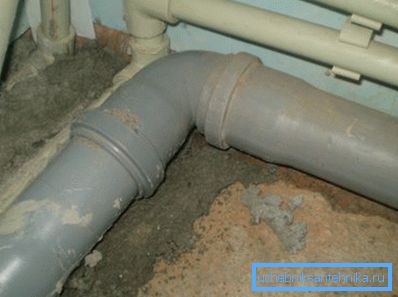
At the moment there is a sufficient range of plastic products and various mounting accessories to them in the trade network. In the set, as a rule, the presence of rubber gaskets is provided, but for confidence, it is recommended, when assembling, to lubricate all the joints with silicone.
Of great importance when installing has a system angle. Non-pressure systems are based on gravity, so it is important to observe the minimum slope, more can be less.
According to SNiP 2.04.03-85, as well as SanPiN 2.1.4.1110-02, the slope of the tube with a cross section of 50 mm should be 30 mm by 1 p / m. For pipes from 100 mm, an inclination of 20 mm to 1 ppm is sufficient.
Tip: every major junction or sharp knee should provide hatches for maintenance structures. Thus, in the event of a blockage, it will be easier for you to clear one sector, rather than get to the traffic jam in a few turns.
Fan ventilation
The installation of a funnel pipe or a vent valve is a mandatory procedure when constructing a sewage system in a private house. In fact, this is a continuation of the riser, which is displayed above the roof level by 700 mm.
This device is necessary to normalize the internal pressure in the system. Without it, due to the pressure drop or hydraulic shock, an unpleasant smell from a pipe can enter the living quarters.
Important: do not forget that the distance from the exit of fan ventilation to the nearest window or balcony should not be less than 4 m. Plus, it is not recommended to combine it with household or stove ventilation in the house.
Outdoor system
Ideally, the technology of laying sewer pipes in the ground requires a burial below the level of soil freezing. But in many areas of our country the ground freezes to 1-1.5m and more. Therefore, as a rule, the pipe is laid at a depth of 50 - 70 cm and additionally warmed.
For insulation around the exhaust pipe, a cocoon is made of a larger diameter pipe or any roll waterproofing, the cheapest option is technical polyethylene. The clearance between the waterproofing and the drain is made in the range of 50 - 150 mm and is filled with any non-hygroscopic insulation. Most often it is a crumb foam or expanded clay.
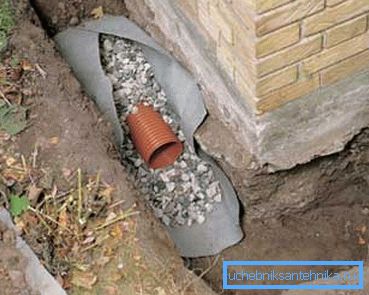
In the northern regions, it is recommended to attach an insulated electrical cable to the bottom of the pipe, on the outside. Also note that when leaving the foundation, a sleeve is put on the drain and the space is filled with insulation in order to prevent direct contact of the drain with the cold, concrete foundation. Plus you need to monitor compliance with the slope.
Tip: the system is better to mount by sector. But before you put everything together, connect the plumbing equipment, crash into the central sewer or septic tank and bury the external wiring. We advise you to check the work of each sector, pouring clean water into it. Measurements are good, but water will immediately indicate errors.
On the video in this article you can see some of the subtleties of installation.
Conclusion
As you can see the laying of sewage pipes with their own hands, if you want a very real and doable task. It is theoretically possible to do all the work alone, but it is better to invite at least one assistant. Experience shows that it will be not only faster, but also safer, as you know, two heads work better.
