Master class how to install a shower in the corner
Talking about how to install a shower cabin, we will not mean a box, but a fence, the perimeter of which is combined with the walls of the bathroom, since the boxes are ready-made equipment that you only need to connect to the plumbing and sanitary. In our case, the installation may vary with the shape of the pallet, that is, it may just be a near-wall installation, or perhaps an angular installation, where two connected walls are used at once to fix the frame.
We will now consider some options together. Features and nuances inherent in the angular souls, as there are more complex requirements, and also offer you a demonstration of the video in this article.
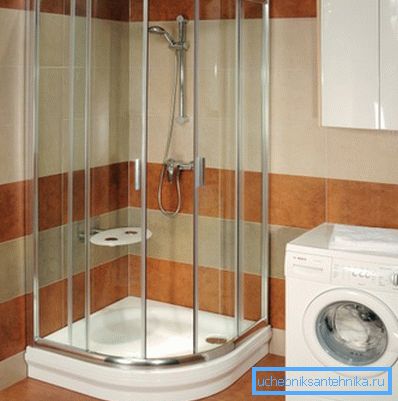
Corner Fencing
Some differences
Note. By and large, all the cabins of this type are the same, but, nevertheless, they can differ in area and depth of the pallet and the material from which the fence is made, as well as its level of transparency.
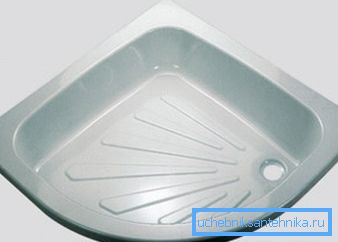
- Pallets for corner fencing can be made of steel, cast iron, wood, ceramics (faience, porcelain), composite materials (artificial marble, granite or onyx), wood (oak, larch) and acrylic. But we can state with confidence the fact that acrylic is the most popular material - its products are light and durable, it is not cold, like metal or composite, and, moreover, it has a quite affordable price. Pallets also differ in height (this is how they often define this parameter, although a more precise definition is depth) - they can be shallow (up to 5 cm), medium (up to 15 cm) and deep (from 15 cm or more).
Note. Some are interested in how much weight can a shower stand? So, the weakest pallet (from thin acrylic) is designed for weight up to 160 kg, and from thick - up to 200 kg. Naturally, wood, ceramics, composite and metal withstand much more.
- We continue to consider how the shower is arranged and pay attention to the fence, which can be either of tempered glass or plastic, and visually these materials do not differ much from each other.. But glass is, of course, a more noble material - it does not darken over time, as it has a very dense structure and this makes it possible to care for it even with the use of abrasive detergents, although this is usually done by household chemicals, which is designed for windows and mirrors and slippery . In plastic, the structure is porous, which makes it vulnerable to small particles and it is almost impossible to clean them from there, which makes the panels grow turbid, and care of them is best done with detergents marked “for acrylic baths”.
- One of the important factors when buying a cabin in the store is the degree of transparency of the fence - it can be transparent, translucent (tinted) and opaque (matte). This question is important because in small apartments, bathrooms are often combined and another family member may need to use the toilet during your bath - do you want others to see your naked body? This, of course, is not a manual, but for the most part is a matter of ethics and parenting.
Install a shower stall
This Pay attention! Check the angle where the shower will be installed - it should have exactly 90 ?. Otherwise, there will be no tight junction of the sides of the pallet to the wall, and if the discrepancy is more than 2, then this is already a critical value. In such cases, the tile is trimmed to the height of the pallet in order to drown one of the sides under it, and with large deviations such an operation is performed from two sides.
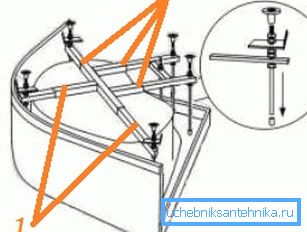
So, we begin to disassemble how to install the shower cabin itself and, first of all, as for any installation, we need to install the base, and here we have a pallet to which we have to fasten the legs. To do this, we place it on the floor upside down and, first, fix a crosspiece on it, which, depending on the size and model of the pallet, can be different - it can be two or more profiles fastened together and fixed to the pallet.
The legs of medium and deep models are made in the form of studs, which are fixed on the cross with lock nuts, and heels are wound on their ends, which already abut the floor. All legs should be checked by level so that they are strictly in the same plane. By the way, this also applies to the question of how to disassemble a shower cabin - installation and disassembly are exactly the same, only the works are performed in the reverse order.
After mounting the legs, you should put the pallet in the corner and check it again - if you notice the slope on the sides, adjust it by twisting-unscrewing the legs - the top should be aligned horizontally, and the slope for draining is provided for the design features of the tank.
If everything is in order, fix the siphon on the drain and insert the hose into the drainage fitting of the sewer pipe, and smear the sides from the outside with silicone sealant and glue the tray to the walls - this is the beginning of the answer to the question of how to silicone a shower cabin.
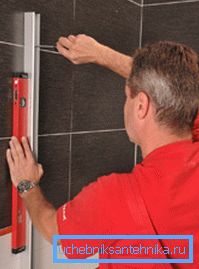
When the pan is already in place, go to the question of how to seal the shower stall, that is, how to install the fence so that water does not penetrate into the room, and start with the guides for the frame, which are screwed to the walls strictly vertically along the edges (corners) pallet.
These profiles need to be fixed not only on screws with dowels, but to grease silicone sealant under them - you get something like a cut-off waterproofing. After that, you assemble the frame itself of four profiles - two straight and two arcuate, where there is a slide for moving the doors.

The frame is screwed to the guides from the inside (this is shown in the upper photo) and if you have a shallow tray, then it is also better to push the silicone under the lower arc - otherwise water will leak through this joint and fall to the floor.
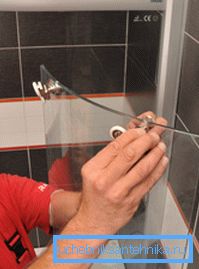
We continue to consider the question of how to seal the shower cabin with our own hands and put U-shaped seals on the fixed panels (on the vertical), and from the side of the doors this seal comes with an apron that prevents water from entering the gap between the movable and fixed panel.
Insert this sheet into the seat on the frame (from the wall) and fasten it with special brackets with rubber bands from the kit, just be careful not to overtighten the bolt and crush the panel.
Now we fasten two pairs of wheels on the doors and at the same time we clamp the top pair tightly, and the bottom pair is simply baited - the fixation will be after the panels are hung.
Hang both doors and check the vertical to ensure a good junction, and then put it on the edge of the alignment on a magnetic tape - the junction will be one hundred percent - the water will not pass through the target, even if you direct the jet there. Screw on the door handle and look further, how to turn on the shower.
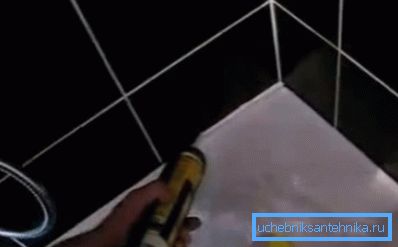
Now you need to seal the joint between the wall and the tray using the same silicone, since it is still impossible to turn on the water in the shower, otherwise it will leak into the slot and get into the room. Correct the layer of silicone with a finger cannon, removing the excess - the joint will turn out beautiful and airtight. Tests can be carried out in 3-4 hours.
Conclusion
Some users are interested in how to build a shower cabin in an apartment - for this you will have to use foam blocks or bricks to raise the partition, which you will later coat with ceramic tiles. The pallet can be installed as a factory, or it can be made of brick or fine-grained concrete, only for draining, you need not a siphon, but a ladder.