Mount the cabinet under the sink
In any case, the kitchen facade should be equipped with a sanitary unit for washing dishes and according to average statistical parameters; this is a cabinet for washing 50x60 cm, although other sizes are possible. But the differences are not only in the dimensions of the cabinet or the shell itself, there is also a difference in the way the bowl is installed - it can be invoice and embedded, and each of these methods may also need a sidebar.
We will consider with you the differences between the above methods of installation, their advantages and disadvantages, and to help demonstrate the video in this article.
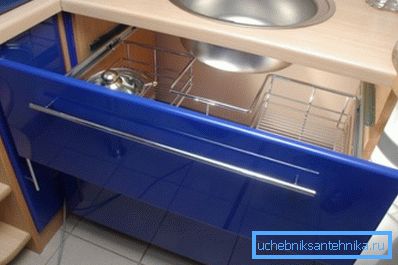
Cabinets, cabinets, sinks
Installation methods
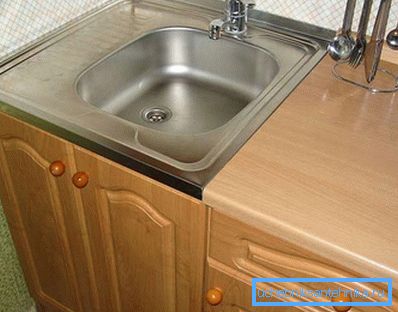
Most often in use and sale you can find a locker for a sink of the surface type, that is, a special seat is provided on the pedestal, into which the bowl with sides is placed or superimposed.
The main difference of the waybill option is fixing the bowl on the furniture with the help of horizontal turndown boards, by the way, one of these cuffs (left or right) can be a corrugated pedestal, which serves for storing dishes during its washing.
When installing the sink, the cabinet for the kitchen sink can be in the form of a pedestal where the bowl is mounted directly on its body (walls), but the installation can also be made on a cut-out in the worktop.
In some cases, such a seat is already ready (made by the manufacturer), but sometimes this privilege remains for the buyer and this opening will have to be done with his own hands.
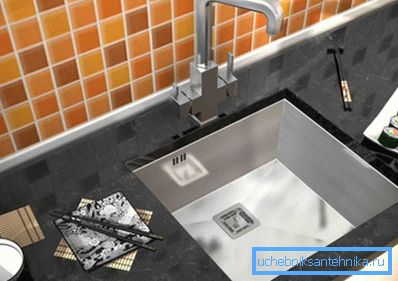
But the embedded installation is already more complicated, although in some cases the seat is provided by the manufacturer, but in most cases such an opening has to be done independently.
But you can cut the kitchen countertop with your own hands only if it is made of chipboard, but if it is made of natural or artificial stone (granite or marble), then such work can only be done by professionals who have the necessary tools for cutting.
The essence of the built-in installation is that the sink is attached to the worktop from below, into the grooves and it turns out just below the surface. But there are also options when the sides of the bowl are flush with the table top, but in such cases additional attachments are used there.
Recessed installation with inset
Note. We bring to your attention a small master class from which you will learn how to make a built-in installation of a metal sink in a cabinet (tabletop) with glue fixation.
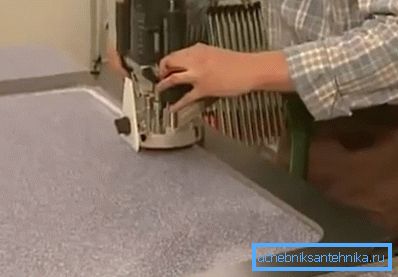
- First of all, it should be noted that branded sinks with cabinets, where an inset with an embedded installation is provided, are completed with a rigid template, according to which you will need to cut a hole in three (even in four) steps - one pass from the top and three - from the bottom. To do this, a milling cutter with an end cap is used, and the first groove is selected from the top (front) side, but you need to cut this hole completely to remove the cut center.
Note! When attaching the template with clamps, try to ensure that the distance from the edge of the table top is at least 50 mm. This will create the necessary margin of safety.
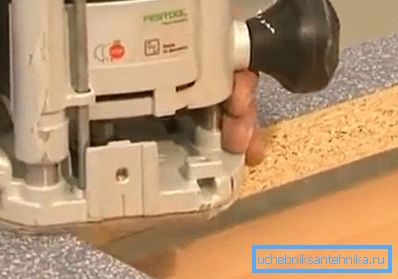
- After you cut a hole, you will need to remove the sharp edge around the perimeter on the front side of the tabletop.. To do this, use the same milling cutter, but already with an inclined (radius) attachment of 2-3 mm.
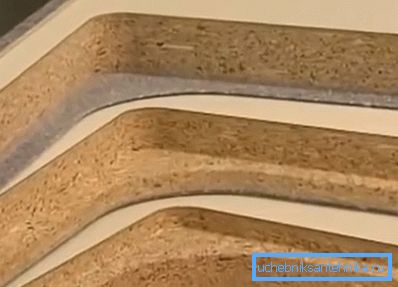
- Now we need to turn the table upside down (with the wrong side up) and begin to choose the grooves for the size of the sink and in this case it took three steps, as seen in the top photo. But such a number of grooves is not needed for each bowl - everything will depend on the configuration of its turn-down sides and for another option, you may need to choose only two slots from the bottom. After work with a selection of grooves of the cutting place, it is necessary to treat with a solvent (646, 647, white spirit) or isopropyl alcohol to remove the resins, which are always in the particle board.

- In this situation, polymer adhesive based on silane modification was used, but you can use other polymer compositions. You lower a sink in grooves, previously having smeared them with glue. For good fixation, the instruction recommends pressing the bowl with clamps, but in order not to damage the container, you will install gaskets at the pressure points - for this you can use any lumber, including waste from the table top. Such fixation is maintained for 12 hours.
- After that, the clamps are removed, and the joint is filled with any two-component glue - this, for example, can be epoxy resin. Such compounds usually dry very quickly - just a few hours - and after that, on top of the cast glue, seal the joint with foil tape. If epoxy is needed to stabilize the sink in the worktop, the tape serves as a waterproofing.
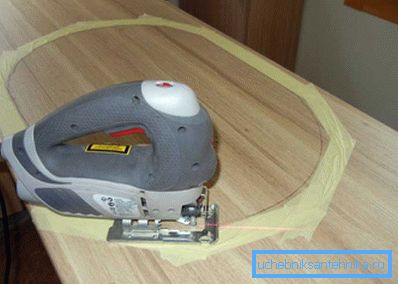
In cases where the tie-in to the tabletop of the cabinet is made for surface mounting, you can use an electric jigsaw - the sides of the sink overlap the cut perimeter. However, in order not to scratch the surface, the perimeter of the hole is covered with masking tape, as shown in the photo.
Conclusion
When choosing a cabinet under the sink to the kitchen, you need to take into account not only its dimensions, but also the method of mounting the sink. That is, you need to understand that you may have to make a mortise cup installation, and these are additional labor and time costs.