Proper installation of the toilet - a detailed guide
Installing plumbing in an apartment usually falls on the men's shoulders, this is a matter of principle and the call of experts is an extreme measure. Moreover, not everyone has the practice of performing such work, and the installation process itself may differ slightly depending on local conditions, for example, installing a toilet bowl on a wooden floor is somewhat different from installing it on a tile. Lack of experience can be compensated by a thorough theoretical study of the issue.
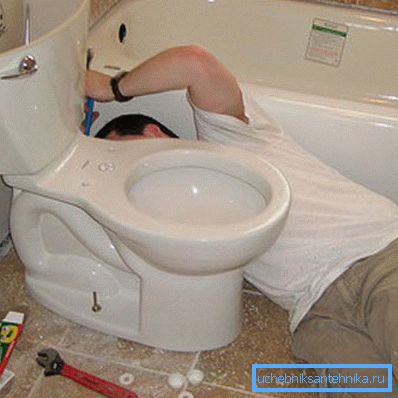
The scope of work when installing the toilet
At the exit, we must get santehpribor, 100% prepared for use.
As for the scope of work, conventionally the whole process can be divided into the following stages:
- toilet bowl installation - meaning its attachment to the base;
- connection of sanitary equipment - the drain of a toilet bowl is connected to a sewer pipe;
- tank installation;
- tank connection.
Of course, you can just call the experts and not worry about the quality of work, but why pay for what you can do yourself and indulge your self-esteem. The cost of installing a toilet bowl, depending on the company, is several thousand rubles, so the savings will be noticeable.
Choosing an installation site
At the planning stage, you need to choose the optimal location of the sanitary device. On the one hand, the toilet should not occupy all the free space in the room, on the other - a person should not sit on it with his nose buried in the wall.
Knowing the installation dimensions of the toilet bowl (length, height, width), you can choose the ideal position for it.
There are only a few general recommendations that should be targeted:
- from the wall to the toilet should be at least 0.3 m of free space;
- the minimum distance to the door is 0.6-0.7 m;
- as for the height of the sanitary device, it is selected on the basis that the knees are bent at about 90? For a person of average height, you can take the height of 0.4-0.45 m;
- Also, the accepted dimensions for the installation of the toilet should take into account the placement of the rest of the plumbing in the toilet, for example, bidet, bath, etc.
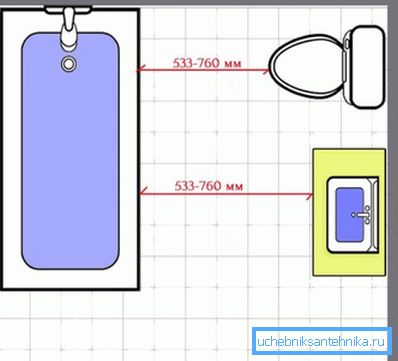
Installation and connection of a toilet bowl
The easiest way to this stage is if the floor in the toilet is tiled.
The main steps are as follows:
- the base is prepared (leveled, if necessary), if you need to lift the toilet a little, then you can build a small pedestal for sanitary fixtures;
Note! The quality of the flush depends on how smoothly the toilet was installed. Even a seemingly slight bias can lead to the fact that on one side of the toilet bowl the products of human life will be removed much worse than on the other.
- then the design position of the plumbing fixture is planned on the floor, a hole for fasteners is drilled;
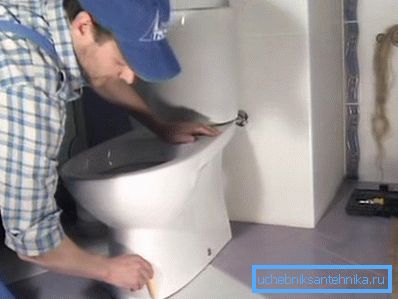
- After that, installation of the toilet bowl on the sealant or glue is performed — an area that the supporting column will occupy is squeezed out of the sealant or glue, then the plumbing fixture is put in place and fixed to the base. If there is a gap between the floor and the toilet, it must be filled with sealant.
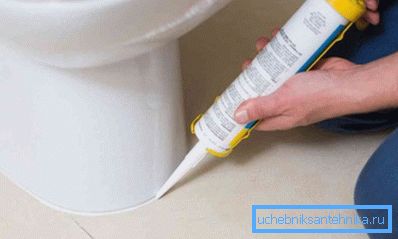
Note! Part of the composition must be squeezed out by the weight of the toilet bowl, it must be removed immediately, without waiting for hardening.
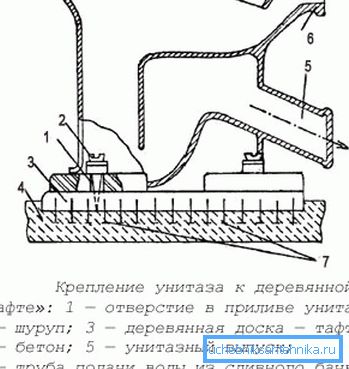
In the case of a wooden floor, the installation instructions will look somewhat different - you cannot install the toilet directly on the floor, so you will have to create a lining for it (taffeta). Ideally, taffeta should have the same shape as the lower part of the toilet bowl (the one that is in contact with the floor), you can make it yourself from a tree with a thickness of at least 28 mm, thick rubber will also work.
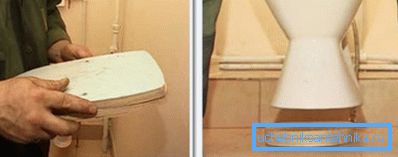
If you wish, you can buy a ready-made taffeta, especially since its price is not high, but it is much easier to simply cut it out of an array of wood or a piece of rubber.
As for the mounting of taffeta and sanitary device to the floor, then there are such options:
- taffeta itself put on the glue, when installing a sanitary appliance dowels will additionally fix it;
- select the flooring tree according to the shape of the taffeta (the depth of the sample is equal to the height of the taffeta), then fill the groove with cement mortar. Do nails drive in about a wooden pad? its height, then it sinks into the cement mortar, protruding nails play the role of anchors.
Separate attention deserves hanging plumbing. In this case, the installation process of the toilet itself is somewhat simplified. Installing a wall-mounted toilet bowl will require installation of the installation (metal wall frame), this stage is really time-consuming.
The installation itself is a conventional frame or block structure, which houses the tank and pipes. To install the toilet at the bottom of the mounting is provided with holes for mounting bolts.
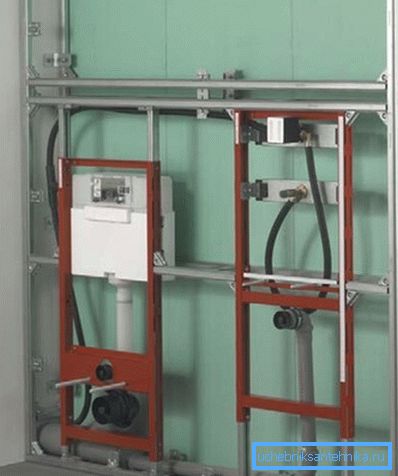
Note! Before starting work, you should carefully check whether the required height of the toilet bowl installation from the floor is ensured. Then it will be difficult to adjust this parameter without dismantling the installation.
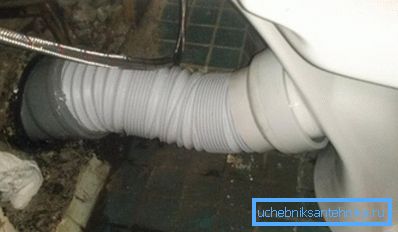
As for the connection of the toilet, plumbing corrugation or eccentric cuffs are suitable for straight and oblique draining. But the installation of a sanitary device with a vertical drain is performed so that the release of the toilet is pressed directly to the sewer pipe.
Installation and connection of the tank
It can be considered the easiest step. The tank is attached to the toilet itself (a portable tank fixed at a height is a rarity), and it is simply impossible to make a mistake during installation.
At the bottom of the tank - 3 holes (1 drain and 2 for fasteners). In order that the tank and the toilet bowl do not come into direct contact with each other, a rubber gasket is used, it is coated with glue on both sides, the tank is attached to the toilet bowl and the fixing screws are fixed in place.
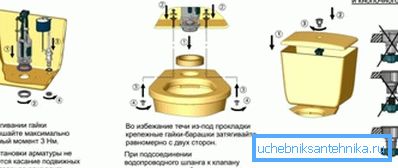
The connection is also done by hand, the supply pipe is fed and connected to the tank using a rubber gasket. After that, it remains only to install the internal reinforcement in the tank and check the tightness of the connections.
Some interesting ideas
The lack of free space in the restroom often leads to, to put it mildly, original ways to solve this problem. To the number of such risky experiments include the installation of a washing machine above the toilet.
The advantage of this solution is only one - a significant saving of free space, but there are a lot of disadvantages:
- Installing a washing machine over the toilet is rather inconvenient in cramped conditions;
- Vibration when running a typewriter will not contribute to comfort in the administration of natural needs. Yes, and just the realization that something massive has been placed on his nerves behind his back;
- linen can be accidentally dropped into the toilet;
- loading powder and laundry turns into a serious test, especially for people whose height is below average.
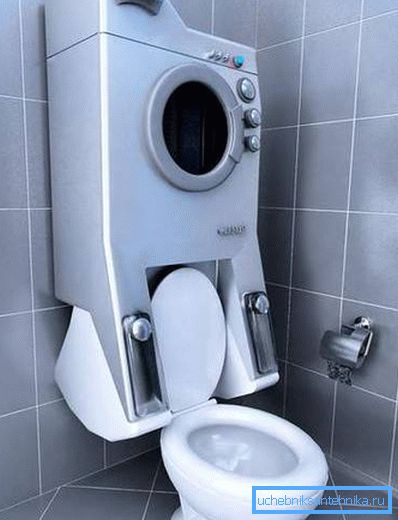
If the craving for the experiment has not disappeared, then we can recommend:
- frame to be assembled from shaped pipes 40x40 mm or parts of the same size;
- fix the structure to the wall with anchor bolts;
- It is advisable to install a rim so that the machine does not slip from its place due to vibrations.
Another interesting idea to save space in the toilet can be considered to be the addition of a bidet to the toilet. You can go in an easy way and buy a cover with such a function or purchase a special prefix separately.
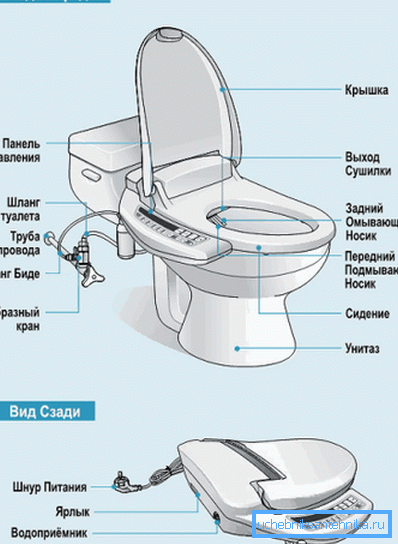
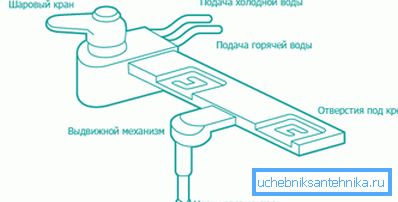
A bidet attachment for installation on the toilet includes a faucet, a metal bar with hoses and a shower. After installation, the toilet turns into a full bidet. It is also important that the cost of such a kit for self-installation is small.
Summarizing
Installing a toilet and a bidet on your own is not only a great way to save your family budget, but also a legitimate reason for pride in a job well done. And for this you do not need to have the skills of a plumber with experience, you just need to follow the instructions.
The video in this article shows an example of installing a toilet on a tile from A to Z.