Replacing the toilet bowl - help beginners plumbers
The toilet cistern is a key element, the quality of which depends on the quality of the flush. Despite the simple device, it may well be out of order, and most often it is due to a malfunction of the internal reinforcement. Repairs, as a rule, consist in the replacement of worn out elements, but a more radical option is also possible - replacing the entire structure.
When need a replacement
By itself, the drain tank (its body) is a simple and durable device. It can be made of plastic (most often this material is used when installing wall-hung toilets), cast iron or earthenware.
Replacing the toilet cistern is recommended in such cases:
- if there is a complete replacement of plumbing in the toilet. An old tank may not fit well with a new toilet;
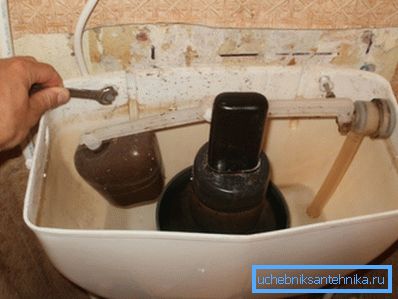
- mechanical damage, when recovery is no longer possible;
- Problems may occur with fittings of foreign manufacturers. For example, IDO and IFO products are distinguished by the fact that valves from other manufacturers cannot be used for repairs. If such plumbing is installed in a hard-to-reach region, where there are problems with the service, the installation of a simpler model, at least temporary, can be the way out.
The scope of work when replacing
The task is simple, from start to finish it is easy to do with your own hands.
The entire list of repair work can be divided into several stages:
- dismantling of the old structure;
- installation of a new cistern on the shelf of the toilet or on the wall;
- fitting installation;
- its connection to the water supply;
- control drain in order to ensure the tightness of the connections.
Dismantling the old and installing a new tank
Before starting work, be sure to disconnect the old tank from the water supply. Then you need to drain it - click on the flush button and wait until the water is completely gone.
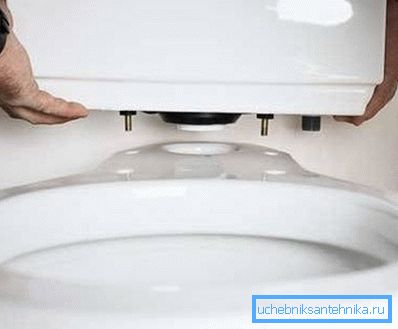
It fastens to the shelf of the toilet bowl in 2 places, fastening screws from the underside of the shelf are tightened. To dismantle them, you must first gently loosen and then remove them completely. Between the toilet and the cistern is a rubber gasket that can stick to the earthenware, it is also removed.
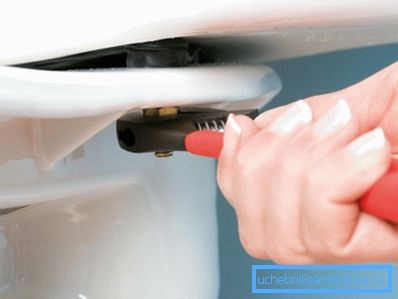
Note! If the plans do not include the replacement of the toilet bowl, then the work should be carried out with utmost care, even the enamel of the toilet bowl can crack or form a chipping from a light stroke.
After that, let's face it, how to change the toilet bowl. By the time of its installation on the shelf of the toilet, the fittings should already be installed.
As for the installation itself on the shelf, then it is performed according to the following instruction:
- To seal the drain on the shelf, the rubber gasket is first laid, as a rule, it comes complete with plumbing, although you can cut a full replacement from a piece of rubber;
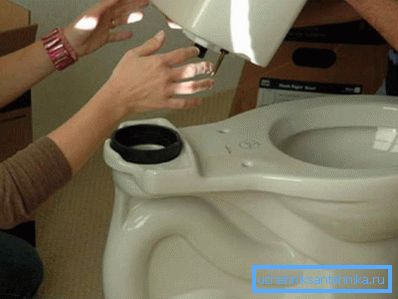
Note! This gasket should be glued to the shelf of the toilet and the tank, so before installing both its surface must be lubricated with glue.
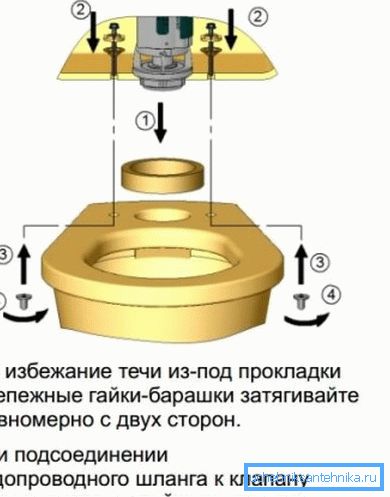
- then the tank is carefully installed on the shelf and both fasteners are tightened.
Note! Fasteners must be tightened simultaneously on both sides. If you first tighten the fastener with one hand until it stops, then the earthenware can crack.
Installation of fittings and tank connection
For convenience, the internal reinforcement can be placed in the tank even before it is mounted on the shelf of the toilet bowl. You will have to install drain and plumbing fittings, the required gaskets are included in the kit for sealing the connections.
Instructions for installing the "internals" is as follows:
- water intake fittings are placed so that it does not touch the walls. Nothing should prevent the valve from moving vertically, otherwise the valve may not adequately regulate the flow of water. In the place where the water intake tube exits through the water supply hole, a rubber gasket is placed (pre-lubricated with sealant); on the outside, the nut creates the necessary downforce;
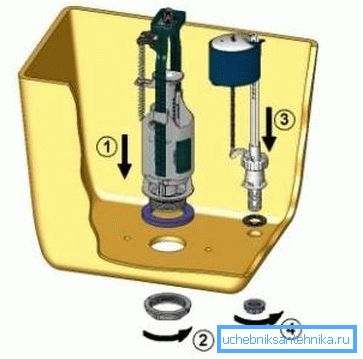
- drain valves are mounted in the same way. Special attention should be paid to the rubber gasket on the drain hole, if it is not ensured that it fits snugly to the bottom, the water will constantly drain into the toilet;
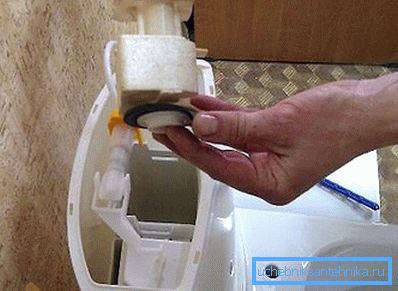
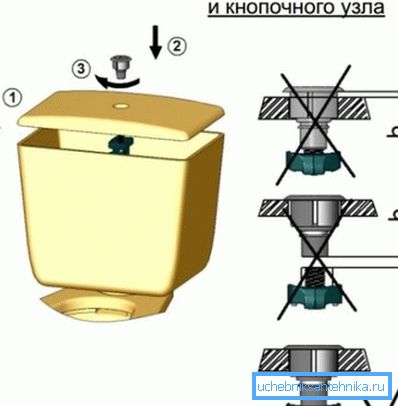
- the final stage of installation of the internal elements of the drain tank can be considered the installation of the cover and flush buttons. The main rule here is that the button should fit snugly against the lid, gaps, distortions are unacceptable.
When connecting the supply pipe, there may be a slight confusion with the dimensions - not everyone understands the metric and inch sizes. Water is supplied through pipes of 3/8 and? inches (internal diameter - 15 and 10 mm, respectively), you may need an adapter for the connection, it is better to purchase it in advance.
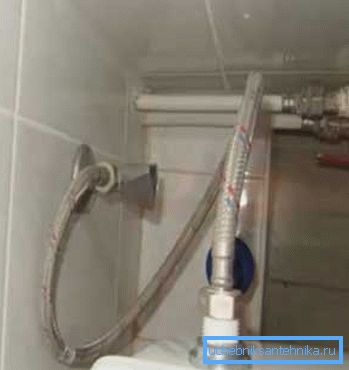
After that it will be necessary only to connect the giving pipe. It is most convenient to organize the water supply by a flexible tube, this will allow to operate in conditions of a shortage of free space. Another advantage of the flexible tube can be considered that it can be used to connect models with both side and bottom water supply.
After that it will be necessary only to fill the tank with water and carry out a test flush. At the same time it is necessary to carefully monitor the connections - not a single drop of water should leak out.
Valve adjustment
Formally, all the installation work on the new tank has been completed, it remains only to check whether the connections are tight, and whether the internal fittings are working adequately. Particularly relevant is the question of how to reduce the flow of water in the toilet bowl. Modern lever-traction drain fittings have the ability to adjust the volume of the drain.
In such a valve initially laid the possibility of small and complete discharge, each of them is regulated separately. The point of adjustment is that for a full and partial flush, the opening value of the valve is set, and accordingly the volume of water produced when draining.
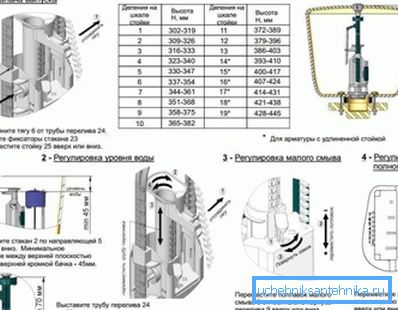
In order to adjust the drain fitting you need:
- the overflow tube is disconnected from the thrust, then the rack is moved (up or down), first you need to squeeze the latch of the drain cup;
- Moving the glass adjusts the water level.
Note! The minimum distance from the edge of the tank to the top of the glass is 45 mm. The overflow pipe must be installed 20 mm above the maximum water level.
Adjustment of the partial (small) flush is performed by moving the small flush float up and down. Moving up, the volume of the drain decreases. A full flush is adjusted in the same way — a flap that adjusts the flush volume moves vertically.
Over the years of operation, water savings will be impressive. So a few big price of such fittings looks justified.
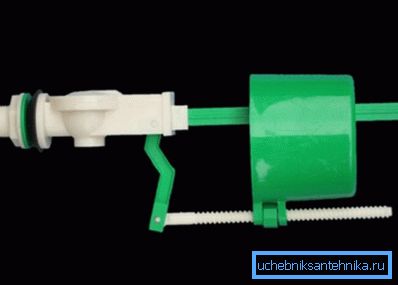
You can also adjust the water intake valves. If a metal lever is used, it can be bent slightly by hand and thus the maximum water level can be adjusted. In more modern plastic fittings, the position of the float is adjusted using a screw.
Summarizing
Replacing a cistern is an extremely simple task, but a rather responsible one, after all, a person visits the lavatory every day, so the toilet should work without problems. Even if you do not have experience in plumbing, you can cope with this task on your own, it is enough just to follow the suggested instructions.
The video in this article is a step-by-step instruction on how to replace a cistern.