Riser sewer in the apartment: how to repair, replace and who
During the planned replacement of the general riser, the utility workers are obliged to notify all tenants about the time of work. In this case, there is almost no problem, except temporary temporary inconvenience. But the replacement of the sewer riser in the apartment can turn into quite tangible troubles, if the basic rules are not followed.
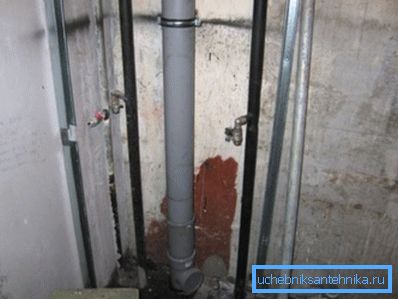
When it is possible to do repair
The total riser changes extremely rarely, much more often there are leaks at the level of an individual apartment.
And almost always the owner is forced to make repairs for their money.
- In the event of a crack in a common drain pipe, the best option is to apply a rubber clamp. A measure, by and large temporary, but this time can last even a few years. You will forget about leakage for a long time.
- Often, both cast-iron and modern plastic sewer tees and wiring are cracked. They can also be replaced with your own hands. However, you will have to ask all neighbors above not to turn on the water and not to flush the toilet while you work.
- Replacing the drain from the toilet, bathroom or kitchen is a little more complicated. The pipe needs to be cut into the general riser, and in most cases it is impossible to do without an invited plumber. And here you need to warn your neighbors, otherwise all the water from above will pour on you and the tenants on the floors below.
Who changes and who pays
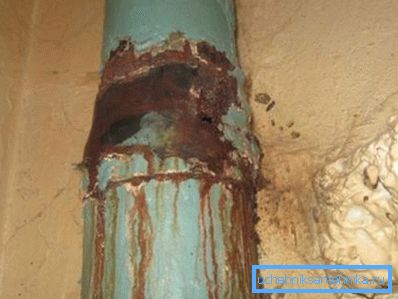
Often the question arises - who should change the sewer riser in the apartment, in case of its leakage or coming into disrepair.
- If all or almost all the neighbors suffer from running water and the smell of sewage, you need to write a collective application to the public service. In this case, housing and utilities workers are obliged to replace the entire system at no additional charge. After all, you already give monthly installments, some of which should go to the sewer repair.
- When a common pipe and eyeliner require replacement within the boundaries of your apartment, you will probably have to pay a certain amount to someone who needs to be repaired.
Note! Moreover, with patience and perseverance, you can achieve replacement of the main drain for free. But all the incoming and outgoing communications in the apartment are made at their own expense.
Replacing the old part of the system
If you decide on a capital alteration, stock up not only patience, but also the necessary materials and tools. When everything is at hand, the replacement of the sewer riser in the apartment will be much faster.
What you need
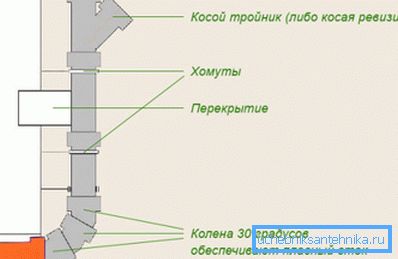
- Plastic pipe of the required length, diameter 110 mm.
- Plastic base 110 × 110 × 110 × 50 mm or tee 110 × 110 × 110 mm.
- Compensator for connecting pipes.
- Cuff made of rubber, for tight joining of a plastic pipe with a common cast-iron.
- Adapter with rubber sleeves for docking with a non-bellied upper tube.
- Clamps for mounting the riser to the wall.
- 110 mm plastic bends for displacing or leveling the riser.
Note! The instruction permits replacing the cast-iron riser with plastic only on the last (upper) floor. At the same time be sure to keep the ventilation pipe going to the roof. It is needed to balance the pressure in the drain system. In the absence of ventilation, the operation of the water traps is disturbed, and an unpleasant smell will be felt in the apartments.
Instruments
- Bulgarian with a set of disks.
- Gas torch or blowtorch.
- Silicone sealant.
- Hammer, chisel, screwdriver.
- Sturdy stepladder.
- Respirator and safety glasses.
Replacement process
Before you replace the sewer riser in the apartment, warn your neighbors. It is advisable that they stock up on drinking water so that you do not have any unnecessary complaints. To have no complaints about them, it is better to turn off the water supply in the basement. Thus, you deprive individual “well-wishers” on purpose of actively flushing the toilet bowl, pouring waste water over you through the cut off drain.
Dismantling pipe
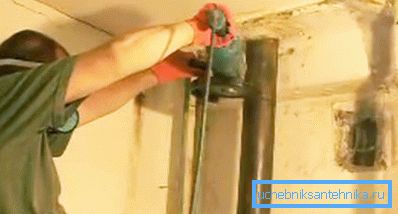
- Grinder make a cut at a height of about a meter from the distribution tee.
- The second incision is made at the top of the pipe, at a distance of 7/8 cm from the ceiling.
- A chisel is driven into the resulting incision by tapping it with a hammer.
- The chisel "ripped" the pipe, which will burst along the circumference.
- Similarly, do the bottom, then cut the piece carefully pulled out.
Cauldron
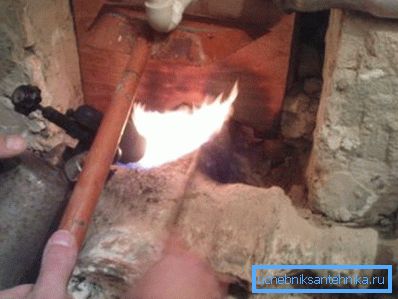
- Tap the pipe gently with a hammer. Ideally the socket should stagger. This suggests that during the initial installation they were caulked with a rope winding with a carbolic oxide.
- Wrap the rope with a screwdriver and carefully pull it out with pliers.
- Slowly shake the socket until it is removed.
- Often found chasing sulfur, it will add problems. Swinging an element with bare hands is almost impossible.
- Using a blowtorch or a gas torch, burn the sulfur around the circumference. This method almost always helps.
Note! When burning sulfur, harmful substances are released. Therefore, wear a respirator and safety glasses when working. The room must be ventilated.
- When the sulfur melts, the bell can be pulled out. It is convenient to hold it with a wrench and a checker, pull on yourself.
- The socket of the bell should be cleaned of residues with a chisel or chisel. Then the sealing cuff will sit without distortions.
Installing a new riser
Before changing the sewer riser in the apartment, remove the already dismantled and get rid of all the excess around.
Provide access to the work site and prepare the tools.
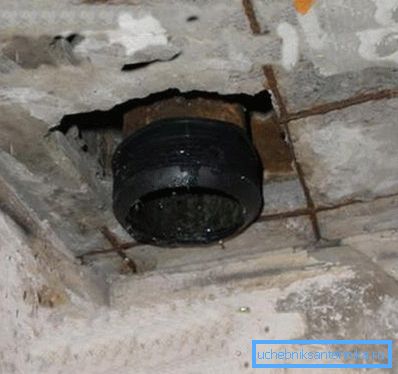
- A rubber cuff - adapter is installed on the cast-iron pipe coming out of the upper apartment. The joint should be smeared with sealant.
- A plastic adapter is placed on the cuff on top.
- The second rubber adapter is also installed below the floor.
- The pipe is measured with a compensator. One end of it is inserted into the adapter from above.
- The lower end of the pipe is cut just above the socket with a compensator.
- Now you can connect all the details by carefully sealing the joints with sealant.
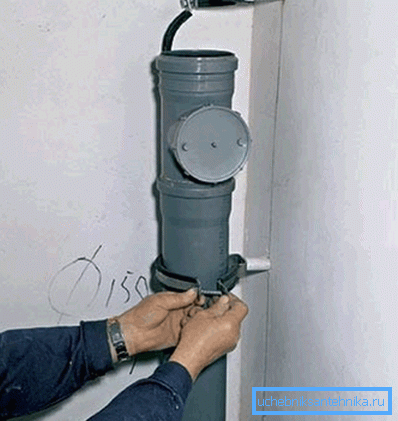
- With plastic clamps, the almost ready riser is attached to the wall. This should be done without fail, otherwise the tube may shift downwards and break in time.
- If in the course of work and replace the tee, it put a compensator. In the case of installation of two riser pipes, the compensator is used in the places of their connection.
- At the end, all joints are inspected for the presence of cracks, tightness is checked.
Conclusion
Independent replacement of the riser, with permission and compliance with all standards, is not such a difficult task. The price of materials is minimal, and hired labor is not necessary for the haughty owner. After a competent repair will become more comfortable for you and your neighbors.
The process description offers a video in this article.