Self correct installation of the sink in the bathroom
Installation of the sink in the bathroom or in the bathroom, as well as other sanitary fixtures, is carried out at the last stage of repair work. This stage is responsible for how comfortable all the equipment can be used later. The work is simple, but requires the implementation of all instructions. Our task is to tell you how to install the sink in the bathroom with your own hands, what to do and why.

General information
On the market today offers a wide range of various models of sinks from a variety of materials, for example, from:
- porcelain, the price of products in this case is quite high;
- sanitary ware;
- artificial or natural stone;
- of stainless steel;
- glass;
- non-ferrous metals.
Shells are classified according to the shape and size of the bowl, while these categories are quite a lot. You can find on the shelves of stores large and miniature products for bathrooms and kitchens, round, oval, square, rectangular or arbitrary geometry. Therefore, from such a diversity can run eyes.
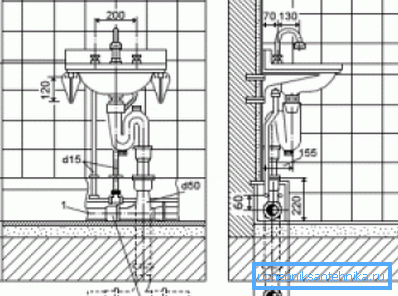
In addition, different products and type of installation, which also must be considered when choosing.
Sink can be:
- attach to the wall;
- set on the worktop. In this case, they are mounted from above or below, flush with it ("sinking") or placed on top - in whole or in part;
- partially "drown" in the tabletop, when the edge will stand for its edge and hang over the floor.
Structures with a leg are called "tulip", there are also overhead washes, representing a single whole with a tabletop made of artificial or natural stone. They are placed on top of the cabinet or cabinet. The price of each depends on the material and complexity of the configuration.
In general, the installation process of washing is simple, so often it is done independently.
To solve this, you need two tasks related to connecting the sink to:
- sewage;
- cold and hot water.
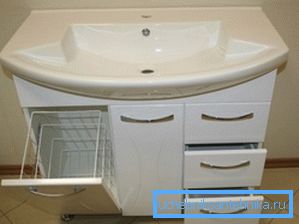
The complexity of the work will depend on the type of shell selected:
- it is easiest to connect the product on a special leg or pedestal;
- will have to tinker with hanging structures, as it is necessary to securely attach to the wall.
There are several methods of fastening, which we consider in more detail below.
Installation of hanging sink
Below is a step-by-step process instruction:
- Determine the height you need to mount to make it convenient to use the sink.I. When installing the "tulip" this parameter corresponds to the leg. Standard size - the edge of the sink from the floor should be at a height of 850 mm.
- Make the markup by drawing a straight line on the wall parallel to the floor, which will correspond to the chosen height of the sink.. Attach the sink to it and pencil mark the location of the mounting holes.
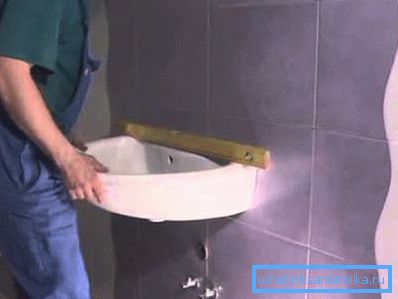
Tip: at this stage, we recommend using an assistant. It will hold the sink, keeping an eye on its edge, and you will be marking.
- Install the fasteners, drill holes in the surface and insert plastic dowels into them, then screw in the fastening pin. Usually in the complete set of the sink all the details are there.
Tip: when installing the stud, make sure that its length will be sufficient for fixing the sink.
The part must correspond to the shell thickness at the point of attachment and have an additional 15 mm in order to screw the fastening nut onto it.
- Connect the mixer. We recommend doing this before the sink is fixed, otherwise all installation work will have to be carried out from below, which is not always convenient.
- Finally fix the sink to the wall, putting it on fasteners, plastic liners and tightening the nuts. With the latter, behave carefully, otherwise you can damage the sink. The protective function is performed by plastic liners.
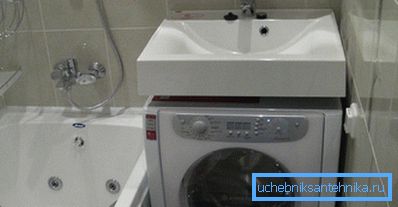
Other options
| On the leg | In general, the process does not differ from the outboard product, it should be carried out in the same manner. The only thing before the final consolidation of the sink, you must put a foot. Install it at a place determined by the scheme, and then you can continue installation according to the scheme indicated above. |
| On brackets | In this case, the installation also differs little from the suspension option. The only difference is that the brackets are not attached to the wall studs. Apply this method to the sink from an artificial natural stone, porcelain or earthenware. This choice is connected with their considerable weight, so manufacturers decided to insure a reliable support. The shell should be fixed after installing the brackets. |
Mixer installation
Installation of sink of any type is connected with the connection of the mixer.
Installation steps are similar for all products and consist of the following stages:
- Screw the studs into the mixer, which can be two or one (depending on the device model).
- Secure the hoses for cold and hot water supply by tightening it with an open-ended wrench. Do not strongly apply force at the same time, proceed with caution.

- Pass the hoses through the hole in the sink. Put on the sealing gum on the back side, and then the presser washer. Lock the washer and gum by tightening the fastening nuts.
Tip: do not forget to adjust the direction of the mixer spout, before tightening the nuts.
Connection of a sink to water and sewage
To install a sink in a bathroom, it is necessary to connect it to cold and hot water - twist the hoses into the appropriate pipes. At the same time, make sure that the joints are tight, using a rubber gasket. Then open the valve and check the pipeline for leakage, tighten the nuts if necessary.
Connection to the sewer:
- Attach the sink to the bottom of the sink, on top - a stainless steel protective grid and secure them with a bolt between them.
- Install a sealing gum between the siphon and the drain so that there are no leaks.
- Connect the drain and siphon of a special nut from the latter, or simply insert one into the other.
- Take a corrugated hose from the siphon into the sewer.
- Turn on the water, check the operation of the drain and the reliability of all connections.
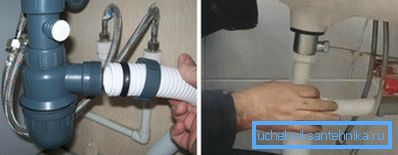
Rules of operation of the device
Self-installation of the sink will not cause difficulties if you have some skills. But, compliance with the rules of operation of the product is also an important issue, which should take into account the characteristics of the material.
Tip: it is forbidden to clean sinks made of copper or natural stone with abrasive materials so as not to scratch their surface.
It does not hurt to know also what to do if there is a blockage in the drain system. What tools will help in solving this problem. We recommend monthly prevention of blockages by pouring special chemicals into the drain hole.
Conclusion
Installing the sink in the bathroom does not take much time and effort, the main thing is to follow the instructions for installing the product. Usually all the necessary fasteners are included, but if their quality does not suit you, you can purchase them separately.
When connecting the sink to water and sewage, check the tightness of all connections and use rubber gaskets. The video in this article will provide an opportunity to find additional information on the above topic.