Self-installation of the sink in the kitchen: understand the
The final stage of repairing the bathroom or kitchen is the installation of plumbing and related fittings. To install a bathtub or toilet, you will most likely have to ask for help from specialists, but it is quite possible to cope with the installation of the sink yourself. Below we take a closer look at how to install the sink in the kitchen with their own hands.
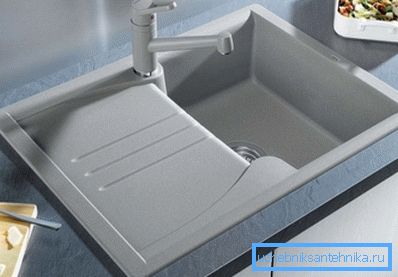
General information
Installing a sink in the kitchen has some special features, the main of which is that overhead plumbing in this room does not apply. Therefore, sinks are installed with pedestals, and, according to the method of installation, they are of two types:
| Overhead | Under this plumbing applied cabinet without tabletop. Instead, set the sink. |
| Mortice | In this case, a dresser with a table top is used, in which a hole is cut to the dimensions of the sink. |
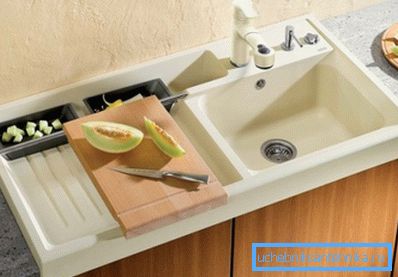
Installation of such plumbing is simplified by the fact that there is no need to fix the product on the wall. In addition, the installation height of the sink from the floor is already determined by the furniture manufacturer.
Therefore, the work is reduced to several stages:
- Assembly of the structure;
- Installation of pedestals in a permanent location;
- Installing the sink on the cabinet;
- Connecting the siphon to the sewer, and the mixer to the water supply.
Below we take a look at all these stages.

Sink installation
Construction assembly
While the plumbing is in a disassembled state, the installation of a siphon on the sink is carried out, since then it will be somewhat more difficult to install the fittings.
This work is performed as follows:
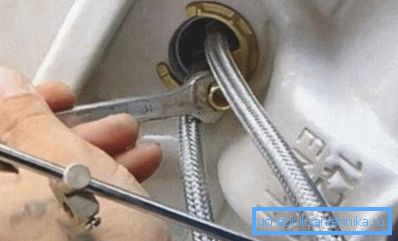
- First of all it is necessary to fasten flexible hoses to the mixer.
- Then the hoses are pushed into a special hole, as a result of which the mixer falls into place.
- A retaining washer is installed on the reverse side and the nuts are tightened, which fix the mixer. In order not to damage the plumbing, strongly tighten the nuts is not worth it.
Next you need to install a siphon. As a rule, detailed installation instructions are available on the packaging.
Most often it looks like this:
- First of all, the upper part of the siphon with a mesh is inserted into the drain hole. Usually it consists of several parts, including gaskets.
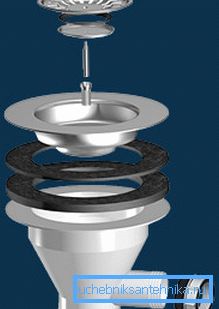
- Bottom to the top of the outlet is attached.
- Then the main part of the siphon is put on the pipe, which is fixed from above with a bolt.
- After that, a drain pipe is attached to the siphon, which is subsequently connected to the sewer drain.
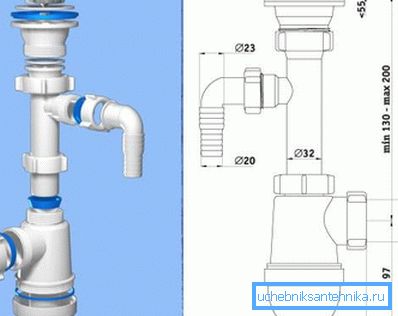
Note! So that after installing the sink, you do not have to disassemble the siphon, when assembling it, you need to pay attention to the quality of the rubber seals - they should not have any burrs and other defects.
I must say that tubular siphons or made in the form of corrugations have a simpler design, respectively, their installation is even easier.
Installation of sinks on the cabinet
After all the accessories will be installed on the sink, you should pay attention to the cabinet. It must be put in the place of permanent location and at the same time make sure that no element of it interferes with the connection of fittings to the sewer or water supply. In some furniture models, it may be necessary to make holes for pipes using a jigsaw or crowns.
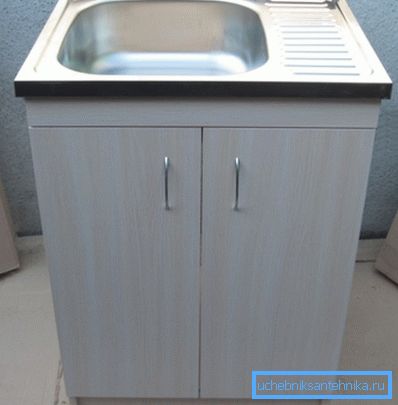
After performing all these manipulations, the installation of the shell sink is reduced to the fact that the device is simply placed on top of the furniture. Some models of sinks require additional fixing on the wall.
This can be done in two ways:
- Using anchors - in this case, the device has special lugs with holes.
- With silicone - the place where the sink meets the wall is simply coated with silicone, after which the plumber is glued to the wall. An hour later, the sink will stick, and the strength of this installation will not be inferior to the anchor one.
The installation of the mortise shell is more complicated as it requires cutting a hole into the table top. If you are not confident in your abilities, then it is better to entrust the work to specialists.
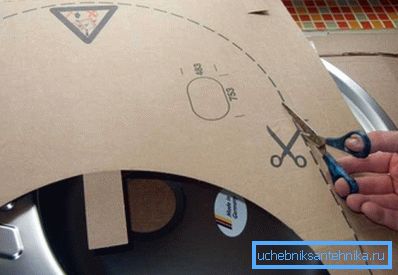
However, having experience with an electric jigsaw, it is easy to cut a hole with your own hands.
This is done as follows:
- First of all, it is necessary to outline the contour of the hole with the help of a special template that is always included with the equipment. Therefore, unpacking the sink, do not throw away the carton with the contour of the bowl.
The template must be attached to the tabletop and carefully choose the location of the future sink on it. You should not install the product too close to the edge - the distance from the edge of the rim should be at least 15 centimeters.
- After that, the template should be circled with a marker or pencil.
- The next stage is the most responsible - you need to cut a hole. To do this, you first need to drill a hole, and then jigsaw to perform a closed propyl.
Tip! In order not to damage the front side of the tabletop, before cutting a hole, a place along the line of cut should be taped.
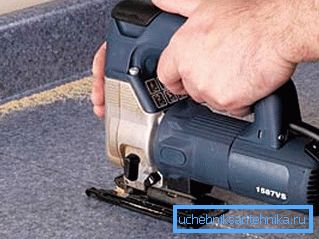
After the cut is made, the sink can be installed, but for this to happen, you also need to perform several actions:
- First you need to attach the sink to the hole and make sure that it is done correctly. If necessary, the hole must be trimmed.
- Then the place of the cut must be cleaned of sawdust and dust, and then smeared with silicone. This operation is very important because it prevents water from entering the saw cut, as a result of which the furniture may deteriorate. Therefore, it is necessary to ensure that the sealant lays evenly, leaving no uncovered places.
- Next, the place of the cut must be glued with a foam polyethylene seal.
- After this, it is advisable to degrease the sealant and cover with sealant.
- At the end of the work should be carefully set the sink in place.
Further, the installation norms of the sink imply the adjustment of the position of the cabinet according to the construction level. To do this, put on the countertop or sink level and adjust the position of the thumbs.
Sink connection
After the sink is installed, you just need to connect it to the communications. It is better to start with connecting the mixer, since the siphon hose can interfere with this work.
With the connection of the mixer, as a rule, there are no problems. The main thing is to make in advance all the necessary communications.
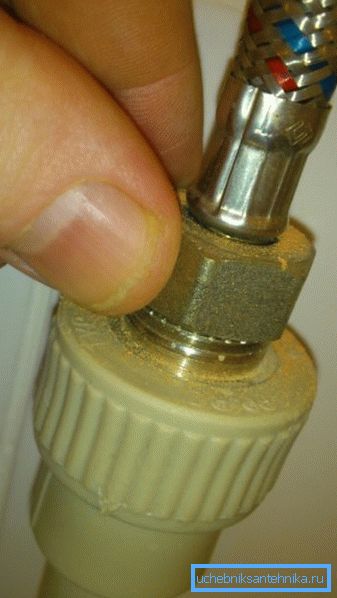
Rubber hose connections are made using cap nuts that have rubber seals. The only thing doing this job is very important not to overtighten the nuts so that the seals are not damaged. Therefore, you need to tighten them with your hands and only at the very end slightly tighten with a wrench.
As for the connection of the siphon, this work is even easier:
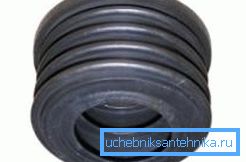
- A special rubber cuff should be inserted into the socket of the sewer pipe. To seal the joint, the pipe walls can be smeared with silicone sealant.
- After that, the rubber corrugation should simply be inserted into the rubber cuff.
This completes the installation of the sink, it remains only to check the quality of the connections.
Connection check
After all the main work is done, you need to check the quality of the connections:
- First of all, you need to turn on hot and cold water supply. Without opening the taps, inspect the hose connection. If necessary, the nuts must be carefully tightened.
- Then you need to open in turn hot and cold water, and also inspect the junction of pipes with a mixer and water supply.
- If the leak is not detected, you need to open the hot and cold water with full pressure and inspect the siphon and the junction of the drain pipe with sewage. In the event of a leak, the threaded connections must be tightened. Silicone sealant can also be used to seal joints.
Note! If a bottle-type siphon is installed, you should not lubricate the lid with the body with a sealant, as it will have to be removed from time to time to clean the siphon.
Here, perhaps, all the features of connecting the sink in the kitchen that you need to know to do this work with your own hands.
Conclusion
As we found out, installing a sink with a pedestal is not a big deal. The main thing - do not make mistakes and adhere to the above recommendations.
From the video in this article, you can get some additional information on installing a car wash.