Sewage in the apartment - features self-replacement system
Old sewage can give the owners of the apartment a lot of trouble, as it is often clogged, and sometimes even exudes an unpleasant smell. Of course, replacing it is quite expensive, but by doing this work yourself you can save a lot. To help in this matter, then we will look at how a new sewage system is mounted in the apartment with its own hands.
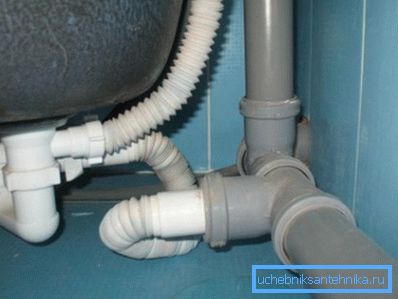
Sewerage device
The first step is to familiarize yourself with the sewage system. The system includes several elements:
| Riser | It is the basis of domestic sewage, it is designed to collect waste from all plumbing fixtures. |
| Layout | Serves for removal of drains from sanitary devices to the riser. |
| Siphons | This device in the sewage system in the apartment provides a water lock that prevents unpleasant odors from the sewage from entering the room. Siphons are installed between sewer pipes and plumbing fixtures. |
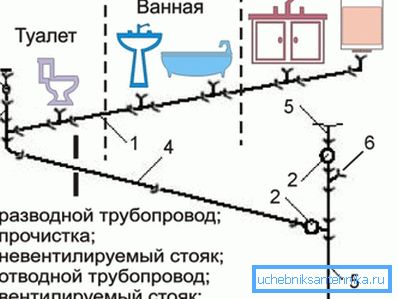
Slopes
The most important thing when installing a sewage system is to properly run the slopes of the discharge pipes. The fact is that with small slopes the liquid will not drain, and with large slopes, water will drain quickly, but solid waste will remain in the system. Thus, as if paradoxically it did not sound, but excessive “flowability” leads to permanent blockages of the system.
The degree of slope depends on the diameter of the sewer pipe.
According to the requirements of SNiP, the following minimum slopes should be observed when installing the pipeline:
- With a pipe diameter of 50 mm - 3 cm per meter;
- 110 mm - 2 cm per meter;
- 200 mm - 0.7 cm per meter.
As for the maximum slope, it should not exceed 15 cm per meter. The exceptions are the bends of sanitary devices, the length of which should not exceed one and a half meters.
Note! Connection of sewer pipes is allowed to perform at a right angle only in the vertical plane.
Pipe diameters
As a rule, use pipes for sewage in the apartment with a diameter of 50 mm. Exceptions are the drain pipes from the toilet bowl and the riser, the diameter of which is usually 110 mm.
I must say that sometimes there are risers with a diameter of 150 or even 200 millimeters. Therefore, before you buy a replacement, you should measure the old riser.
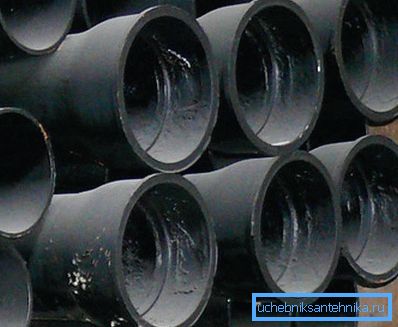
Materials for sewer system
Before you install the sewers in the apartment with their own hands, you must purchase all the necessary elements. And for this, you must first decide on the pipe material.
As a rule, domestic sewers are made of the following materials:
- Cast iron - quite durable and fireproof, however, has several disadvantages, such as heavy weight and high cost. Therefore, cast-iron systems in recent times almost never used.
- PVC - is the most common material for the sewer system. Among the shortcomings can be identified instability to high temperatures. In addition, PVC sewer pipes are quite noisy, although the sound insulation of sewage pipes in the apartment allows to solve this problem.
- Polyethylene - this material should not be considered as an option for sewage, as it is unstable to deformations, it is not heat-resistant and does not provide reliable sealing of the system.
- Polyisopropylene - not such a smooth material like PVC, besides its price is somewhat higher than PVC pipes. However, it can withstand temperatures up to 130 degrees, and is also resistant to mechanical and chemical influences.
Sewage Replacement
Training
Now let's take a closer look at how to properly make a sewer in the apartment. It should start with the preparatory work. Of course, the first thing you need to do is prepare the rooms - take out the furniture and lay the floor.
A prerequisite for the replacement of the old sewage system is to secure the old riser to the ceiling. You should not count on interfloor mounts, as over time they rust and weaken. Therefore, when dismantling the riser, all the upper sections may be in your apartment.
Fastening can be done with a yoke with a stud, which must be at least 120 mm in the wall. For reliable installation, the stud must be cemented.
In addition, you should notify neighbors in advance about the upcoming work in your apartment and turn off the water.
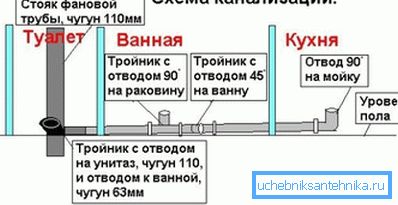
Scheme
If the apartment just needs to replace sewer pipes, then the scheme can not be done. But if the location of plumbing fixtures is changed, then first of all it should be decided on paper how to lay the sewage system in the apartment. This will prevent mistakes during work and calculate the necessary amount of materials in advance.
On the diagram you need to display:
- All rooms in which work will be performed.
- The dimensions of the premises and the pipeline.
- All service elements, such as inspection and clean-up bends, fittings, etc.
- The location of the central riser.
After the scheme is completed, you can proceed directly to work.
Dismantling
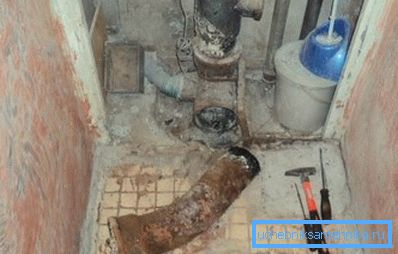
First of all it is necessary to dismantle the old system with your own hands. If the sewage system is plastic, then it will not be difficult to do the work, but if it is cast iron, then some difficulties may arise.
It is possible to break pipes with a hammer only in a private house on the first floor. In all other cases, the easiest way is to make incisions in the socket and to wedge them with a screwdriver or chisel. Another option is to heat the joints with a blowtorch and shake apart the pipes.
To disassemble the riser, you must first cut off the lower part. The difficulty lies in the fact that the cast iron elements are very heavy. Therefore, the work must be done carefully.
After the main part of the system is disassembled, plumbing fixtures should be removed from the sewage system and dismantled if the plumbing fixtures change too.
Rough cut
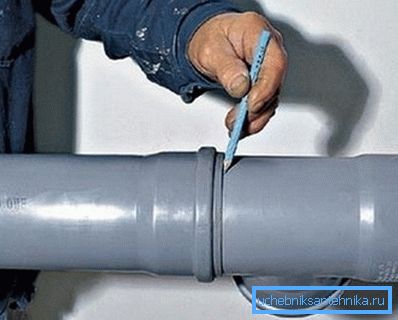
Next is a rough installation, which is carried out without sealing the connections. It is only necessary to insert the ends of the joints into the sockets with gaskets. At this stage, the pipes are cut in accordance with the dimensions in the diagram and taking into account the margin of 10-15 mm.
Cut the pipes need to be strictly at 90 degrees, so it is best to perform the operation in the trash. For cutting usually use a hacksaw for metal. After cutting off unnecessary sections of pipes, you should cut the chamfer with an assembly knife, as burrs can cause permanent blockages in the system.
Note! You can cut only the flat ends of the pipes, since trimming the socket will make the pipe unsuitable for installation.
At the stage of rough installation, you need to correctly position all the tees / splitters. Plumbing fixtures should be marked with a pencil on the walls.
Fine assembly
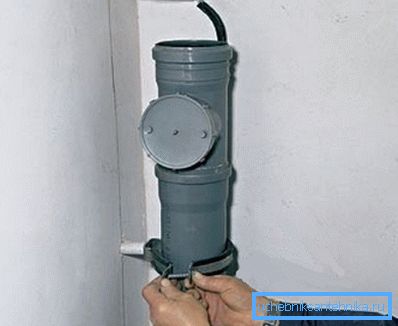
Next is the final assembly, which starts from the riser.
The work is done in this order:
- A plastic-cast iron adapter is inserted into the riser outlet, located under the ceiling.
- Then, insert the first section of the riser into the cuff and seal it with a sealant.
- At the bottom of the riser tees are installed under the wiring. At this stage, the exact size of the toilet fitting is fitted and the toilet itself is installed in place.
- Further, on the same principle as the riser assembly, the rest of the pipeline is being installed.
- Then sanitary devices are installed in place and their siphons are mounted.
- At the end of the work, the siphon drain pipes are inserted into the sewer pipes.
So, the sewage system in the apartment is ready. When the sealant hardens at the pipe joints, the pipeline should be checked for leaks.
Tip! In order to face the clogging of the system as little as possible, you should use special nets on plumbing fixtures. Such a simple filter in the apartment sewer systems will prevent the penetration of hair and large objects that are able to form a plug.
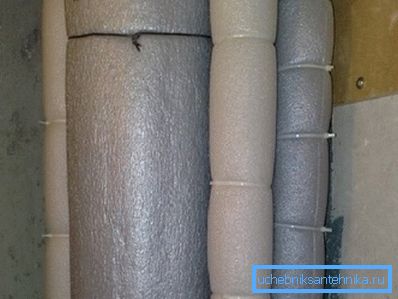
If the work is done successfully, then you need to soundproof pipes. For these purposes, usually using polyurethane foam, which is wrapped riser.
Conclusion
The implementation of sewage in the apartment is quite a difficult job, which contains a number of nuances and subtleties. Moreover, most of them occur at the stage of dismantling the cast iron pipeline.
However, to cope with these difficulties, it is quite within the power of every home craftsman who is used to working on home improvement on his own.
From the video in this article, you can get more information on this topic.